• Skip to main content
  • Skip to secondary menu
  • Skip to primary sidebar
  • Skip to footer
  • Home
  • About
  • Social
  • Subscribe
  • Amazon Storefront

Philip or Flop

Let's Make our Homes Incredible Together through DIY!

  • Projects
    • Financial Planning for a Large Home Renovation
    • DIY a Raised Bed Vegetable Garden
    • Build an Outdoor Planter from Cedar Wood
    • Transform Your Bedroom with Paint
    • Raised Kids Craftsman Playhouse
    • DIY Epoxy Garage Floors
    • Fall Porch Makeover with a Bench Swing
    • Garage Football Stadium Makeover
  • DIY Tutorials
    • DIY Indoor Glamping: Simple Tents for Your Child’s Sleepover
    • How to Build a Horizontal Fence That Looks Great on Both Sides
    • How to DIY Limewash a Brick House
    • How to Install a Craftsman Style Window Sill and Trim
    • How to Seal Your Kitchen Backsplash
    • Add Glass to Your Pantry Door
    • Install a Transom Window in a Cased Opening
    • DIY Epoxy Garage Floors
    • Install Landscape Lighting for Added Curb Appeal
    • Home Maintenance with Exterior Sealants
    • Removing Trim Without Damaging Drywall
    • Using Sealants in a Bathroom Remodel
    • Smart Home: Air Filtration
  • Tool Tips
    • Removing Trim Without Damaging Drywall
    • Hearing Protection for DIY Projects
  • Lawn & Garden
    • DIY a Raised Bed Vegetable Garden
    • Install Landscape Lighting for Added Curb Appeal
    • Get Your Lawn Ready for Spring
    • Transform a Water Trough into a Planter
    • Build an Outdoor Planter from Cedar Wood
  • Home Transformations
    • Laundry Room Remodel – How to Maximize a Small Space
    • Fall Porch Makeover with a Bench Swing
  • Building a Home
    • Building our Coastal Kitchen with Ready to Assemble (RTA) Cabinets
  • Gift Guides
    • The Valentine’s Day Gift Guide for the DIYer in your Life
    • Holiday Gift Guide for the Tech Lover

Transform a Water Trough into a Planter

January 2, 2020 by Philip

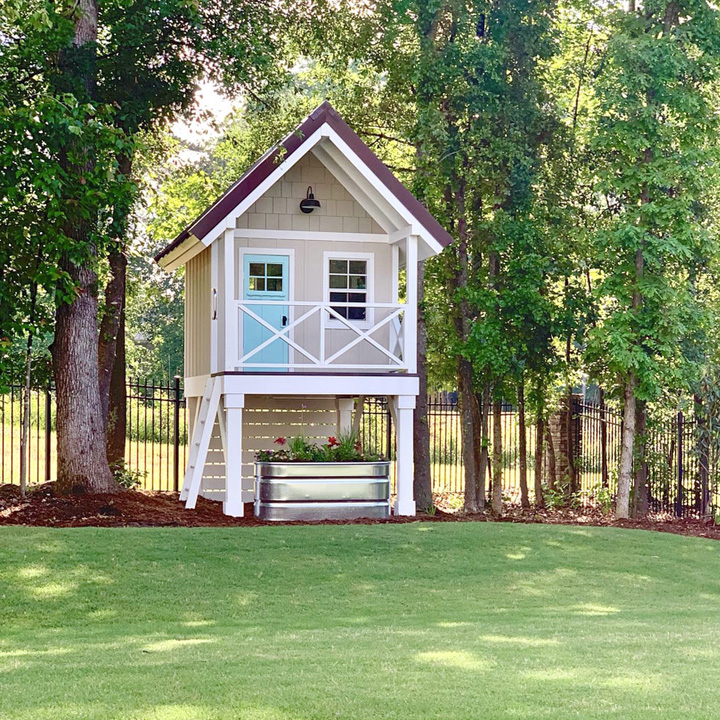
This simple DIY tutorial will allow you to modify a galvanized metal water trough and transform it into a gorgeous planter in a hour!

Making raised bed planters that look good can be a really time consuming process. There are a few items that can be easily be repurposed into a planter and a metal water trough is one of the nicest looking and most cost effective solutions out there! Also called stock tanks these containers are typically filled with water and used to give livestock a cool drink. Due to their galvanized coating these containers can last for years and come in a large number of sizes.

Tools and Materials (click for links)

  • Galvanized water trough
  • Cordless drill
  • 1/8″ cobalt drill bit
  • Six foot level
  • Landscape fabric
  • Large gravel
  • Top soil
  • Slow release fertilizer

Where exactly can you get a large metal water trough? If you want to order online you can find a few on Amazon. I found mine at a local agricultural supply company called Agri Supply. They clearly sell a lot of these things but when I mentioned that I wanted to turn it into a planter a few of the employees had not heard of that and were interested to see the final product!

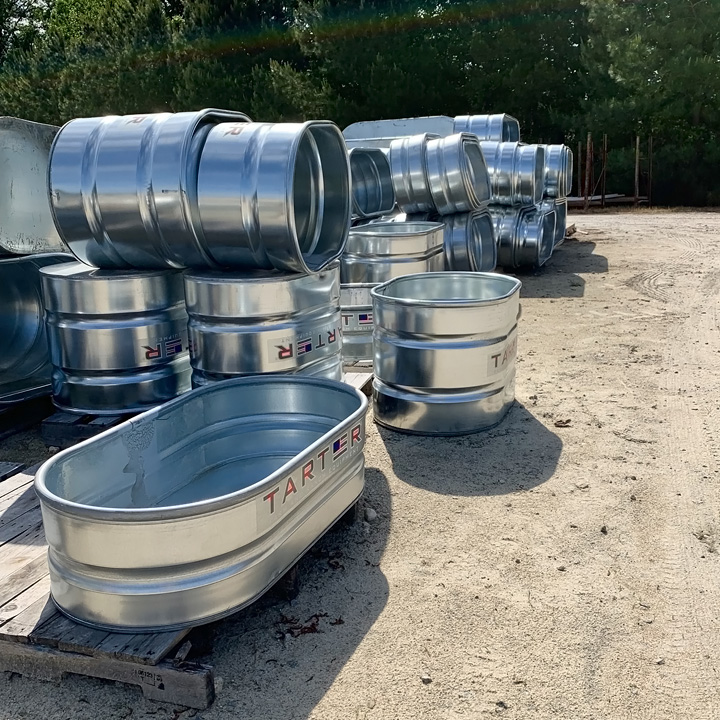
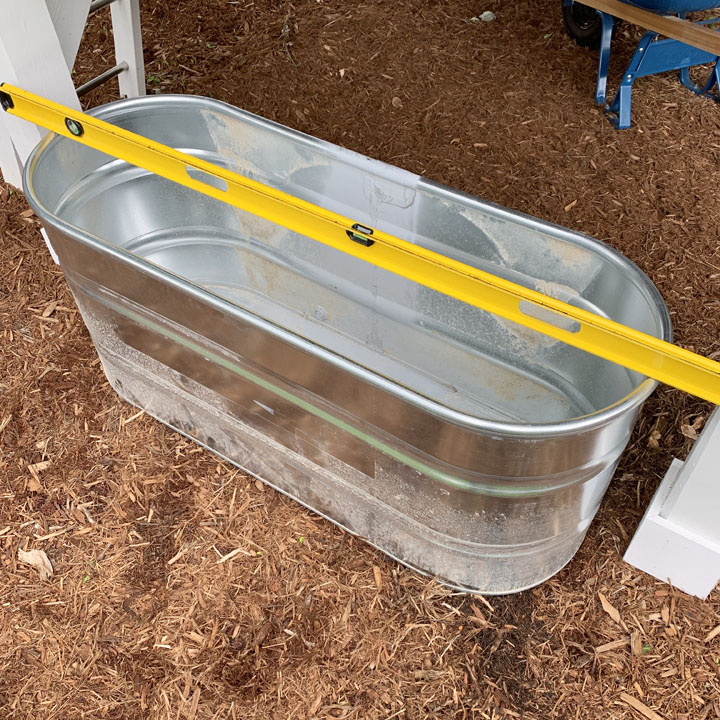
These things come in a lot of different heights (12″, 18″ and 24″ being the most common) and widths (usually in foot increments up to about six feet). I paid about $125 for a 2’x2’x5′ trough. Not too bad for a planter of that size! It came with a big sticker logo on the front, but it was easily removed in one piece. Once I got it home the first step was to add drainage holes to the bottom. I used my cordless drill and a 1/8″ drill bit. Whenever I am drilling through steel I make sure to use a hardened Cobalt bit, because a regular bit will dull very quickly.

Drilling holes for drainage in the trough

I drilled approximately 10 holes around the perimeter and 10 holes in the bottom. A good planter will have plenty of drainage to make sure the soil does not stay saturated and rot out the plant roots. Once I got it set up in front of the playhouse the first step was to make sure the base of soil underneath the planter was flat and level. I used my six foot bubble level for this purpose.

Level the water trough planter

I used a hand held shovel to remove and add soil in the necessary locations until it was sitting flat across the base. This is important because the weight of soil and water will be large and might deform the trough if it does not have a stable base. If you put soil directly in the trough, it can clog of up the drain holes so I added a few components to the bottom to facilitate drainage. The first layer was course gravel.

Fill the base of the water trough with gravel

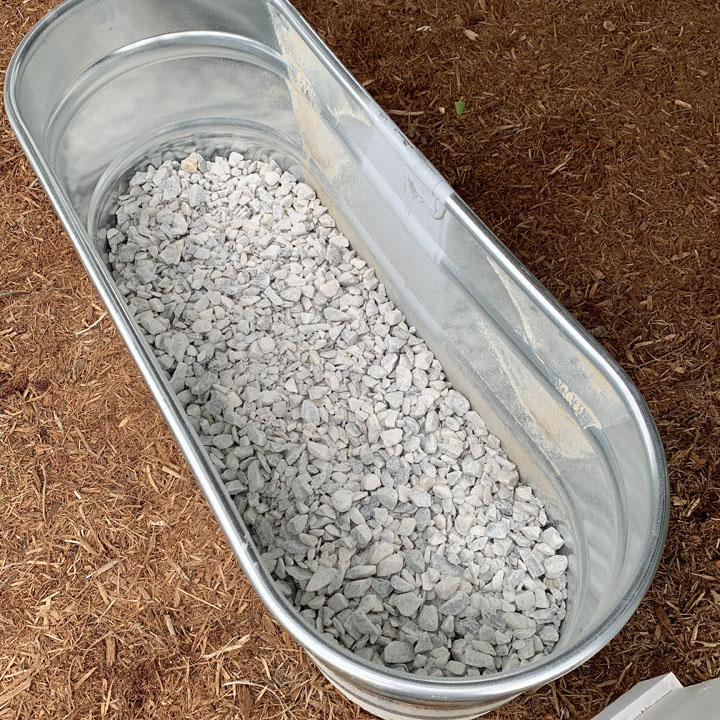
I bough a few bag of the cheapest stuff I could find at Home Depot, enough to cover all the holes that I drilled in the sides of the trough. The gravel will keep free space open around the holes and keep the water flowing! Over time the soil would work its way down the through the gravel so to prevent that, I added a layer of thick weed barrier fabric on top.

I have seen others add large objects to the bottom on this type of trough planter (planter pots, styrofoam blocks etc) to reduce the amount of soil needed, but regular top soil is pretty cheap and I don’t plan on moving this planter any time soon, so I just filled it to the top with topsoil.

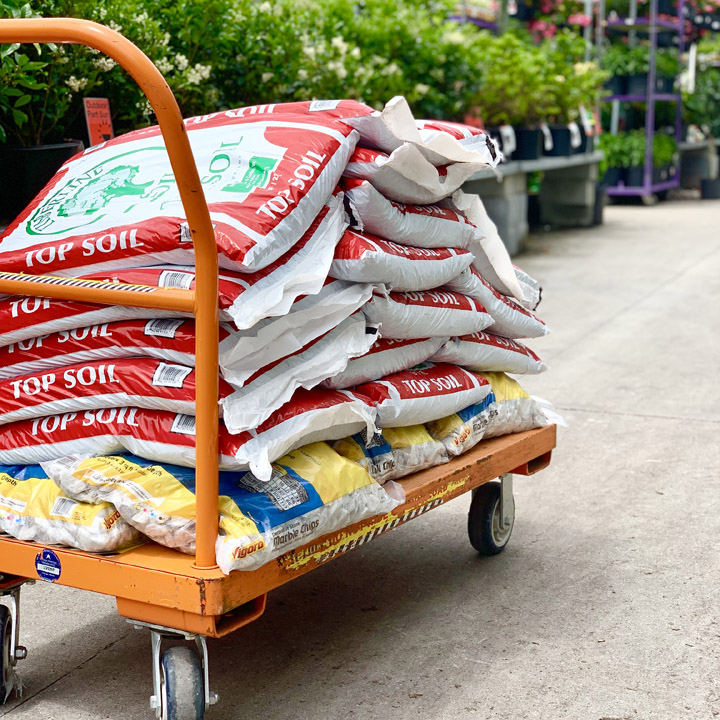
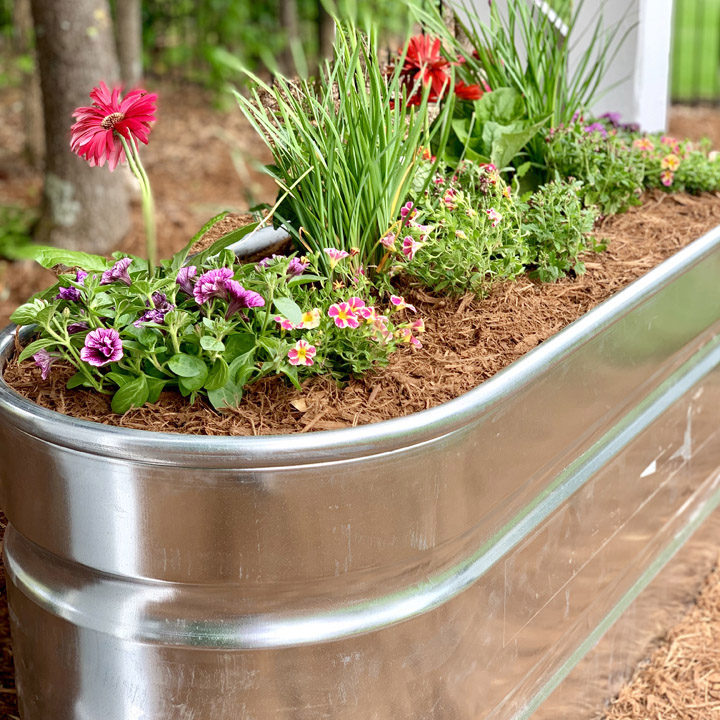
I guessed pretty well because it took exactly 15 – 1 cubic foot bags to fill it. I sprinkled some slow release fertilizer into the top 1/3 of the soil while filling to make sure we got vigorous growth as soon as we planted. After filling it the whole family had fun planting all of the flowers that we bought the same day. With that depth of soil you can plant pretty much anything, but we decided on mostly annuals so that our planter would be flowering all summer long! I can confirm that the annuals have done great after a full hot summer and the planter holds so much water that I have only used supplemental water from a hose about 10 times (about every four days when it hasn’t rained for a while).

Planting flowers in the water trough

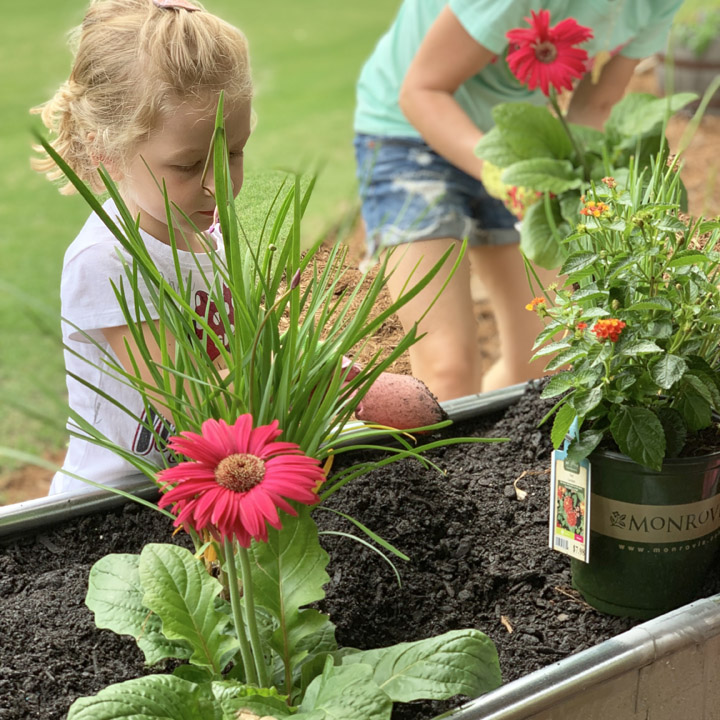
It is good to select a few different types of plants to give a lot of visual interest. Check the tags to see how large they will get and plant the larger ones towards the back. You can use multiple metal water troughs to fill larger spaces and even use ones of different heights in a tiered configuration to really maximize planting space. I hope you enjoy your new DIY planter for years to come!

Filed Under: DIY Tutorials, Lawn & Garden

Primary Sidebar

Sign up for new post updates!

Search my site

Follow Me on Instagram

Follow on Instagram

Footer

Disclaimer

DIY and working with tools have inherent risks. The projects presented on this website are meant for inspiration only, as the conditions, materials and tools on your own project will vary. Always follow the manufactures’ instructions provided with your tools and abide by local building codes. Philip or Flop (of Philip or Flop, LLC) will not assume any liability for any damages, losses or injury sustained in the course of your own project.

Affiliate Links

Many of the links to products on this site are affiliate links. When you click these links and make a purchase I will make a commission off of the sale. The products are the exact same price as found as normal and the commission is paid to me by the merchant. These commissions help me to product more content for this site to make it more complete for you!

Tags

affordable DIY project alternative to custom kitchen cabinets beautiful DIY headboard beautiful fences box trim build custom headboard creative tent custom beach house custom designed house directions on how to build a kid's play tent DIY box trim DIYer gift guide DIY fences DIY headboard diy kid's tent DIY kitchen cabinets DIY limewash fireplace Garden gift guide for DIYer great holiday gift guides high end custom cabinets holiday gift guides Home Maintenance how to limewash your house indoor child's tent indoor tent interesting presenta kid's tent kitchen cabinet assembly low-cost high impact project McElroy metal roof metal roof new home construction new home preconstruction new house construction new house foundations no sew DIY kid's tent planter play tent ready-to-assemble kitchen cabinets RTA kitchen cabinets sleep over tent Valentine's Day Valentine's Day gift guide

Copyright © 2025 · Magazine Pro on Genesis Framework · WordPress · Log in amzn_assoc_ad_type = "link_enhancement_widget"; amzn_assoc_tracking_id = "philipbradfor-20"; amzn_assoc_linkid = "82eabd867b427f59250a4dc01b55bfa3"; amzn_assoc_placement = ""; amzn_assoc_marketplace = "amazon"; amzn_assoc_region = "US";