Replacing trim in your house can be a really rewarding DIY, however it’s easy to accidentally make more work for yourself by damaging the drywall when removing the old trim. This article will give you a few tips to help remove your trim cleanly!

New trim can really change a space. We are replacing all of the builder grade trim in our house with a style that is more craftsman and farmhouse and so I’ve learned quite a bit about the best methods to remove trim with minimal damage.
Tools Needed (click for links)
Trim is attached to the walls first using nails and then is typically caulked into place. To remove the trim, a force must be applied to both pull the nails out of the studs and break the bead of caulk between the trim and the wall. Overcoming both of these connections can create damage to the wall when the trim is removed. If you don’t believe me just google image “drywall trim damage” and see for yourself!
Typically some type of prying action is needed to pull the nails in the trim out of the wood studs. Most damage occurs in this step when the prying mechanism cracks and/or crushes the drywall in the prying process. This can entail extensive repair and should be avoided at all cost. Caulk fills the gap between the trim and the wall and can act as a strong adhesive between the two. When removing the trim this adhesive force can often rip and tear the drywall paper surface. When the drywall paper is torn away it creates a major defect if it is repainted without repairing. Torn drywall paper can take a couple skim coats of joint compound to fix and you’d rather not be spending your time doing this!
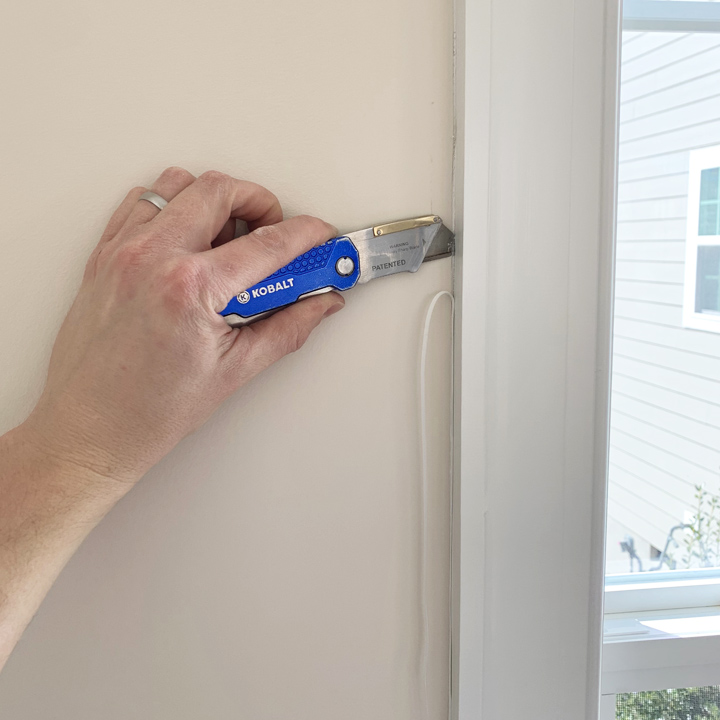
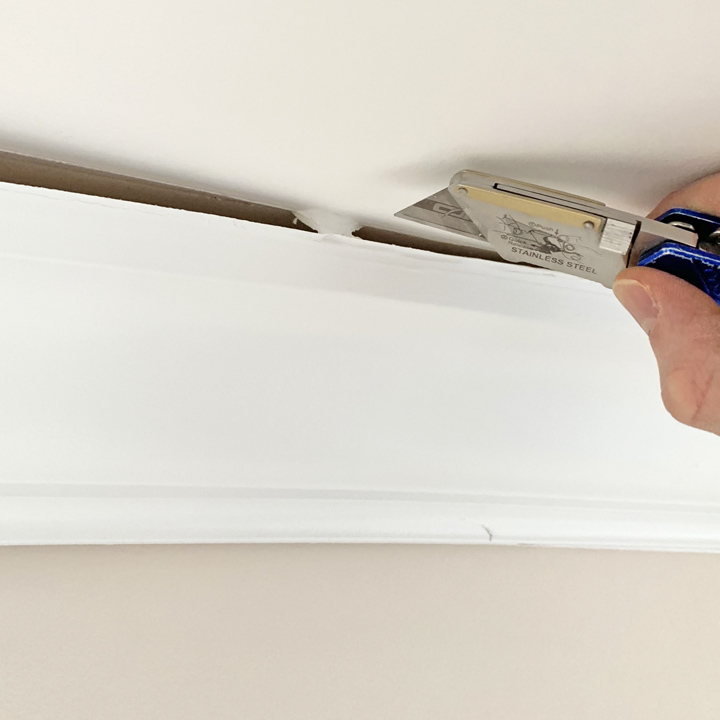
Step 1 – Score the Caulk
Using a sharp razor blade make a cut in the caulk that joins the trim to the wall. Make the cut as parallel to the wall surface as possible and if possible get the blade all the way behind the trim! Doing so will help completely separate the caulk from the dry wall and prevent it from ripping it when pulling it away from the wall. After scoring, you can also run a putty knife between the trim and caulk to fully break the adhesion.
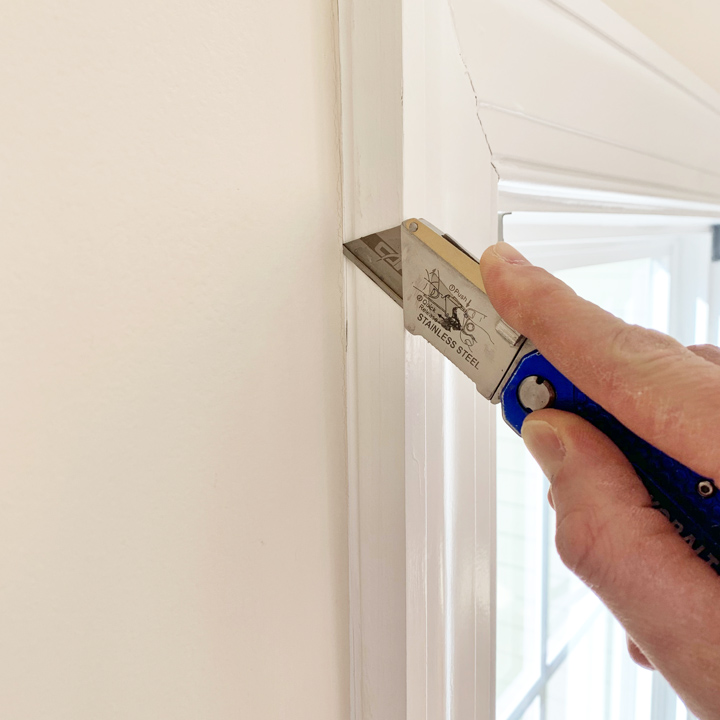
If you can’t easily get the razor and putty knife behind the trim you can make a second cut in the caulk perpendicular to the wall surface. If the drywall paper rips, this second cut helps stop the paper from ripping past the edge of the trim.
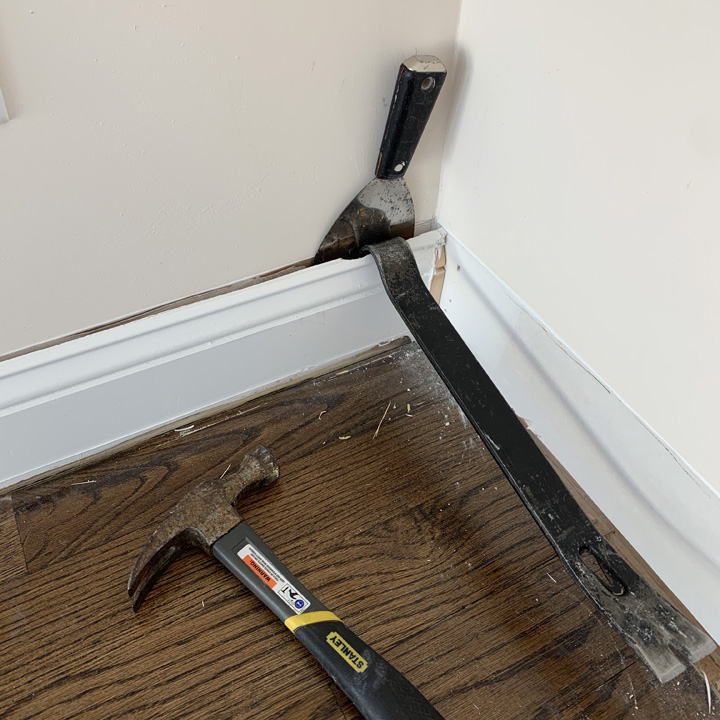
Step 2 – Pry Edge of Trim Away from the Wall
This step is where most people would see damage from prying. If you are going to use a crow bar, use an old putty knife to protect the wall. Slide the putty knife behind the trim over a known location of a wall stud. Then pound in the crow bar in-between the trim and the putty knife. The metal putty knife helps to spread out the force from the head of the crow bar over a larger area. Spreading the force out makes it less likely that the drywall behind the crow bar will be crushed during prying. Selecting a location that is in-front of a wall stud keeps the drywall from bending and cracking during prying.
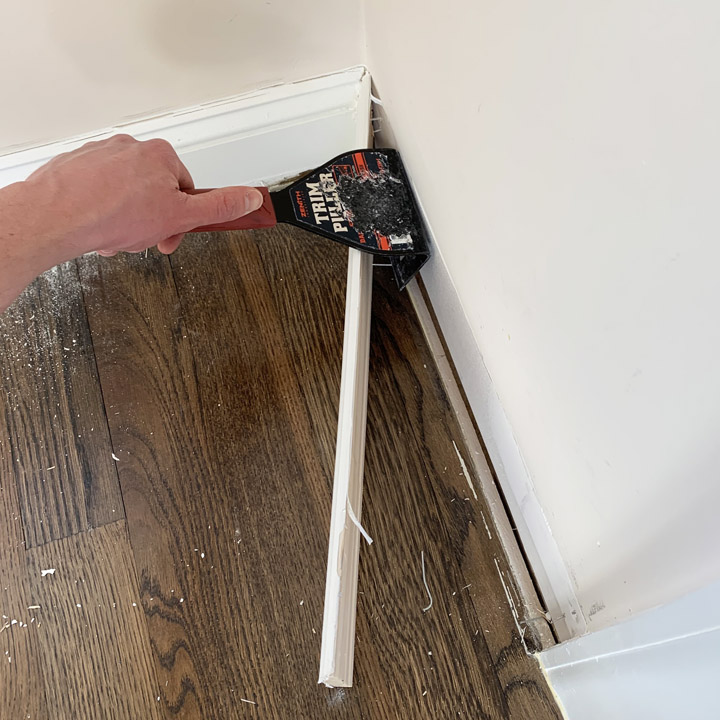
I use a Trim-pulling tool to remove my trim now and it works much easier and faster than using a crow bar and putty knife! It has a wide spread to help distribute the prying load and a wedge to help push the trim out away from the wall as you pound the tool behind the trim with a hammer. I highly recommend it and haven’t damaged any drywall since using it.

Step 3 – Remove Trim
Once the trim has started to come off the wall, move the trim-pulling tool down the length of the board, prying the trim from the wall at each stud location. After is off about half way you may even be able to use leverage from the board to pull the trim off by hand (depending on how many nails the installer used).
If you missed scoring the caulk deep enough and you can see it holding onto the paper as you remove the trim, use your razor blade to slice it before you pull it the rest of the way off to help prevent ripping the drywall paper!
Once you remove the trim it is tempting to just throw it in the landfill but there are many organizations that take donations of building materials. I use Habitat for Humanity ReStores. They take trim pieces longer than 6 ft, so I am always as careful as possible pulling it off so that I don’t break the pieces. They require you to remove the nails and I always use my super hand Nail Puller to remove them all in minutes. In the end, I am usually able to donate about 2/3 of the trim I remove! I also collect all the pulled nails and add them to my scrap metal bucket for recycling!
Want to know what I am up to right now? Follow me on Instagram and check out my stories, I am usually working on a project every weekend!
What do you suggest as the best way of putting new drywall up?
I usually use drywall screws!