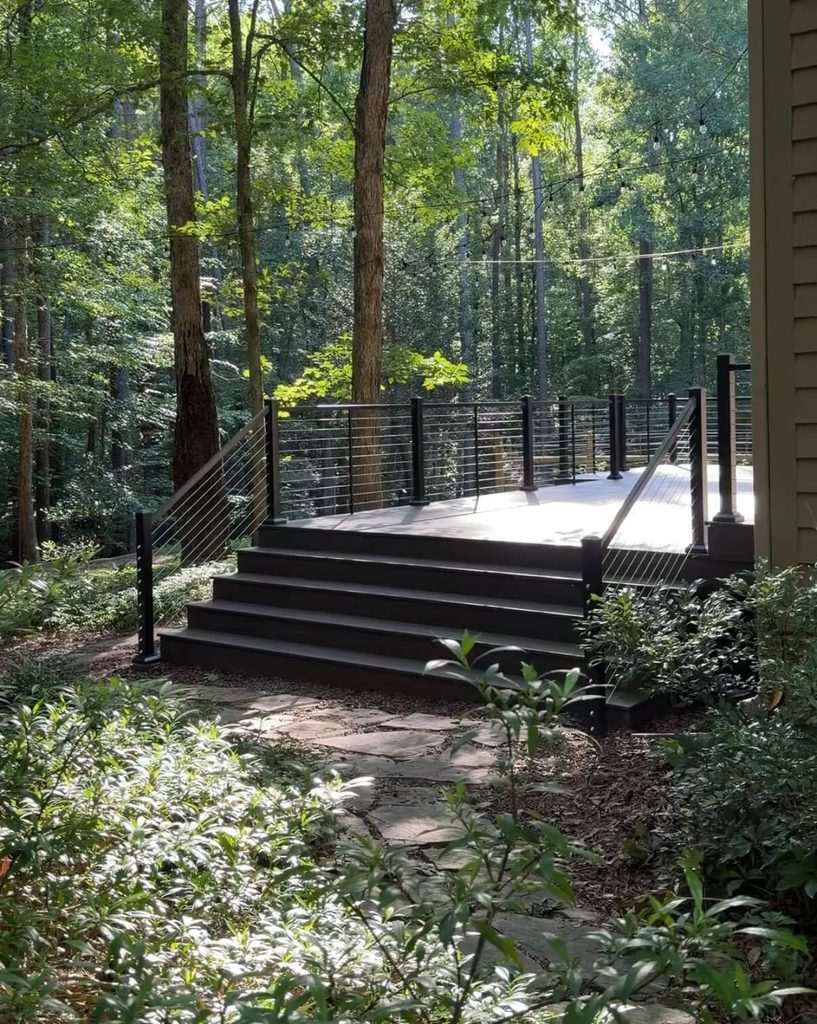
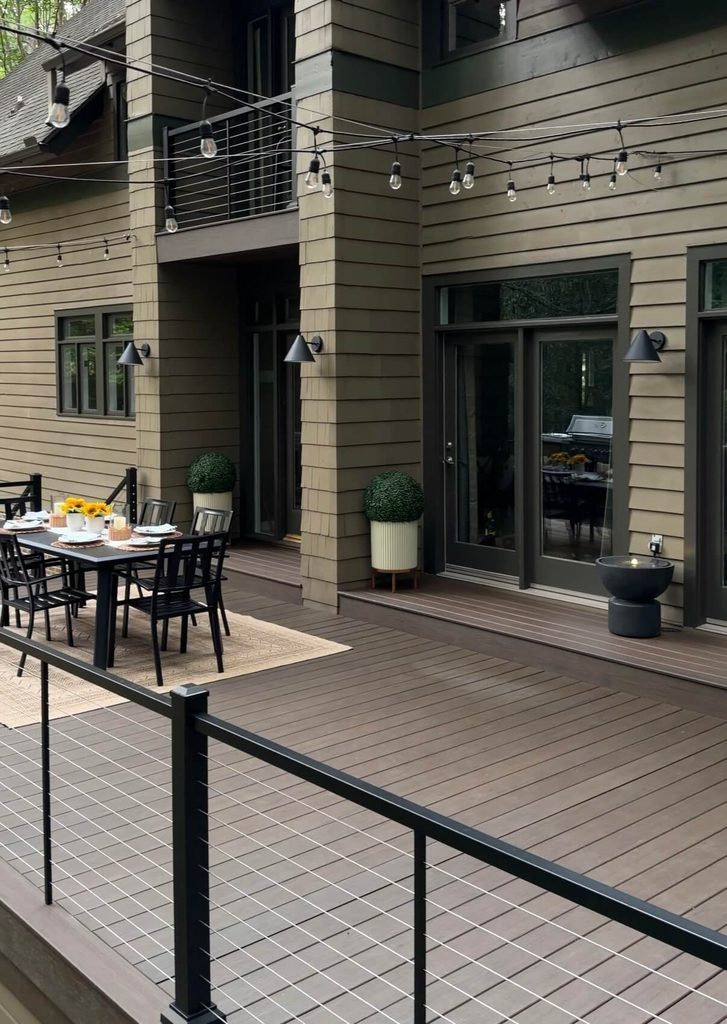
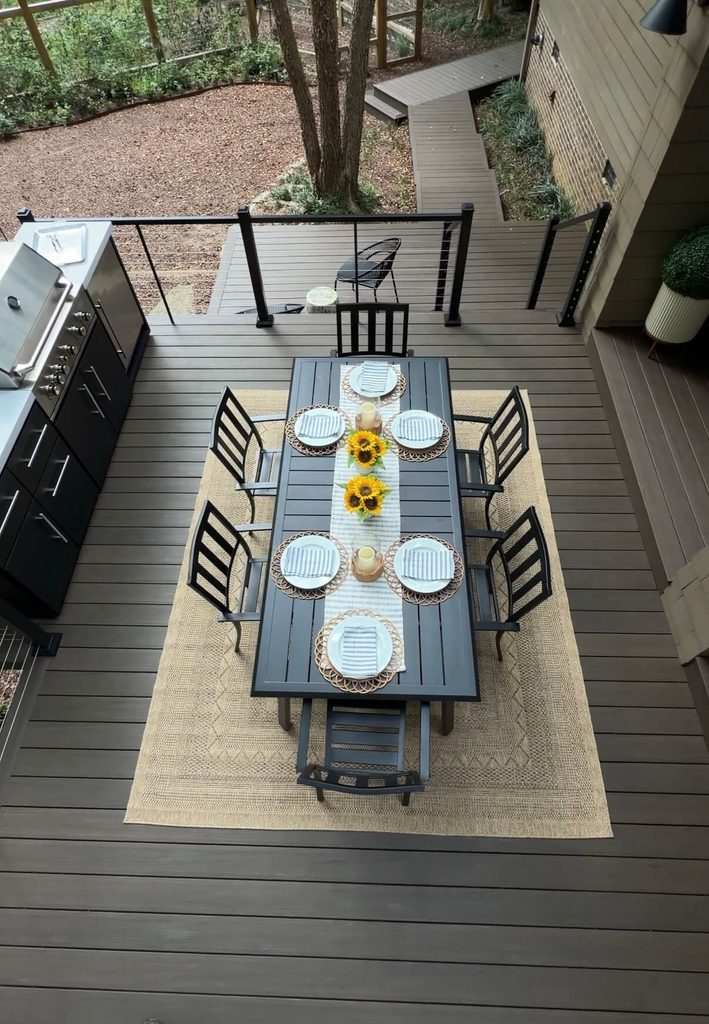
I’ve built a lot of projects over the years, but this one felt a little different.
My parents’ deck had been part of our family home for more than 30 years. It had seen countless cookouts, family gatherings, and quiet evenings outside. But after three decades of weather and everyday use, it was definitely time for an upgrade. The wood deck boards had degraded in so many places that it wasn’t even safe to walk on. Thanks for 84 Lumber and TimberTech for sponsoring this renovation!
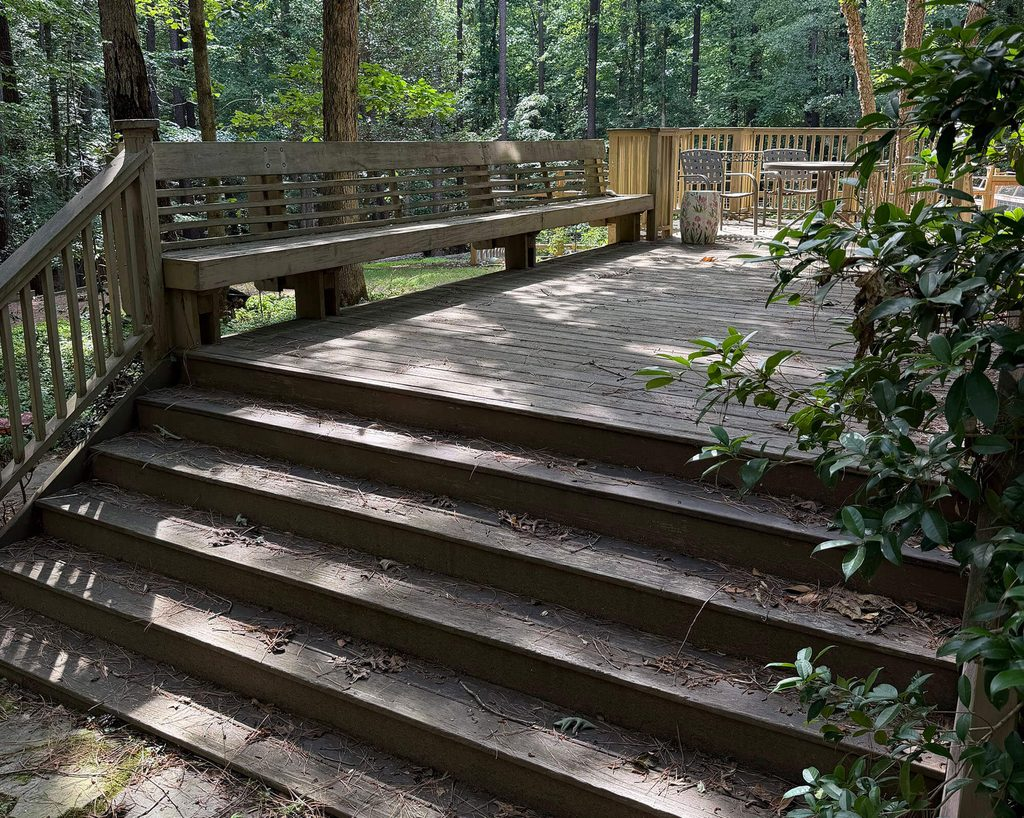
I wanted to build them something that would not only look great but would also be safe, durable, and easy to maintain for years to come. After comparing options, TimberTech made the most sense. It gives them the look of real wood without the constant upkeep, so they can simply enjoy spending time in their backyard.
There’s something pretty special about getting the chance to build something for the people who spent so many years building a home for you.
Repair or Rebuild? Here’s Where to Start
One of the biggest questions people ask is: “Can I just replace the deck boards?” The answer is: “Sometimes.” That’s why the very first step is understanding the condition of the structure underneath, otherwise known as the framing.
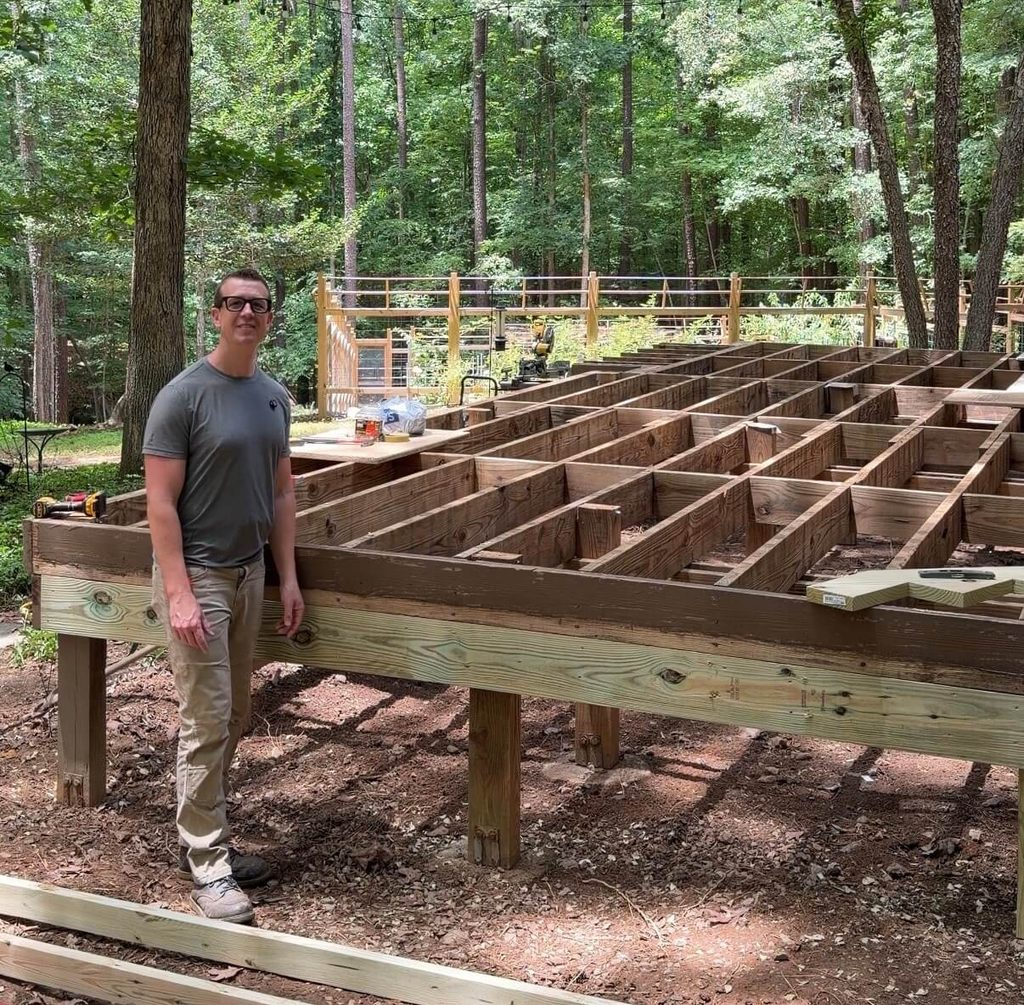
Step 1: Inspect the Existing Structure Before You Buy Anything
One mistake I could see a homeowner potentially making is buying materials before knowing if the existing framing is structurally sound and able to safely support both the weight of the new decking (dead load) and the anticipated live loads from people, furniture, grills, and everyday use. If the framing isn’t up to the job, no amount of beautiful new decking will make it safe. Here’s exactly what I inspected.
Check the Ledger Board
This is the board connecting your deck to the house. If the ledger fails, the entire deck can fail. Never skip this inspection. The most important thing you are looking for is signs of rot. If you can push a screwdriver it into the wood at all, you’ve found rot. Pay extra attention at ground level as that is where moisture usually causes the most damage.
Look for:
- Rot
- Water damage
- Loose lag bolts
- Missing flashing
- Signs of movement
Inspect Every Beam and Joist
These carry the loads throughout the deck and any damaged components should be replaces. Look for:
- Rot
- Splitting
- Insect damage
- Cracks around fasteners
- Condition of fasteners
- Sagging
- Twisting
Check Every Post
Posts should be:
- Solid
- Plumb
- Free from rot
- Properly attached to footings
What We Could Reuse
After a complete inspection, we were pleasantly surprised. The foundation was solid and most of the structural framing components were still in excellent condition. Rather than replacing perfectly good lumber, we keep everything that was still in good shape and did selective repairs. It meant that we could save them money, send less materials to the landfill and get the deck done faster!
Remember, never assume and inspect everything. If you’re unsure, have your local building inspector or a trusted contractor take a look. If a small percentage of the structure needs to be replaced, it might make sense to just do repairs but there’s a always a turning point with cost and time where you may as well just rip it down.
Step2: Before Ordering Materials, Let Someone Else Do the Math
This may be one of the biggest tips for my entire project. I took my parents’ deck drawings to my local 84 Lumber, the nation’s largest privately held supplier of building materials. Instead of me trying to calculate every board, every hidden deck fastener, every box of screws, they completed the material takeoff for me.
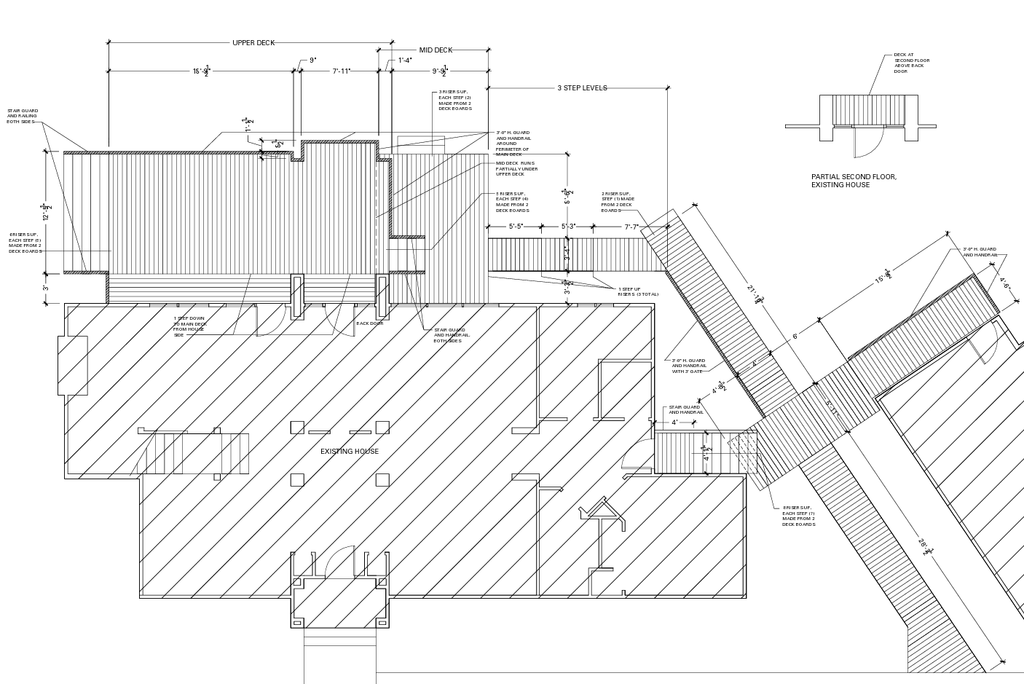
Honestly, it saved me hours and probably days. More importantly, it helped avoid expensive mistakes. When you’re working with premium decking materials, ordering too much, or worse, not enough, gets expensive quickly. Having professionals create a complete material list takes a lot of stress out of the project.
And when your project site isn’t exactly easy to reach, their delivery team made it happen. Everything showed up organized, on time, and exactly where we needed it. That kind of reliability keeps a project moving.
Why I Chose TimberTech Composite Decking for My Parents’ Deck
(Insert photo: TimberTech decking boards)
When I decided to update my parents’ deck, I didn’t want to feel like they might need to replace deck boards again in ten years. That’s why I chose TimberTech Legacy Collection in Mocha. Not only does it look amazing, but it solves many of the problems traditional wood decks eventually develop.
- No annual staining
- No sanding
- Resistant to moisture
- Doesn’t splinter
- Excellent durability
- Beautiful wood-look finishes
- Easy to clean
- Long-lasting color
It gives them the warmth of wood, without signing them up for a maintenance project every spring.
Step 3: Protect the Existing Framing
Before installing a single deck board, you should protect the framing. I applied joist tape across every exposed joist. It’s inexpensive insurance. The tape helps keep water away from screw penetrations (and the penetrations from the prior deck boards) and can extend the life of your framing. It’s a small step with a huge payoff.
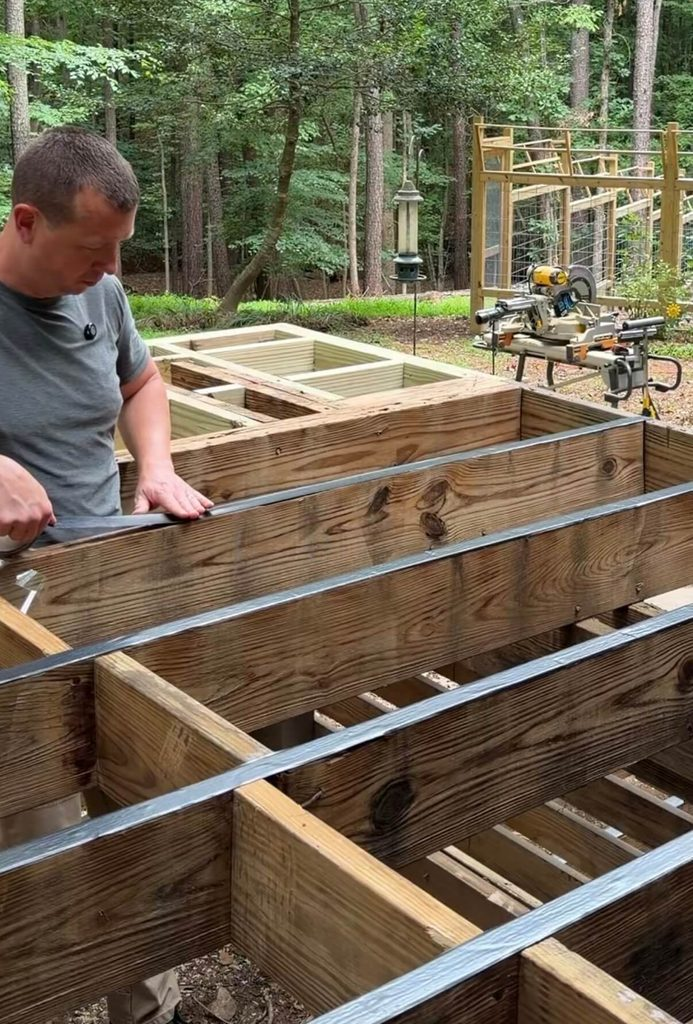
I also applied a below-ground wood preservative where any piece of wood met the ground to deter termites and insects, while resisting mold and mildew.
Step 4: Picture Frame the Deck
If you’ve ever wondered why some composite decks look custom, this is one of the biggest reasons. Instead of ending every board at the edge, I picture-framed the entire perimeter and every stair tread. It creates:
- Cleaner edges
- Professional appearance
- Better transitions
- A finished custom look
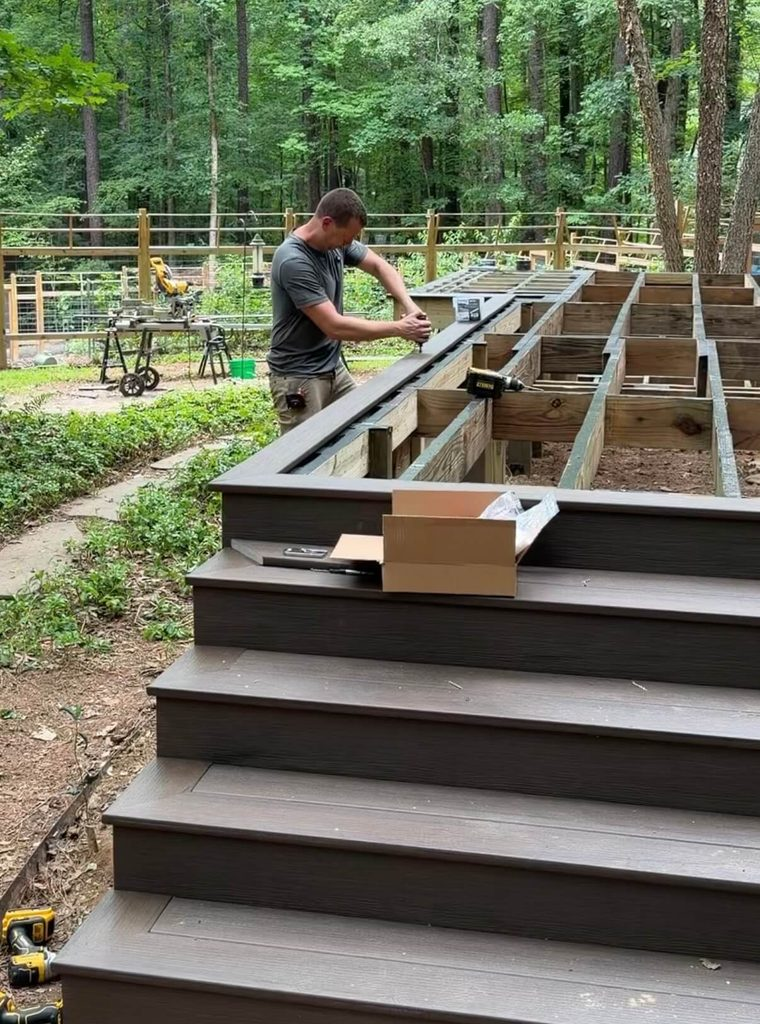
It’s one of those details people may not immediately notice, but everyone notices how beautiful it is. You can check out my reel on Instagram that details how I did this for my sister’s art studio deck.
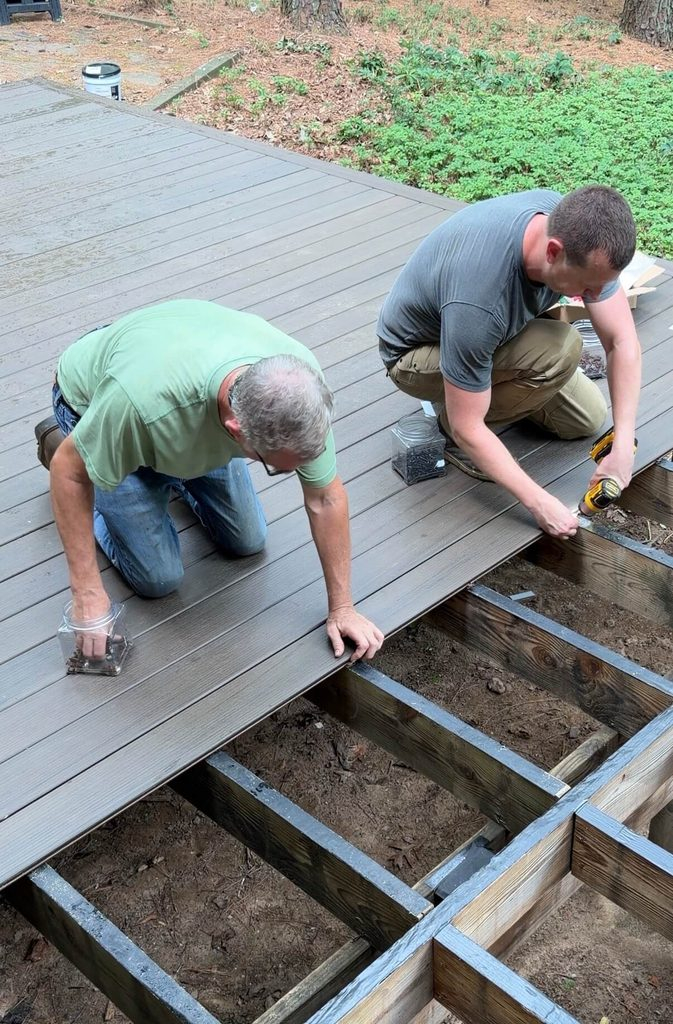
Step 5: Install the Composite Deck Boards
Installing composite decking isn’t difficult, but spacing matters. Fortunately, the TimberTech CONCEALoc hidden fasteners with groove edge boards create a consistent gap. The result? A clean deck surface without hundreds of visible screw heads. TimberTech provides product-specific installation manuals and videos for its decking systems, including hidden-fastener and top-down fastening methods.
Step 6: Install the Cable Rail System
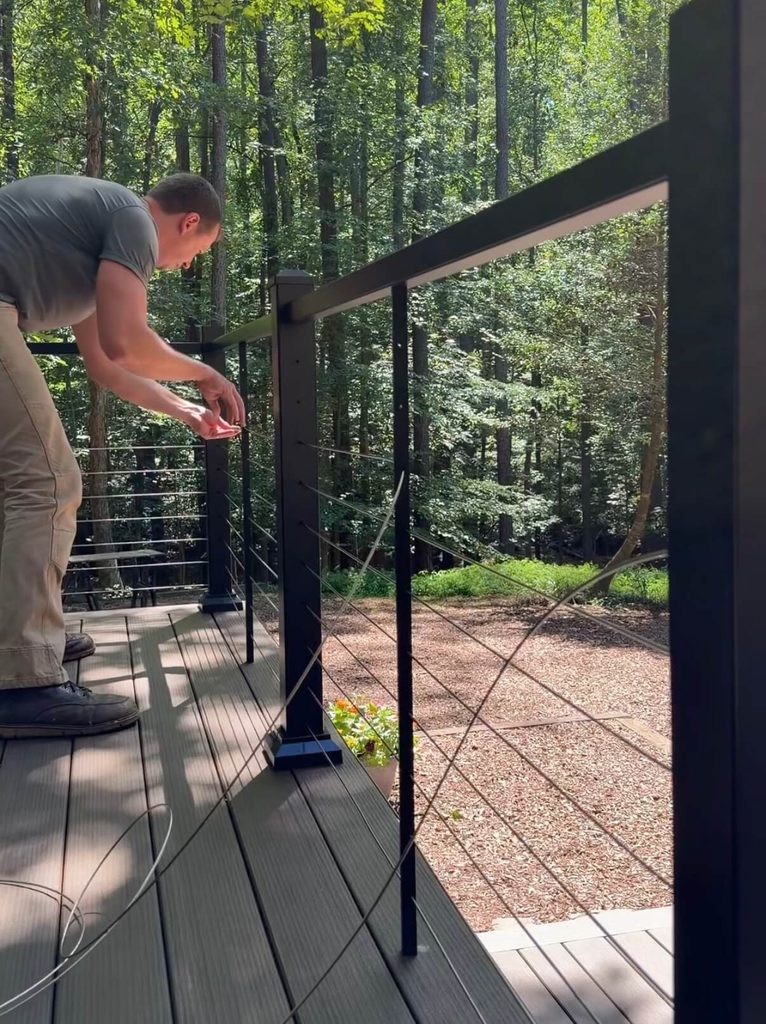
The finishing touch for the new deck was installing the TimberTech Impression Rail Express cable railing. I’ve become a huge fan of cable systems because they almost disappear. Instead of blocking the view, they frame it.
Other benefits include:
- Modern appearance
- Better visibility
- Low maintenance
- Durable stainless-steel cables and aluminum posts
- Clean architectural lines
If your deck overlooks a backyard, lake, or even a beautiful garden as in my parents’ case, cable railing lets the view become part of the design.
What This Project Really Gave Us
Of course, my parents are thrilled with how the finished deck turned out. 84 Lumber made this project so approachable to DIY,the TimberTech decking has the look and warmth of real wood, the cable railing keeps the backyard views open, and details like the picture framing really pull everything together.
But the best part of this project isn’t any one design feature. It’s knowing my parents now have a space they can simply enjoy. No constant upkeep, no worrying about repairs – just a place to relax, spend time outside, and continue making memories with family and friends.