I have partnered with the manufacturer of GE-branded sealants and adhesives to bring you this post and have been compensated for my honest opinions.
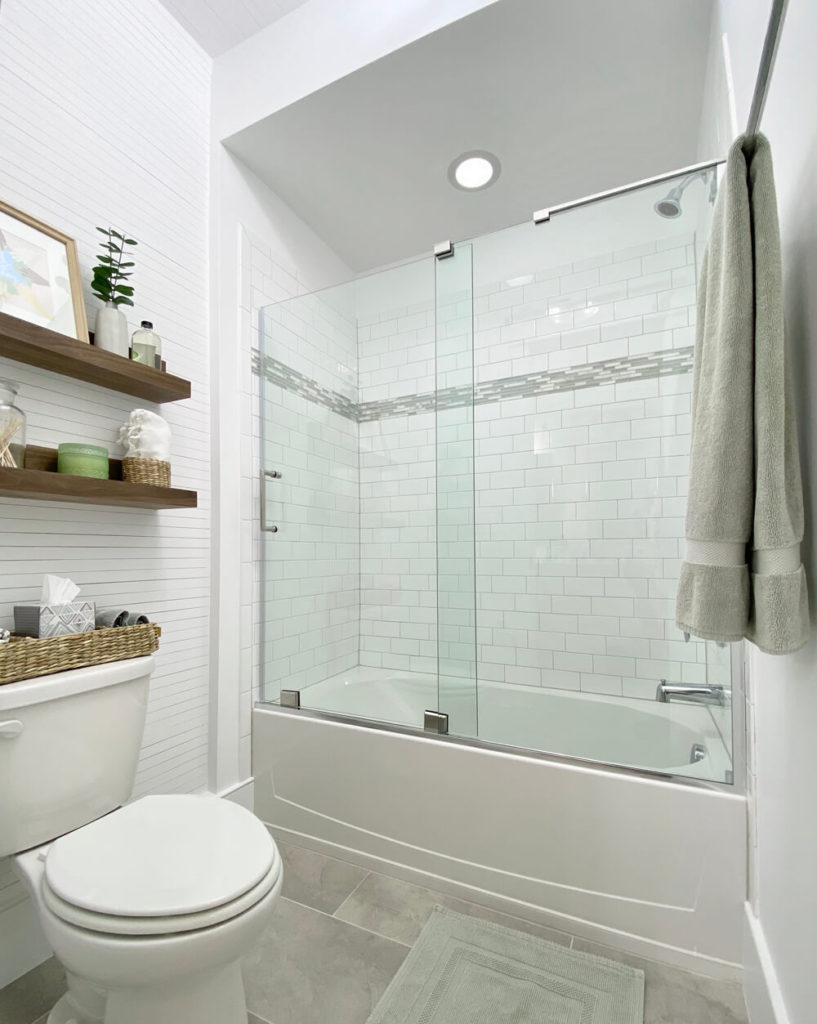
I recently made over the small bathroom that my daughters share, doing a couple of projects that really transformed the space. Along the way, I needed multiple types of sealants to complete the work properly, so I thought I would write up some important points to consider when picking sealants for the bathroom.
Addition of Wood Moldings with Paintable Sealants
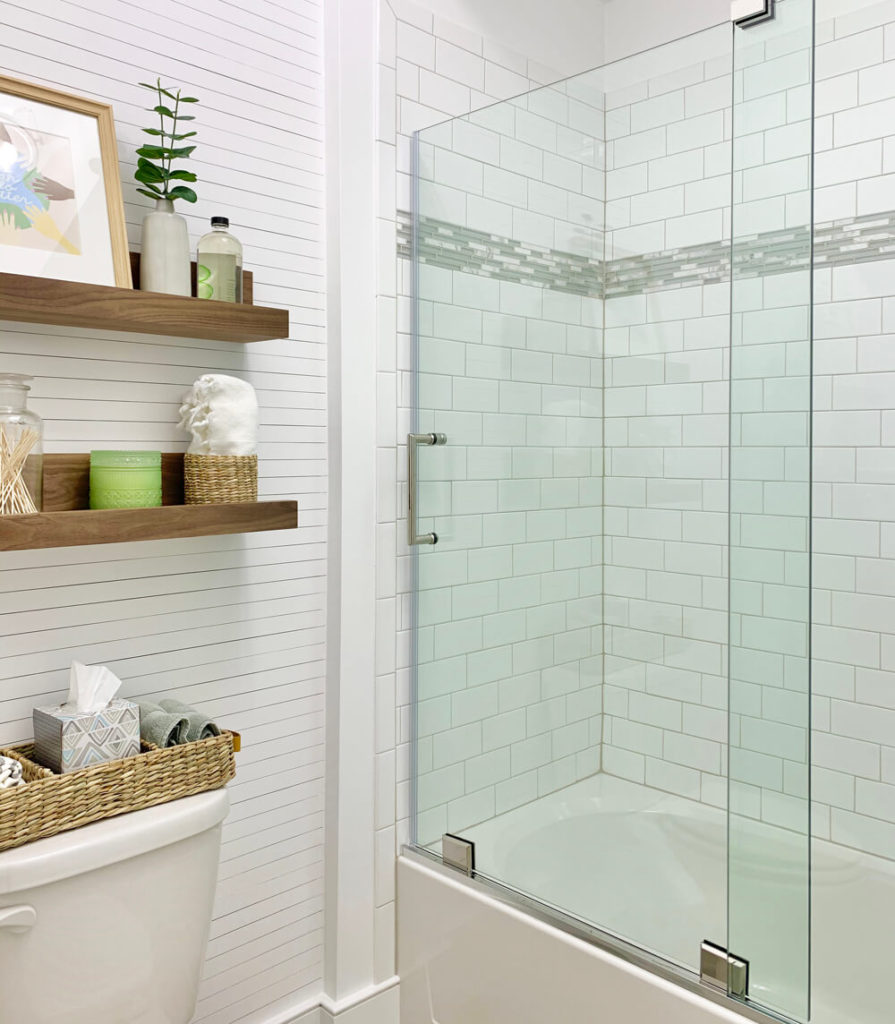
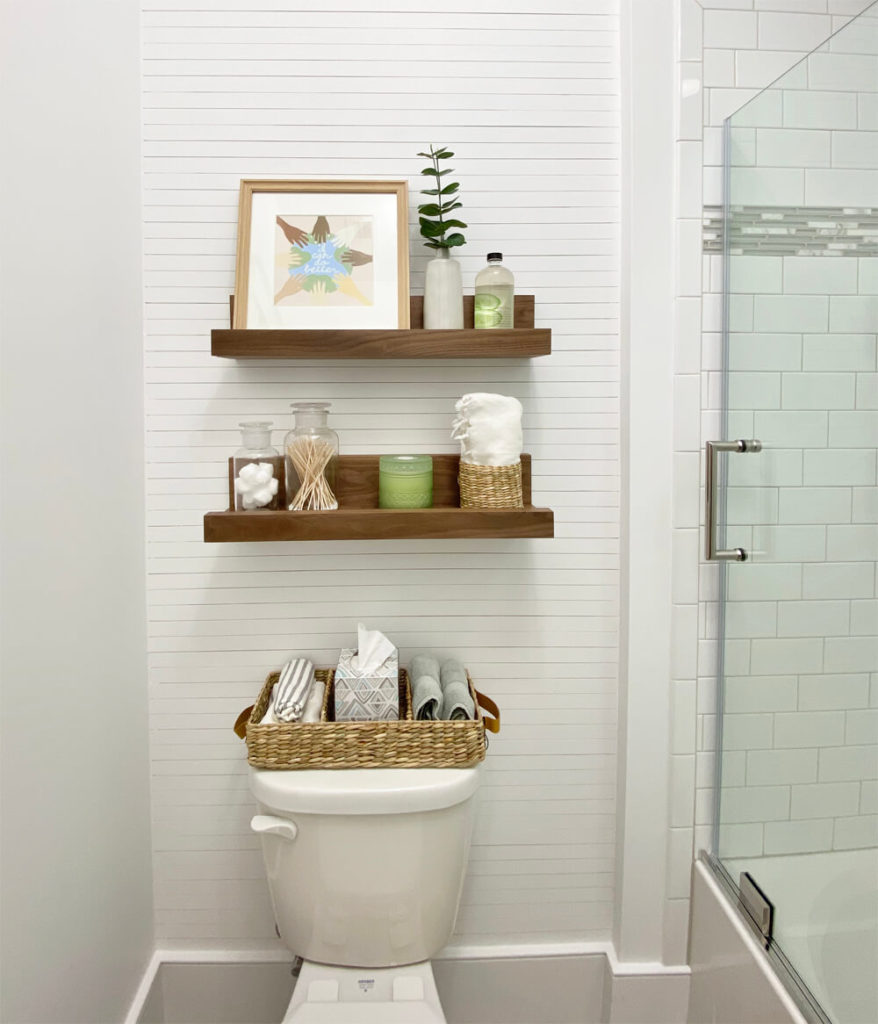
One of the biggest projects in the bathroom was the addition of “skinny lap” on one focal wall and on the ceiling. I used primed pine, ripped it down into strips, and used spacers to get a uniform application of the wood on the walls. At the same time, I took out the builder grade baseboards and upgraded them to 1×8 baseboards to match the rest of the house.
Whenever you are adding wood trim or molding details, it is important to use sealant in the corners and edges where the wood makes contact with the drywall. Filling those gaps is really important in getting a clean and professional finish!
Sealants for this type of wood-wood or wood-drywall junction need to be paintable. If you use a sealant that is not compatible with paint and then paint it, the results will be less than desirable, including the paint separating from the sealant in the joint over time, making for a very sloppy looking finish. At the same time, I recommend using a sealant that is still elastomeric, meaning that it has significant stretch after curing. The reason I feel that this is important is that all wood expands and contracts with moisture levels typically corresponding to the seasons. If the sealant in these joints is not stretchable, it will often crack or pull away from one of the surfaces. Neither of those results is desirable, and may leave you with no choice but to remove the sealant, re-apply, and re-paint. This time consuming work can be avoided by using a high quality sealant the first time around.
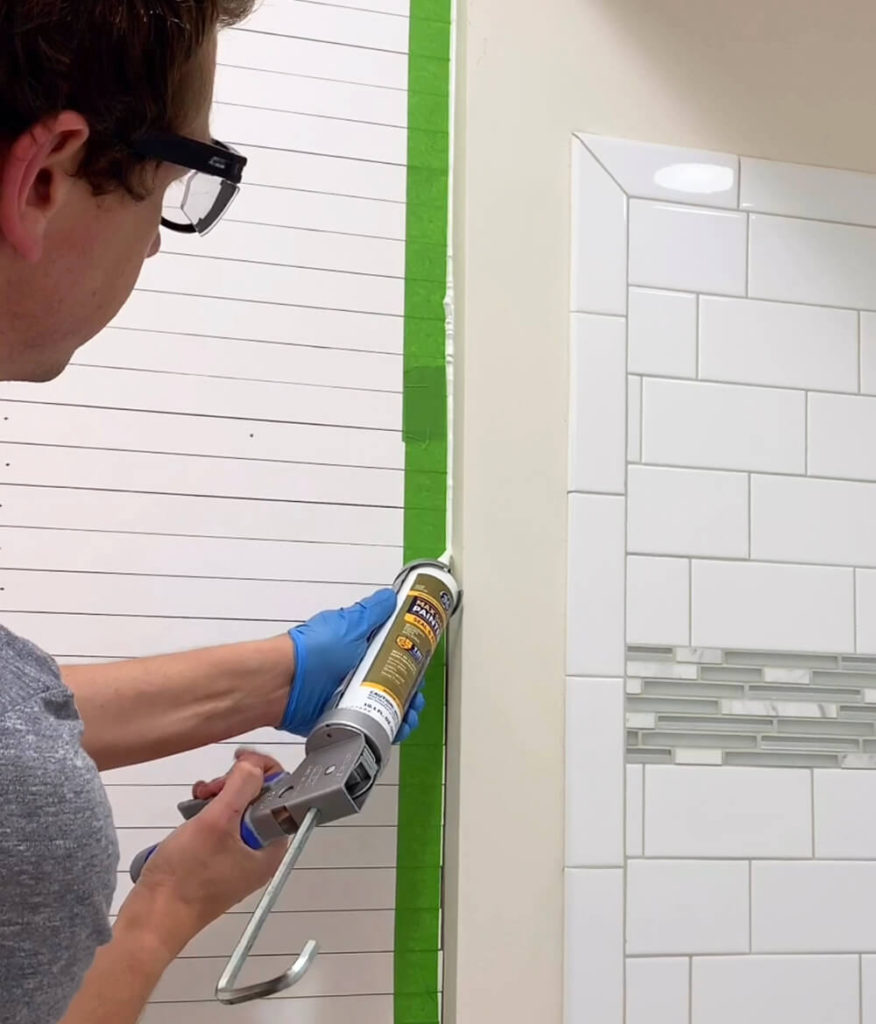
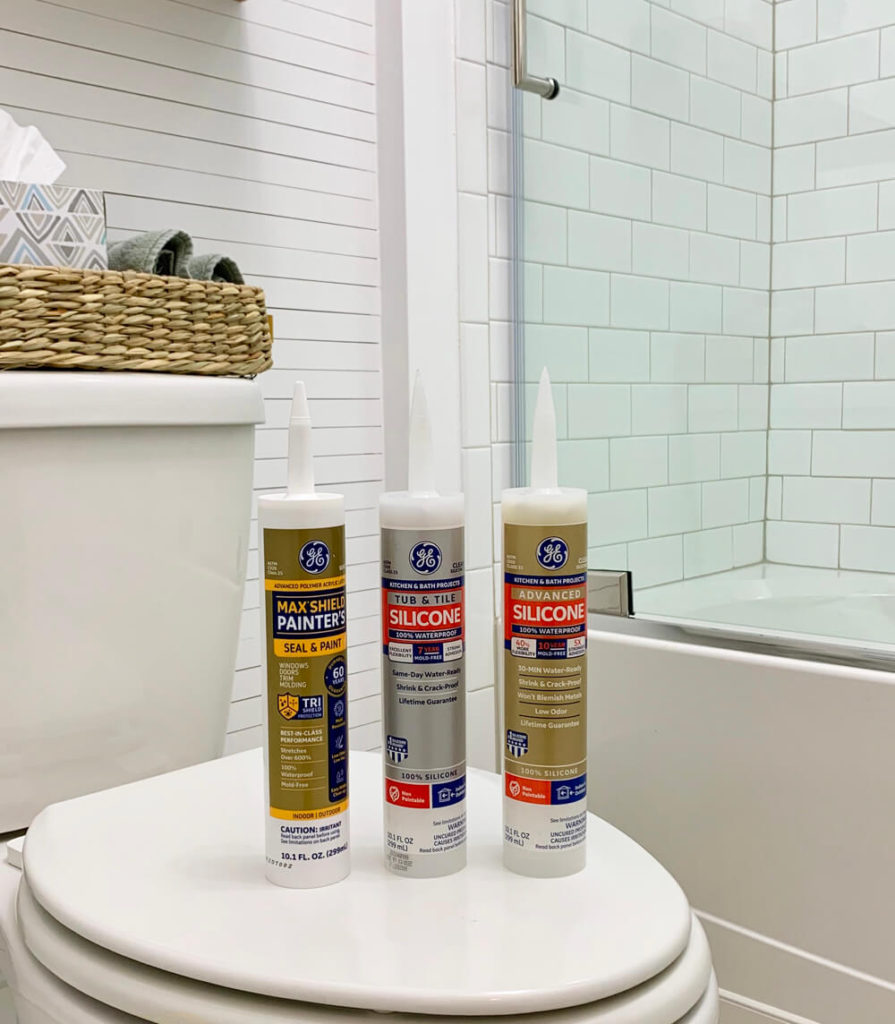
The paintable sealant that I have been using for a while now is Max* Shield Painter’s sealant. It goes on easy, smooths nicely, is waterproof, mold resistant2, and the cured sealant is able to stretch 600%1. Even with extreme movement, the sealant in my joints is going to be able to flex and stretch, so I anticipate not ever having to re-seal these joints for the lifetime of our home. Once cured, the paint I used was able to spread and adhere nicely to the sealant for a flawless finished look.
Installation of Sliding Glass Shower Door with 100% Silicone Sealant
Bathrooms are unique indoor environments where sealants are often exposed to water daily. When it is expected that a sealant will have heavy exposure to water, it is most often recommended that a 100% silicone sealant be used. I decided to install a beautiful glass shower door instead of a shower curtain, and the installation called for sealants in multiple steps.
The sealant that I used for both the glass install and to seal the frame to the tub and tile surround was Tub and Tile Silicone 1* sealant in the clear color. It is a 100% silicone that offers really strong adhesion and is 100% waterproof. This product also has 7-year mold free product protection2 which is really important in a constantly wet environment. Even if a product doesn’t fail mechanically, you don’t want unsightly mold growing on your sealant!
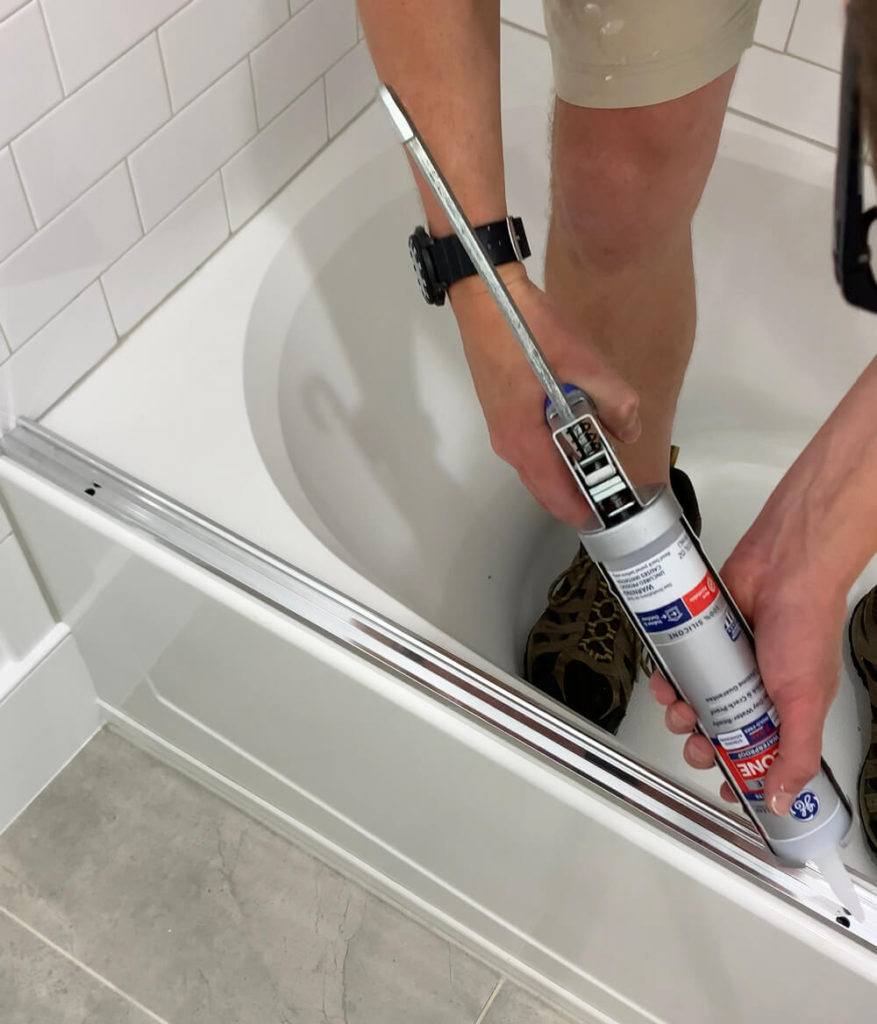
One of my biggest sealant tips is that I often tape off both sides of the joint that are being sealed so that I get a really clean line of sealant in the joint. I apply the sealant in the joint and smooth it with a gloved finger. This can push the sealant far out from the joint and the excess just comes off with the tape! If you do this, make sure to remove the tape immediately after smoothing before the sealant starts to cure.
Installation of a Toilet with 100% Silicone Sealant
I had to take the toilet out to install the wall trim for this project, and when I put it back in, I used white colored Advanced Silicone 2* Kitchen & Bath sealant. I used this sealant to create a nice clean sealed line between the toilet and the floor tile. It has many of the same great properties as the Tub and Tile Silicone sealant but has the additional advantage of being water ready in as little as 30 minutes3!
Again, I used tape to create the cleanest edge of sealant possible. When sealing a toilet, it is recommended that you don’t seal the entire bottom edge. This is because if the toilet forms a leak in the wax ring you might not notice the leak because the sealant is trapping the water inside. To prevent this from happening, leave the back edge (the part you can’t really see anyway) of the toilet unsealed.
I was excited to get this project finished up, and the sealants I used really gave me the clean look that I wanted and will give me the long-lasting performance that I need in the bathroom. If you want to see videos of this project, follow me on Instagram and find my story highlight “Bath Room”!
For more information and specs on the sealants that I used, check out the manufactures web page!
1Based on ASTM C-920, TYPE-S, NS, CLASS 25 analysis, product can span gaps of up to 2-inches wide and ½ inch deep with over 600% stretch and 25% joint movement.
2Cured sealant is resistant to stain-causing mold and mildew. Regular cleaning of caulk is required however, as soap and other residue can cause secondary mold and mildew growth.
3 Exposure to water possible in as little as 30 minutes with bead size maximum of 3/16″, temperature minimum 65° F, and humidity minimum 50 percent. Otherwise, caulk should not be exposed to water for eight hours. Do not touch or clean caulk for 24 hours.
GE is a trademark of General Electric Company. Used under trademark license.
*Max, Silicone 1 and Silicone 2 are trademarks of Momentive Performance Materials Inc.
Loved the bathroom. Where can I find the shelves? Thank you
Thank you! I made the shelves and you can find the process in a story highlight on my Instagram page!