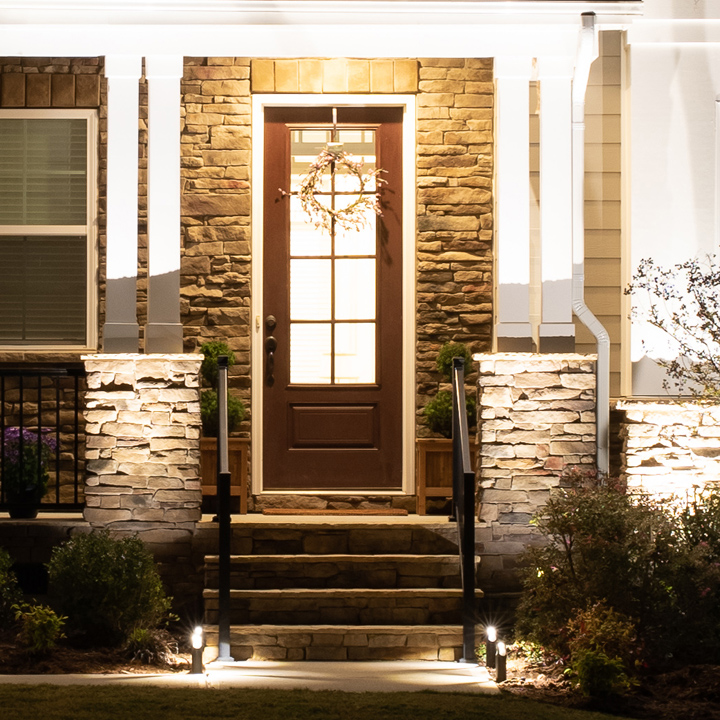
This DIY tutorial was sponsored by Lowe’s Home Improvement. Let me show you how easy it is to install a low voltage lighting system to illuminate your landscape and your home to create a beautiful night time view!

When it comes to best bang-for-your-buck DIY curb appeal projects it is hard to find one better than installing landscape lighting in front of your home. Many DIYers are intimidated by this project because lighting inherently makes one think of electrical work (which people then associate with dangerous voltages and permitting). However almost all the good landscape lighting systems are now low voltage systems thanks to the newest technology of LED landscape light fixtures. The wiring is simple and safe. Let me walk you through the steps!
Step 1 – Plan Out Your Light Fixture Layout
Planning out which light fixtures you might need can seem kind of daunting so here are some tips for figuring it out quickly. I started by taking a picture of the front of my home straight on from a distance where the whole front of the home is visible. For maximum effects you will want to light three things: your home, your featured plantings and your walkway.
To light up your home you have two options. High powered flood lights that illuminate the house from a distance or spot lights used to up-light the home. I choose the second because I feel that the shadows created by up-lighting the home create a much more dramatic lighting effect. You can see in the picture below where I planned to add them. I suggest putting the spot lights in fairly regular intervals along the front of the house, on the sides and in-between windows and highlighting features such as columns.

To highlight landscape features like trees you can use lower powered flood lights. The floodlights have a wider spread to the light, meaning that they will illuminate the whole tree or plant from close distances. You also want to have path lighting installed along the walkway up to your front door. This type of lighting is typically very low power and casts light downwards but will further increase the interest of the overall lighting effect from afar and be welcoming to any guests that arrive to your house at night time.
Step 2 – Calculate What Size Transformer You Need
In step 1 you figured out how many of each type lights you will need to create the lighting effects you want. All of these lights will be powered using a low voltage transformer. To figure out what size transformer you need (the higher output ones tend to cost a little more) you have to add up all the wattages of each fixture. I HIGHLY suggest that you use LED lights for your system because the bulbs have an extremely long life and they cost very little to operate every night. You can see in the picture below that I used 19 LED fixtures in my setup and their combined power requirements was 77 Watts. The Portfolio transformer I selected could handle up to 200 Watts output so I was well within that and allowed myself some future-proofing in case I want to add more lighting to my home in at a later date! If you have any additional questions about which transformer or lights you need, give Lowe’s a call before you order online. They have experts on hand to help you design your system!
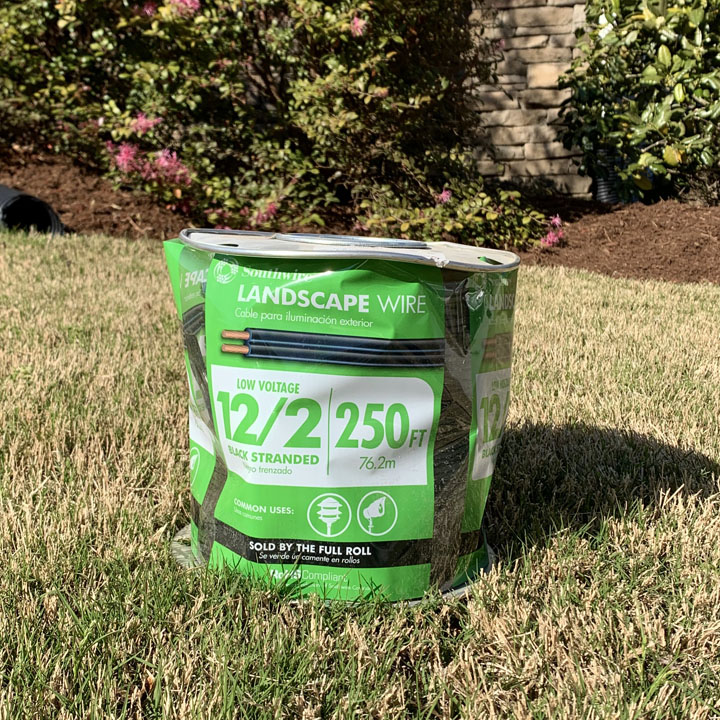
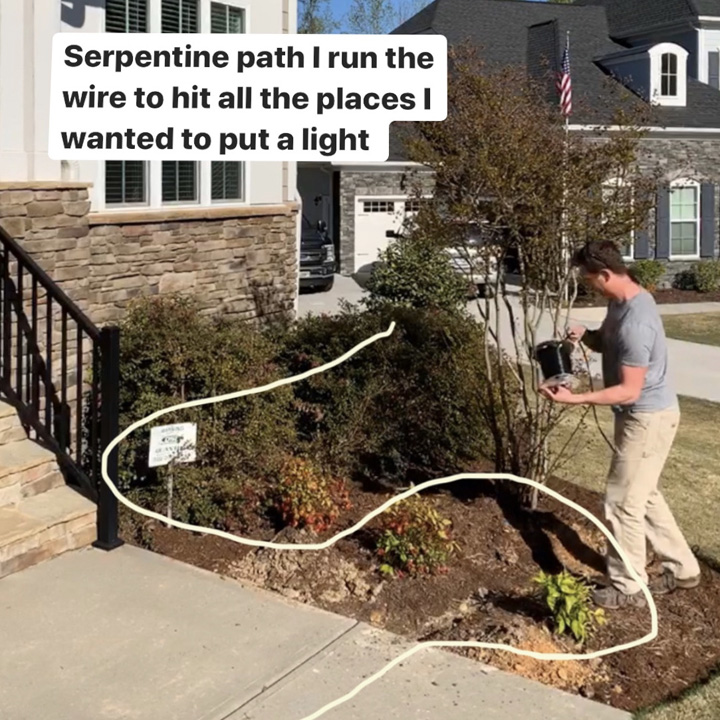
An easy rule of thumb for estimating how much wire you need is to measure the straight line distance from where the transformer will be located to where the last light will be located and double it! All of the lights will be spliced into one main wire and if you are running different types of lights you will be zig-zagging back and forth to hit each lighting point. The gauge of wire will be determined by how much you need in the end (and larger gauge costs more). For runs up to 100 ft you can use 16 gauge wire, up to 200 ft 14 gauge wire and 12 gauge for up to 300 ft runs (smaller gauge number = larger wire with more copper). My layout required about 220 feet of wire so I bought a 250 ft roll of 12 gauge wire.
Step 4 – Run Wire Under Sidewalk
This step may be optional based on how your home is laid out but most of you will have a sidewalk leading to a front entrance and want to put lights on both sides of it. Other than the thought of dealing with electrical, this is the step where most homeowners get stuck and hire this project out. This really isn’t too big of a hurdle and I will give you two methods to solve it.
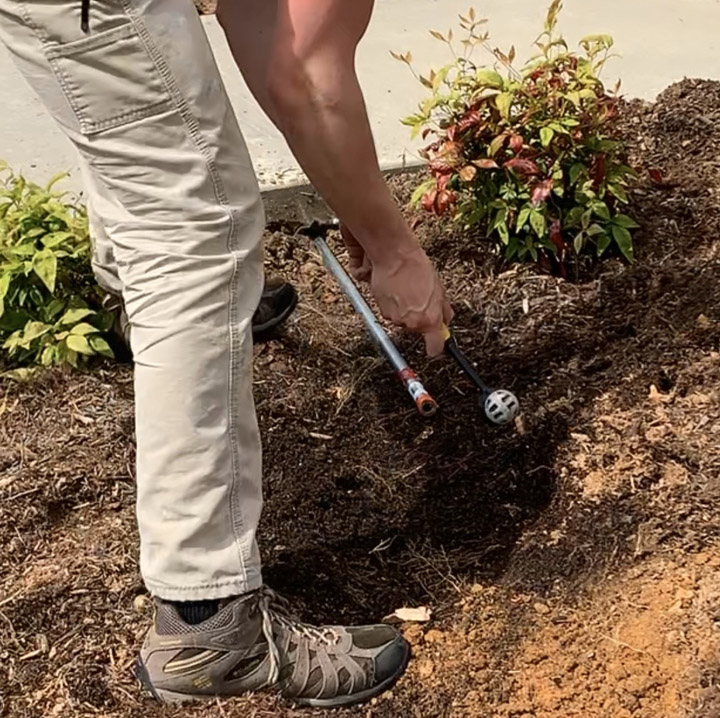
The first one is to use a long flexible drill bit to bore a hole in the dirt directly under the sidewalk. I bought one that was 72” long to go under a sidewalk about 60” wide. First, dig out the soil on either side of the walk way where you want the wire to cross. From the low side start the long drill bit into the soil right under the concrete. Keep flexing the bit upwards as you turn on the drill and the bit will want to stay right at the soil/concrete interface. Once it is through you can attach the wire to the bit and pull the length needed back through the hole created!

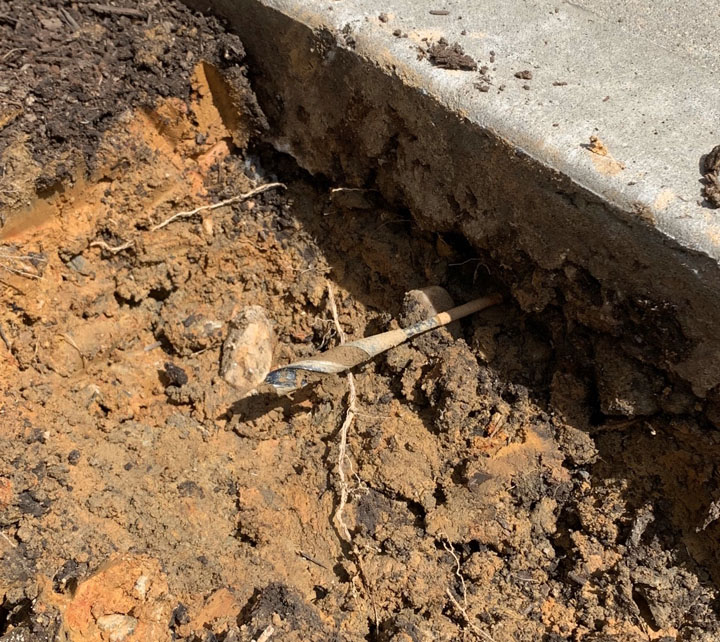
If you want to create a more permanent channel under the concrete you can use a galvanized pipe (I used one that was 72” long, ½” diameter) under the concrete. If your ground is very flat this will be a little harder than the first method but if there is any slope at all this method again is pretty easy. I started by flattening the end of the galvanized pipe with a small sledge hammer. Flattening the pipe allows it to more easily cut through the soil and prevents the pipe from filling itself with soil on the way through.
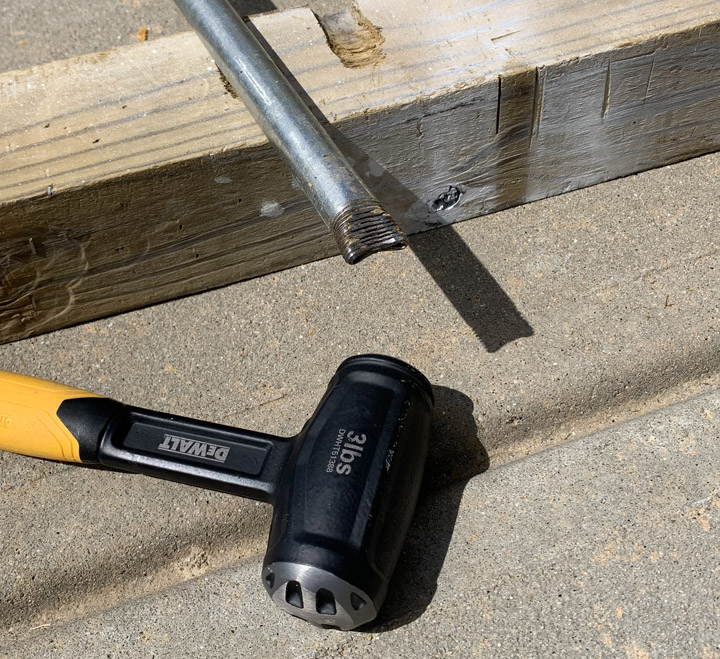
Starting on the low side, I then used a small sledge hammer to pound the pipe through the soil right under the walkway. Using an angle grinder with a cutoff wheel, I cut off about an inch from each end of the pipe can cleaned up the sharp metal edges with a grinding wheel on my drill.
Step 5 – Install the Transformer
This step is much easier than it seems because the transformer just plugs into an exterior outlet. I installed the transformer onto the house according to the manufacturer’s instructions by using the included screws. Before plugging in the transformer, I installed the lighting wire into the terminals on the bottom. I used a set of wire strippers to remove about ½” of wire insulation from the ends of the wire, inserted the wires into the terminals and then used a screw driver to tighten them down firmly. I then hung the transformer on the mounting screws and plugged it in!
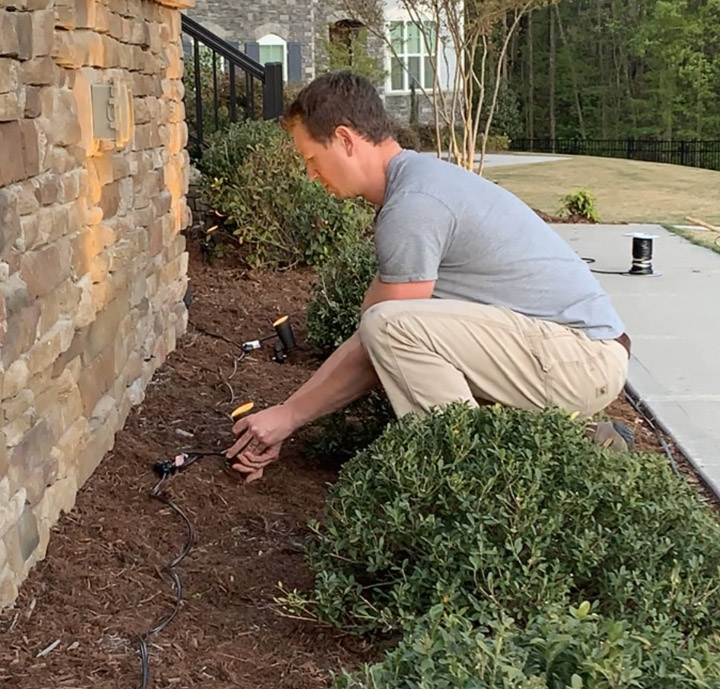
Step 6 – Install the Lights
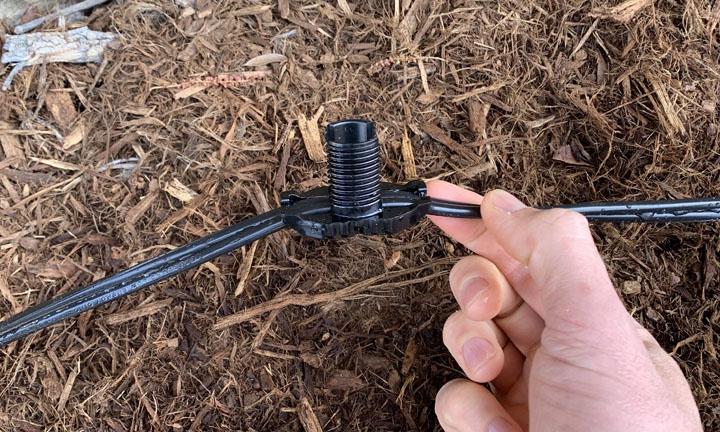
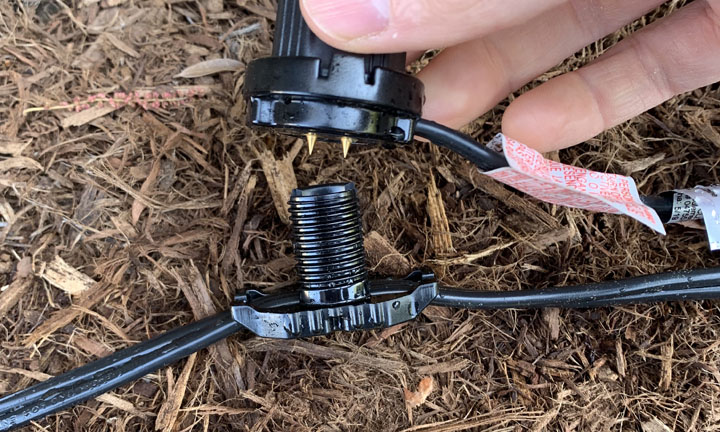
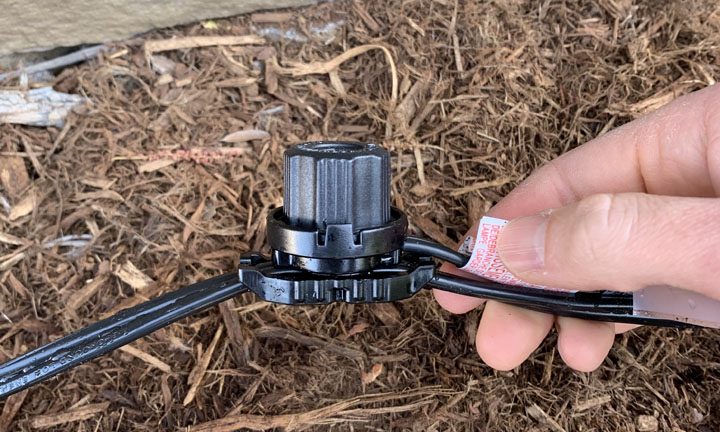
The new lighting systems make this step so easy, with zero wire stripping or splicing needed. I used Portfolio lighting and their connectors were two pieces. The first piece snaps onto the bottom of the wire to hold it in the correct position for the top piece. The top piece is the one that connects into the main line. The connector has two extremely sharp prongs on it that align with the wires. When you screw the top connector down, the prongs pierce the main line wire (one on each side) and the connection is made instantly with zero tools!
I used two different types of spot lights on the front of the house. The first were more traditional looking low profile LED spot lights from Portfolio. I used these in areas where there was an open spot with no plantings. I positioned the lights approximately 15 inches from the house and positioned them at an angle so that their light hit the largest portion of the house. This is most easily done at night when the lights are on.
I also used Portfolio spot lights on an extension pole. These were really handy in locations where I needed the light to be off the ground because of existing bushes to prevent some of the foliage from hanging over the light and casting shadows.

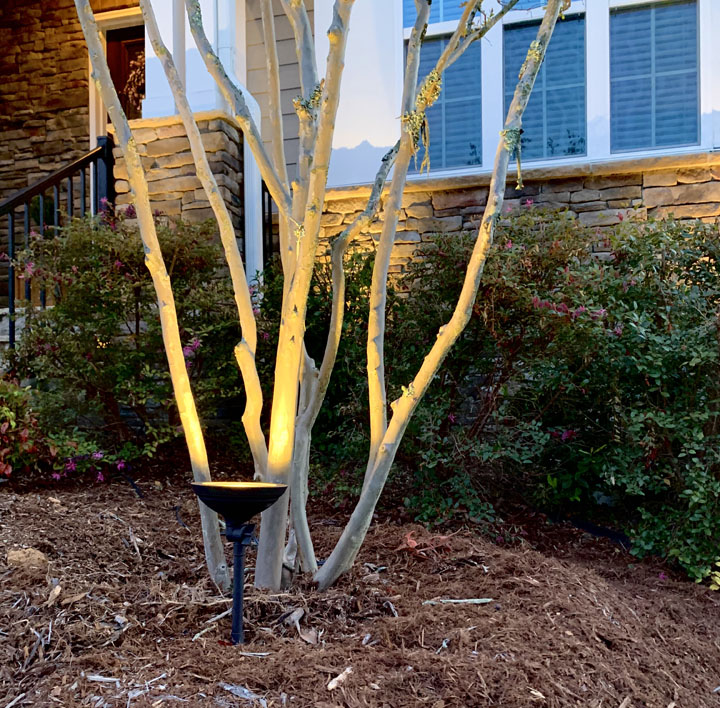
To light up a few trees in the front of the house I used both Portfolio LED flood lights and a Portfolio wall wash light. The flood lights were used to highlight a few dense Holly trees and I used the wall wash light, which has a really wide beam angle, to illuminate a Crape Myrtle tree from below giving a really dramatic lighting effect.
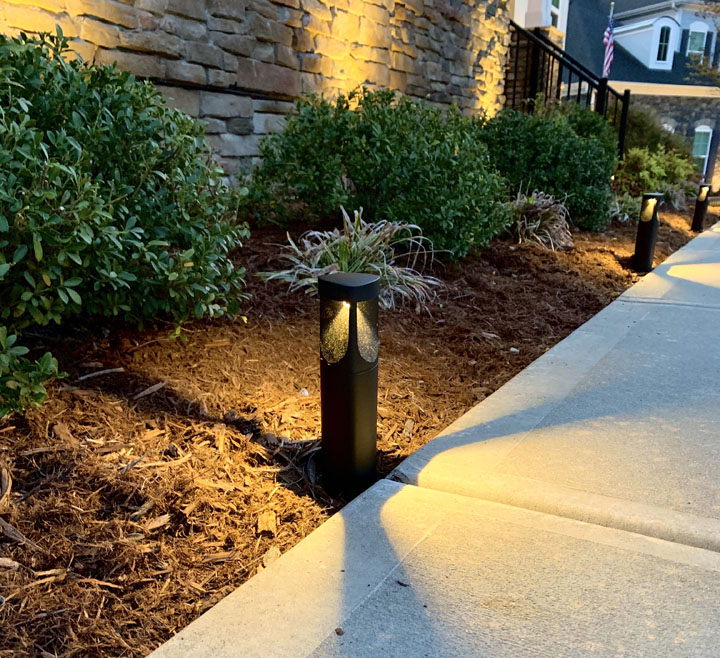
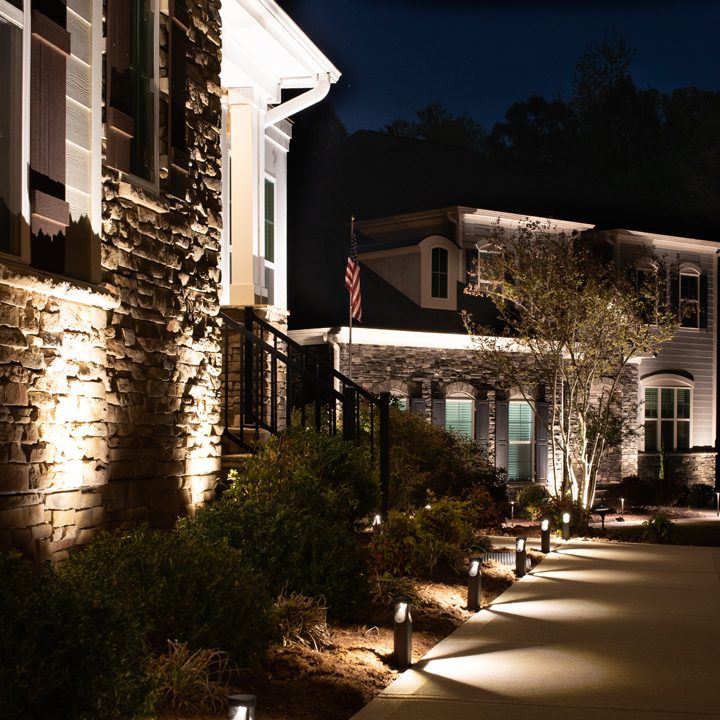
Finally, I lit up our walk way using a bollard style path light from Portfolio. I really like these because they are really low profile and give a very interesting light pattern at night!
Step 7 – Cover the Wire
The instructions said that the wire can be buried up to 6” deep in the ground permanently and I could see where this would be important when running wires under a lawn for instance. However if you are installing the wires in mulched planting beds I would recommend just covering the wire with mulch instead of burying it. If you bury it then there is a chance you will forget its exact location and could cut it when you go to replace or add plants to the landscaping in the future. If it is just under the mulch then you can easily find the wire before planting by moving the mulch away by hand!
Step 8 – Program the Lights
Even though all the LED lights I installed draw less power than a single 100 Watt light bulb, it is still good to think about energy efficiency. The Portfolio transformer has a built-in photocell and a setting that allows the system to turn on at sunset and turn off at sunrise. You can also program the lights to turn off a certain number of hours after sunset (so that they don’t run all night). However, I like the added sense of security I immediately got after having the house lit up and so I chose to just let the photosensor determine when to turn the lights on and off!
I hope you realize now how simple this project really is! To install all the lighting you see in this post took me approximately 6 hours. If you want to see videos of the process follow me on Instagram and check out my story highlight “Landscape Lighting”!