I recently built a four foot fence at my sisters house that is based on an original design my Dad created for their beach house. (here is a link to a full set of digital schematics). In this post I’ll show you how we built it!
Fences usually have two sides—the good side and the ugly side. The good side is the pretty one with the nice, finished look and according to fence etiquette is the one you should face towards your neighbor. The ugly side is the side where you can see the fence’s structural elements and typically the one you’re stuck looking at, even though it’s your fence.
When you’re investing in a fence, whether it’s one being used for privacy or one to keep your pets in, you want it to look good from all perspectives since no one wants to be left looking at the ugly side of a fence.
You can have it all
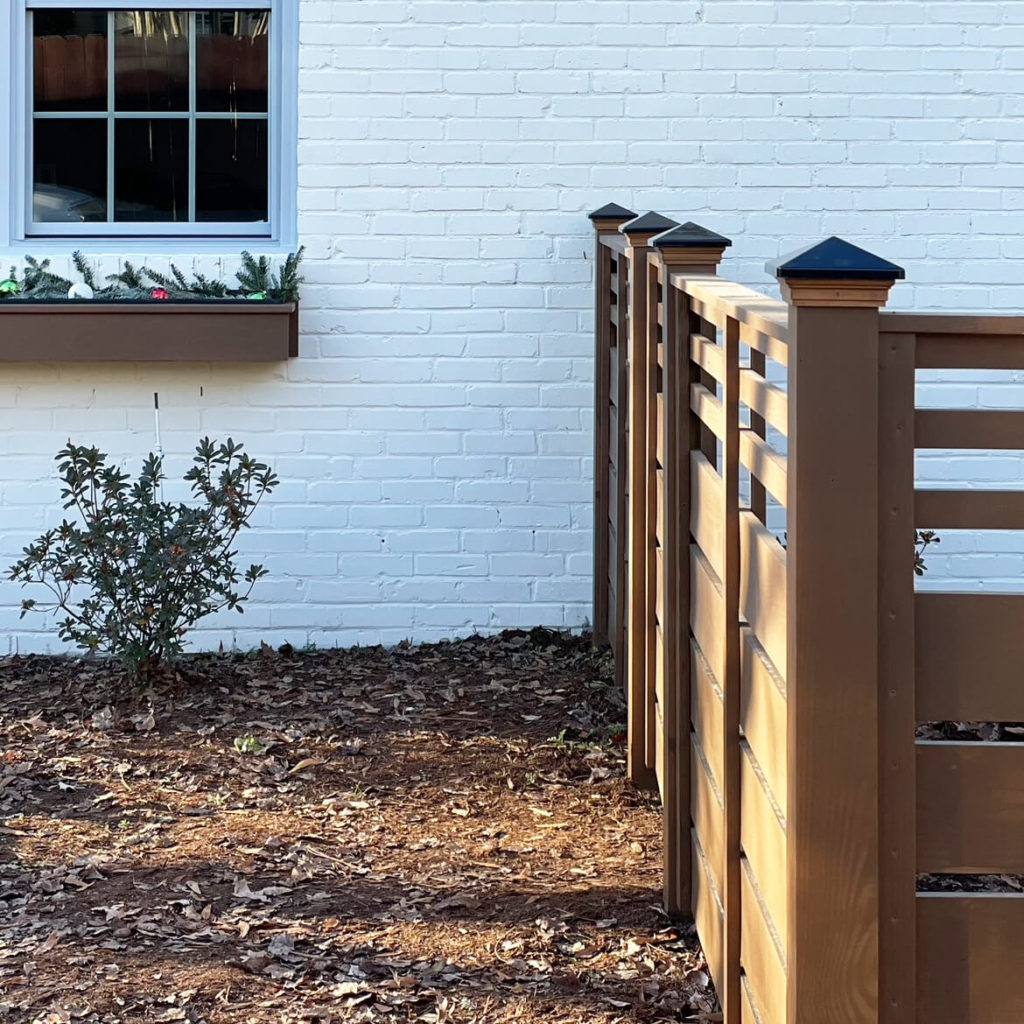
Let’s face it. It takes a lot of effort to make a vertical fence beautiful. A horizontal fence is a great option for anyone who is looking for a more contemporary look and feel. With simple clean lines, a horizontal fence offers unmatched beauty in comparison to a vertical one. It can transform an ordinary backyard into a backdrop for an outdoor room. And better yet, if you build one that looks good on both sides, you can have it all.
Before you get started
Check your local building codes and determine if you need to meet any building codes or obtain any building permits. Also, refer to your local homeowner’s association, if applicable, to see if you need to address any of their guidelines before starting your fence project.
Next, determine the reason why you are installing a new fence so you can select a style that best supports your needs. You may want a fence for privacy or one that keeps children and pets inside your property line.
Next, determine the exact location of your property lines before you start construction. If you don’t have a property survey, you can get that information from your local assessor’s office. If possible, discuss your fence plans with your neighbors to avoid property line disputes.
Locate and mark utility lines. Contact your utility companies if you need assistance locating gas, water, power, sewer, and telecommunications lines. You want to avoid damaging any lines that could inconvenience you and your neighbors, or possibly cause you injury.
And finally, use a tape measure to measure the entire fence line, including fence gates. Subtract the length of the gates from the total footage and divide by the size of your fence panels (six feet) to determine how many panels you’ll need.
How to build a horizontal fence that looks great on both sides
Lay out the fence posts. Use a string line to outline the perimeter of the fence. Mark your fence post positions by spacing them every six feet along the fence line with spray paint.
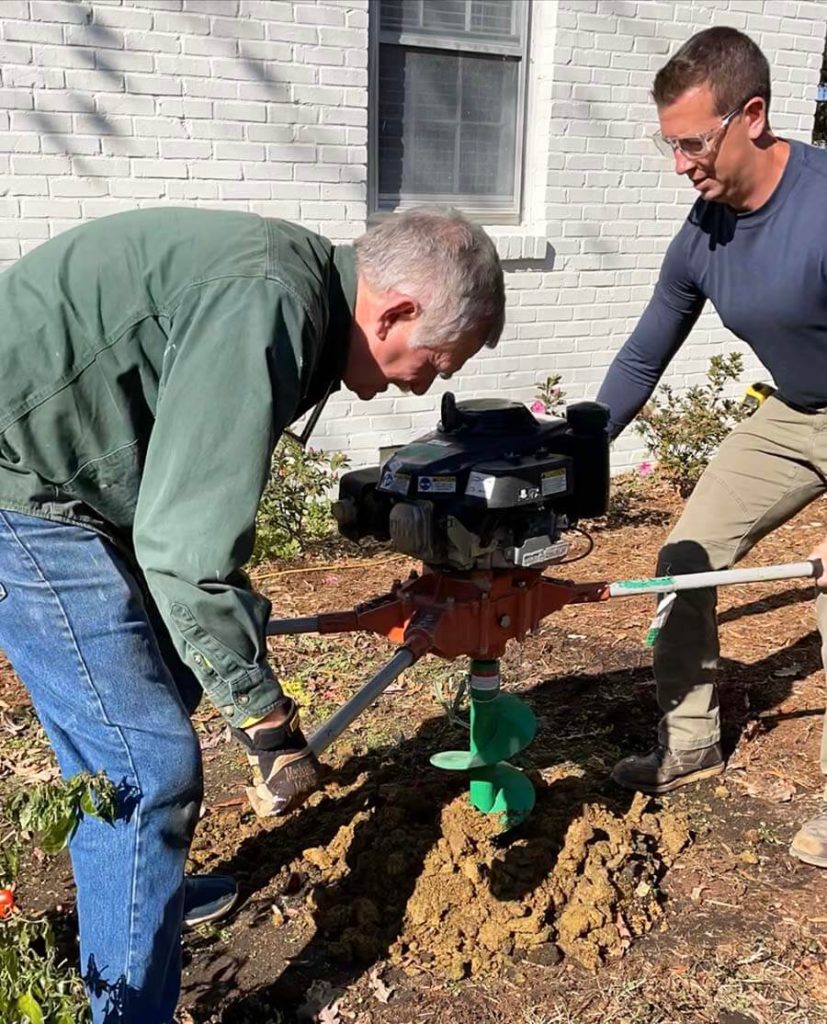
Dig holes for posts. With a shovel, power auger or post hole digger, dig your holes according to post size and code. Post hole diameters should be approximately three times the width of the post. Some building codes may require you to dig holes below the frost line to prevent the ground from pushing up the posts during a freeze.
Set pressure treated posts no further than six feet apart. Set them in the middle of the hole and add dry concrete mix and water to within six inches of ground level. Use a level to make sure the post is vertically straight; hold them in place with braces until the concrete is dry.
Attach two cleats (1 X 4 ripped in half) on the inside of each post (set in the middle) with 3.5” exterior screws to form a ¾” channel for horizontal boards to slip into.
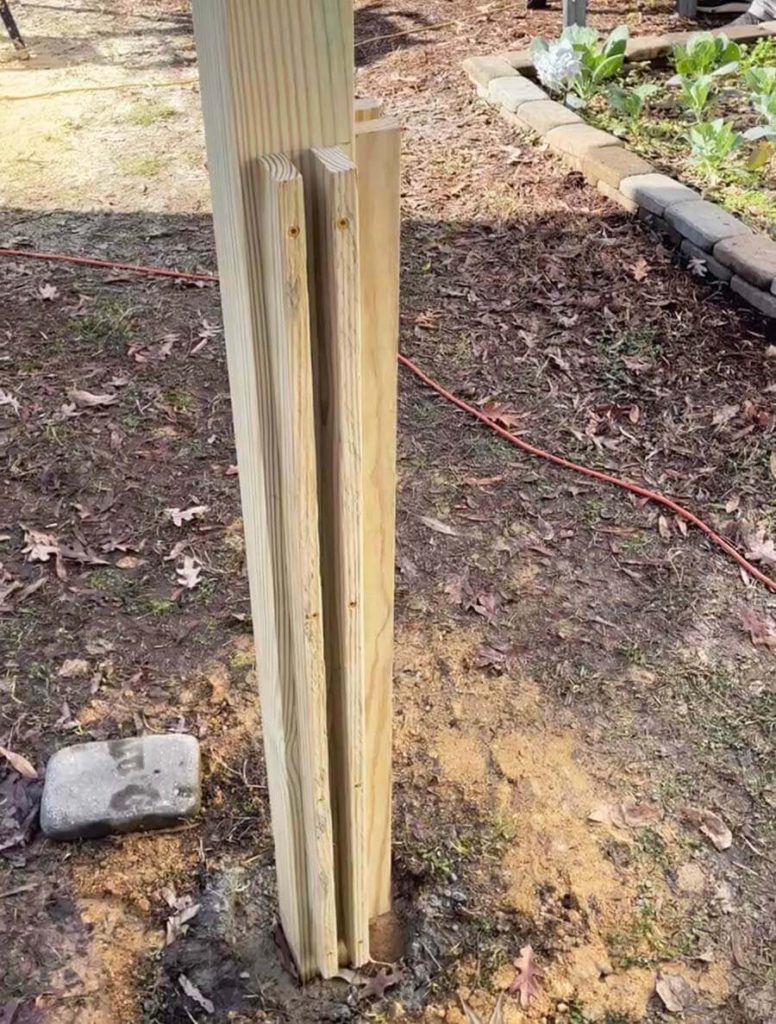
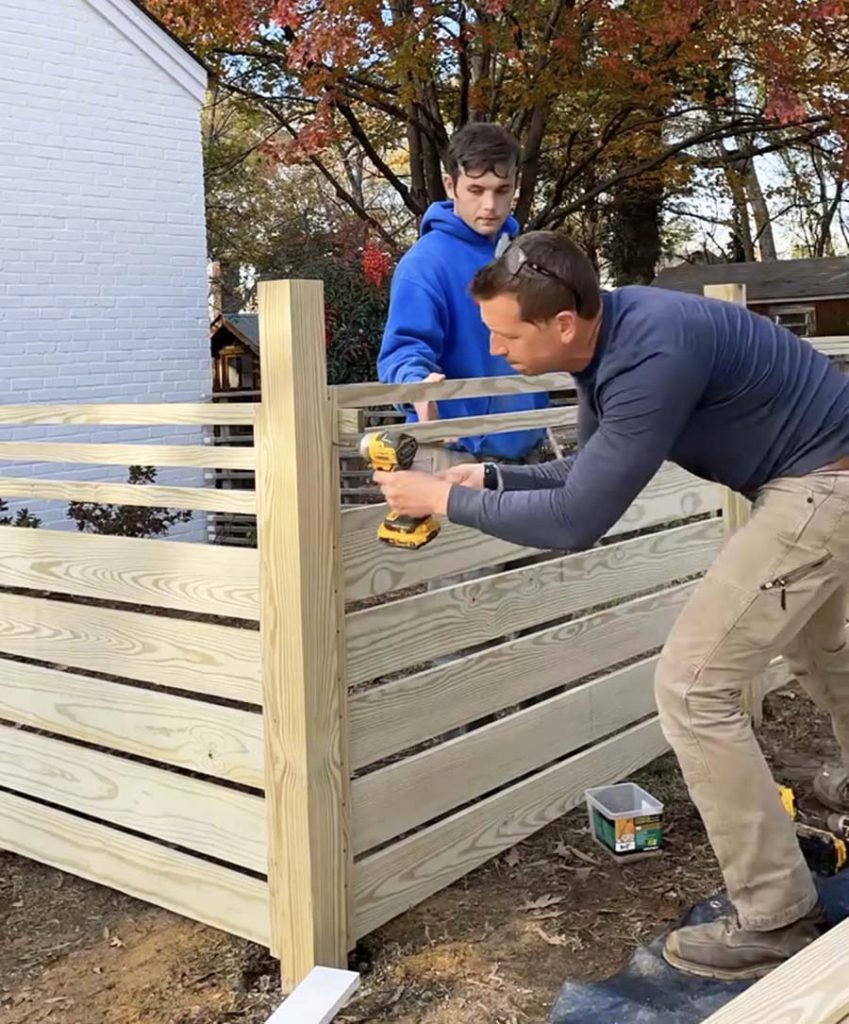
Once the cleats are mounted on the inside of each side of the post, slide the first 1 X 6 pressure treated board into the channel and align the bottom of the board with the bottom of the cleats. Place a 1” spacer block on the top of the board and then slide the second board down the cleat. Repeat as necessary for bottom part of fence. (Approximately five 1 X 6 boards are needed for a 4 ft. fence and seven 1 X 6 boards are needed for a 6 ft. fence.)
For top horizontal fence boards, rip 1 X 4 treated boards in half. Place a 1 3/4” spacer block in between boards. (Approximately three ripped boards are needed for a 4 ft. fence and four ripped boards are needed for a 6 ft. fence.)
Next, rip a 1 X4 board in half for each center trim piece for the front and back of the fence. Attach with stainless steel screws.
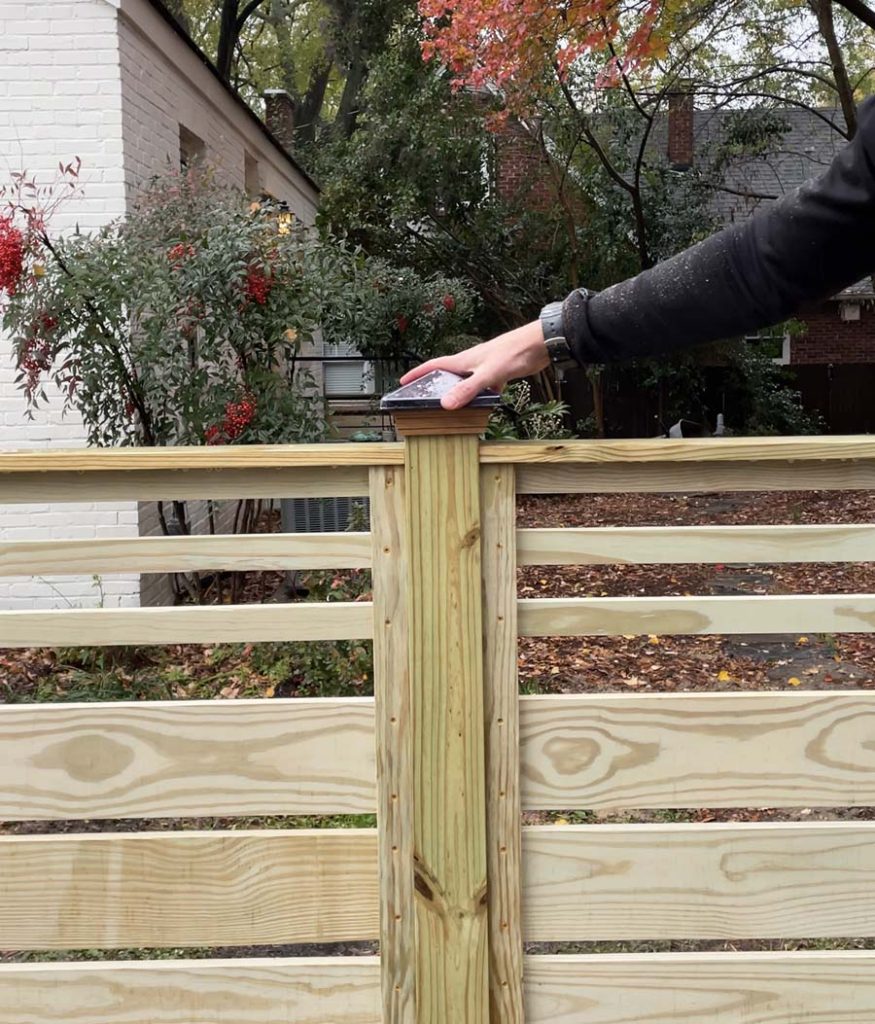
And finally, rip a 1 X 4 into 3” cap board. Use stainless steel finishing nails to nail into place.
Attach post caps to each post, ensuring each fits securely on its post.
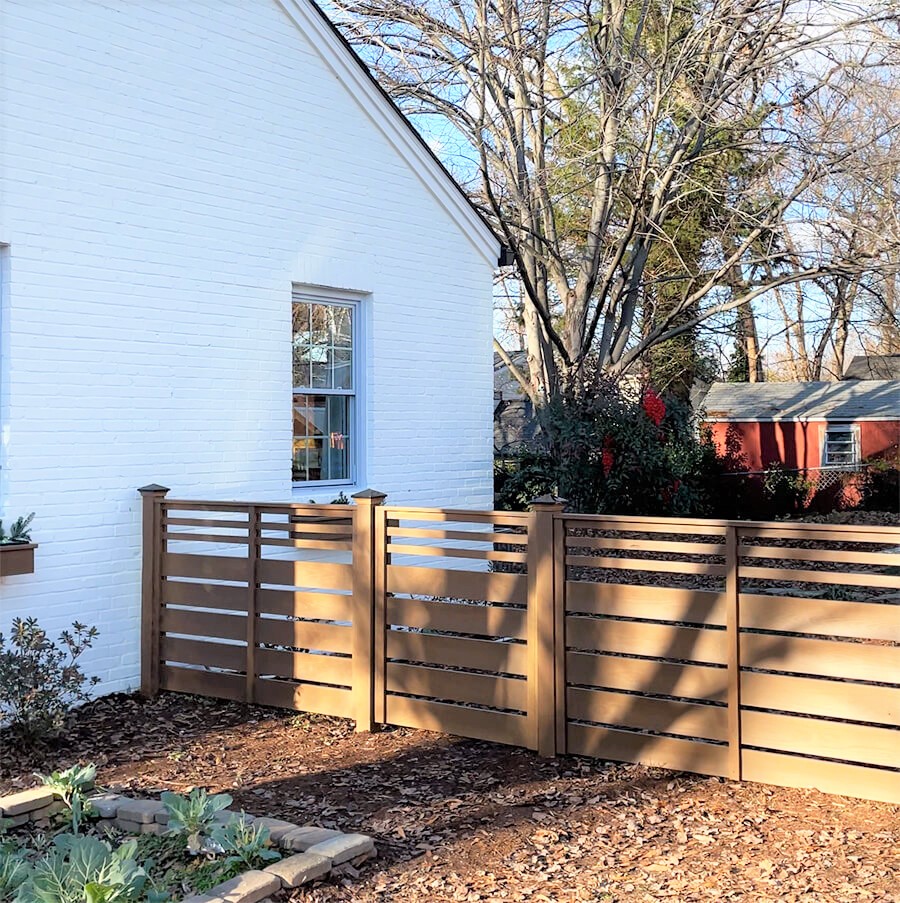
Paint or stain your new fence and then sit back and enjoy your new contemporary, horizontal fence. It provides visual interest and integrates beautifully with nature. (Tip: re-stain or paint the fence every two to three years to keep it beautiful.)
Get your digital fence plans today
If you’re interested, you can purchase digital plans that will provide more detailed instructions on how to build this beautiful horizontal fence that looks good on both sides with your own materials. You will receive a PDF file that includes fence plans, and a materials list for each fence section, right after you make your purchase. Purchase here.
For more information, see this beautiful, horizontal fence project on Instagram.