Every year you should do a survey of your home and do any necessary repairs to seals to keep them looking their best and to keep your home protected from the elements. I have partnered with the manufacturer of GE-branded sealants and adhesives to bring you this post and have been compensated for my honest opinions.
Your home exterior is made up of many components that work together to keep air and water out of the structure. Keeping air out is an energy saving bonus especially when you are paying money to condition the air in the summer and heat the air in the winter. Keeping water out is important because water that gets behind exterior components can cause damage to the home! Typically, you will get air and water intrusion at the junction of two exterior elements, for example – between a window frame and the home siding or a vent and the roof. Engineered sealants are used to bridge these junctions to keep air and water out permanently.
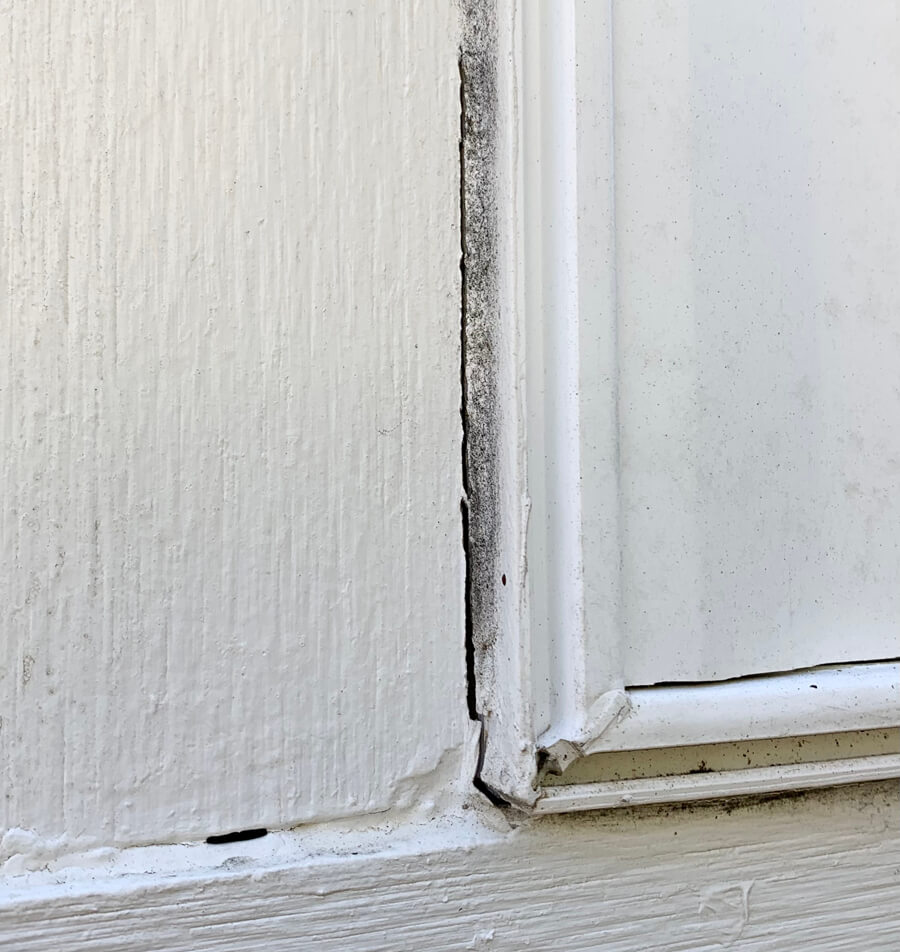
However, if the right sealants are not used, or applied correctly, repairs are often needed. My home is only four years old, and still I found some areas of concern that I wanted to reseal before the winter. Let me show you these problem areas and the GE-branded sealants I used to fix them!
Re-sealing Window Trim
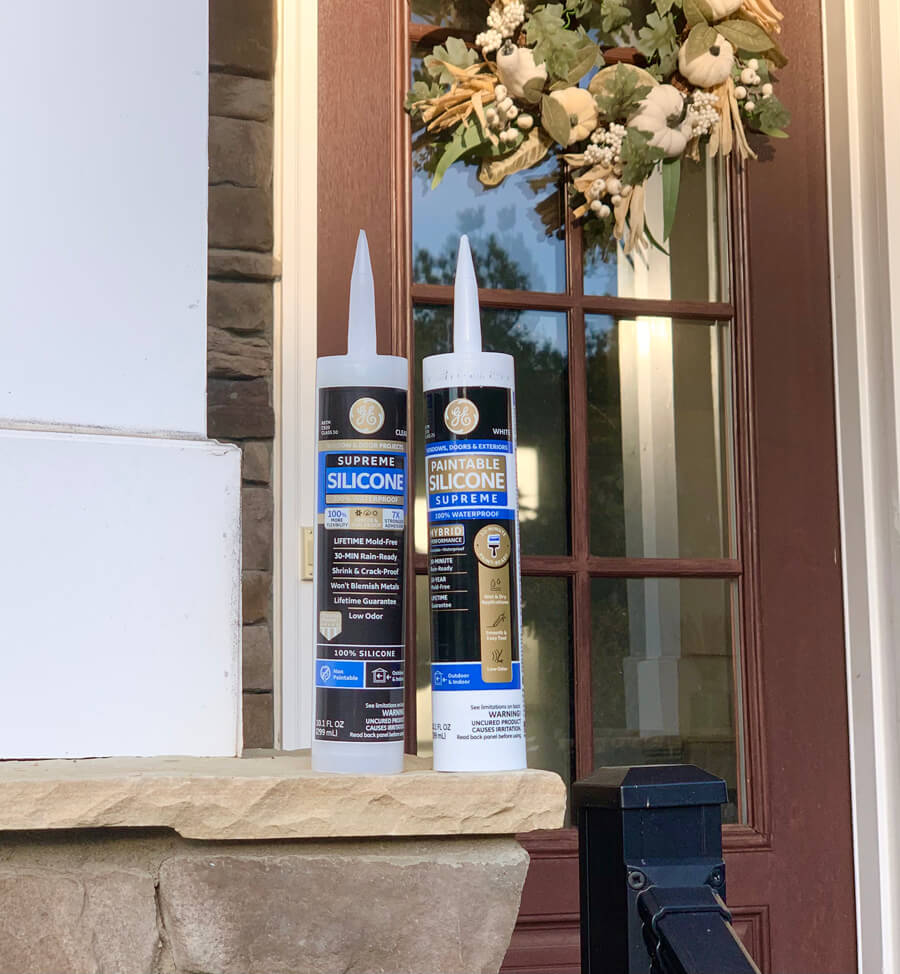
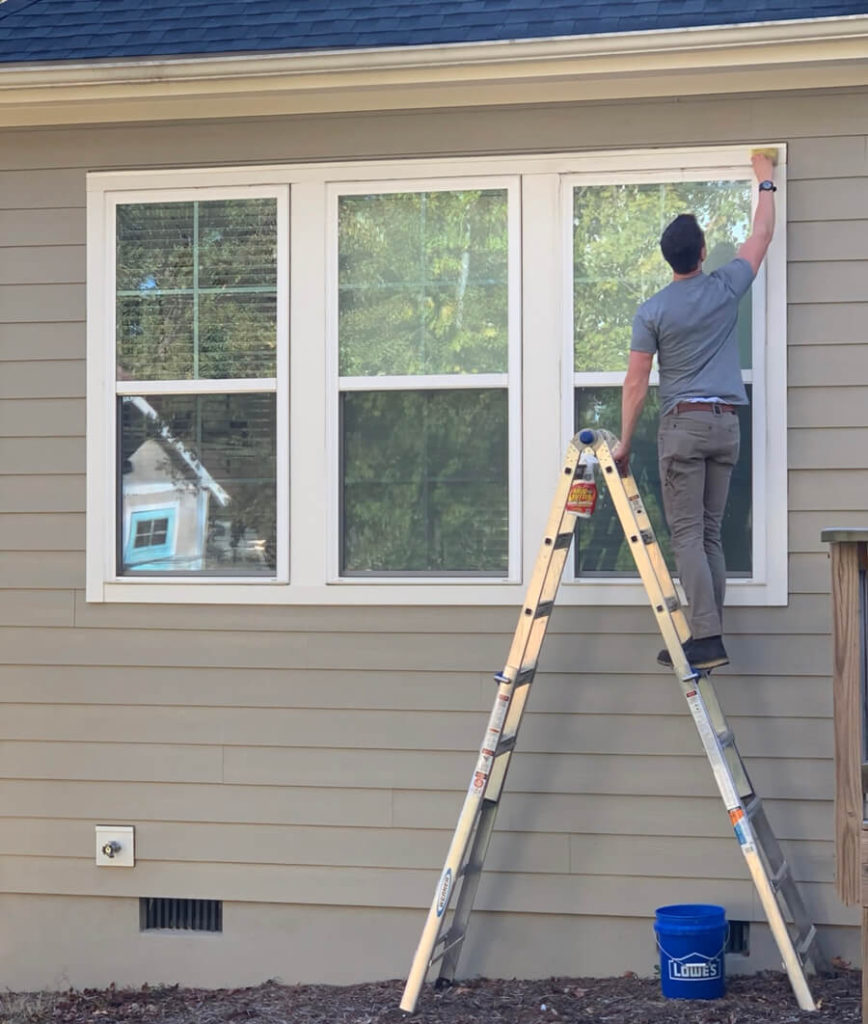
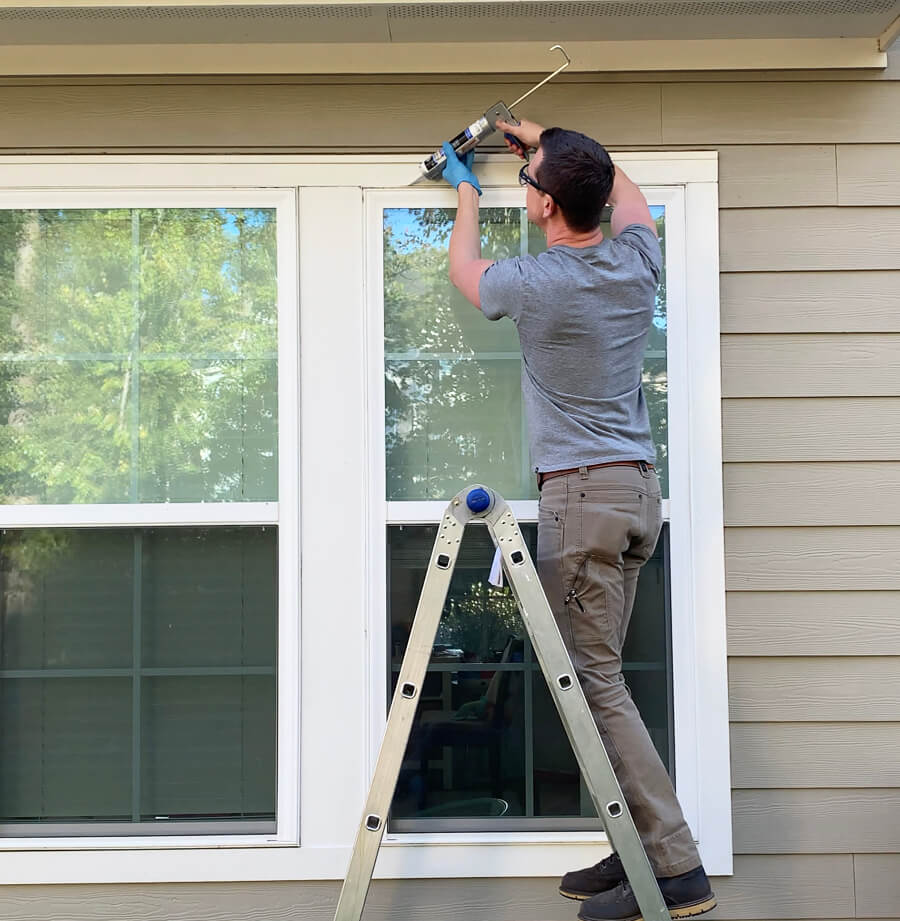
The first problem area was some window trim. It was clear that the builder did not use a silicone-based sealant to fill the junctions between the window framing and the window trim. I do not want water seeping into these cracks repeatedly over the years and so I decided to re-seal them using GE Paintable Silicone Supreme Window & Door Sealant.
The first step was to clean these areas well. This silicone has excellent adhesion properties, but no sealant is going to adhere well to dirt, so I used a cleaner with a Scotchbright pad to remove the surface dirt, rinsed and then let it dry out fully.
Did you know that most caulking guns have a built-in tip cutter and needle to puncture the inner seal of your sealant? These are really handy features so look for them on yours the next time you use it!
Many acrylic based sealants don’t have an inner foil to protect them from air exposure. Silicone based sealants usually have an inner foil because they are very sensitive to exposure to moisture. The smallest amount starts the crosslinking reaction that gives the silicones their amazing final properties. Even if you try to “close-up” the tube to use the rest later, it will often have been exposed to enough moisture to make it impossible to squeeze it out of the tube after a few days. Once you puncture the seal of the silicone, try to get far enough along on your project to use it all up!
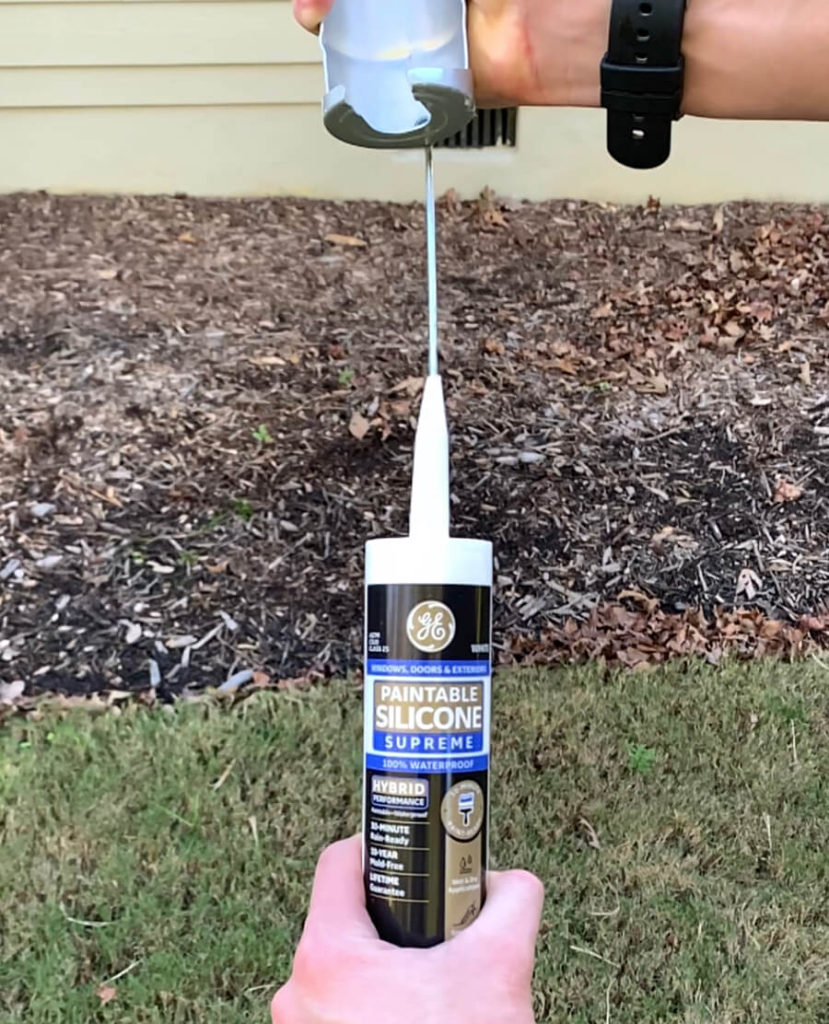
If the old sealant is on the surface, is it always good practice to remove as much of it as possible before adding new sealant. However, my sealant was recessed in the joint and since I could tell it was not silicone-based, I felt comfortable that the new silicone sealant would adhere well to the underlying remaining sealant. I applied a small bead of silicone using a no-drip caulking gun.
After applying it to a single window, I smoothed it into the joint (and therefore into the cracks) with a gloved finger. I’ve found that the easiest way to clean up my gloved finger for the next application is a paper towel wet with rubbing alcohol!
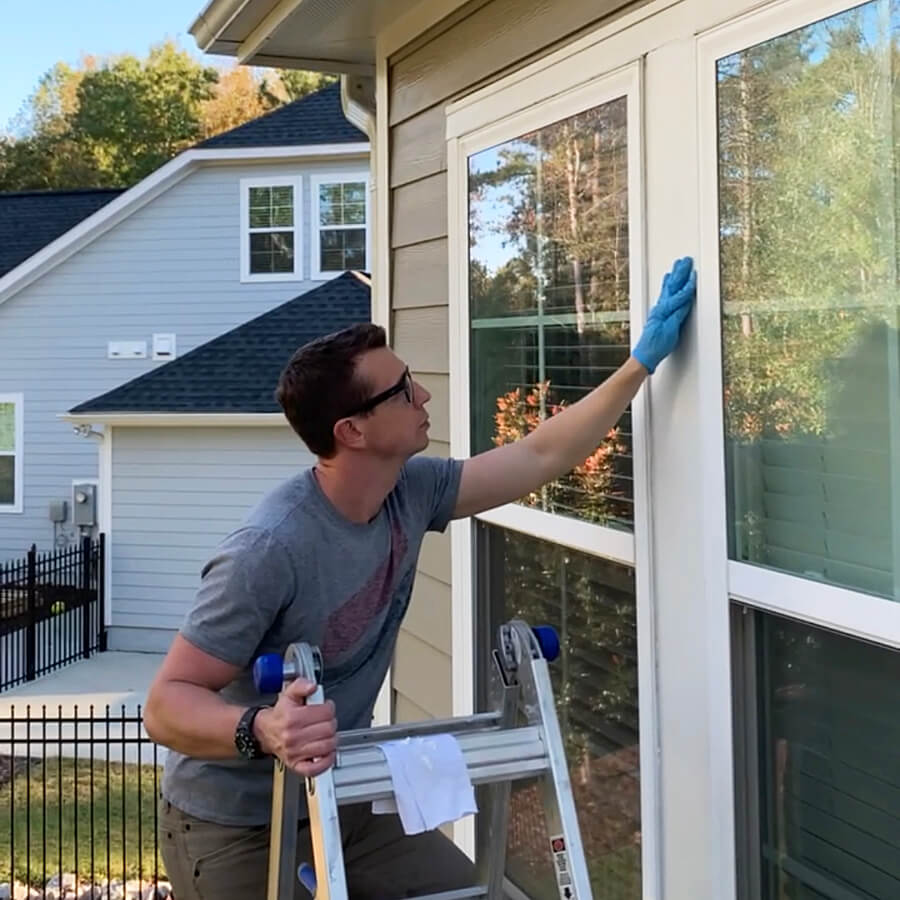
Many silicones are inherently not paintable because their chemistry defines that nothing likes to “stick” to them. However, the GE Paintable Silicone Supreme Window & Door Sealant is specifically modified so that paint will adhere permanently. This is great because now my window sealants will have the stretchability and long-term weather resistance of a silicone and I can still paint over it with the off-white trim color!
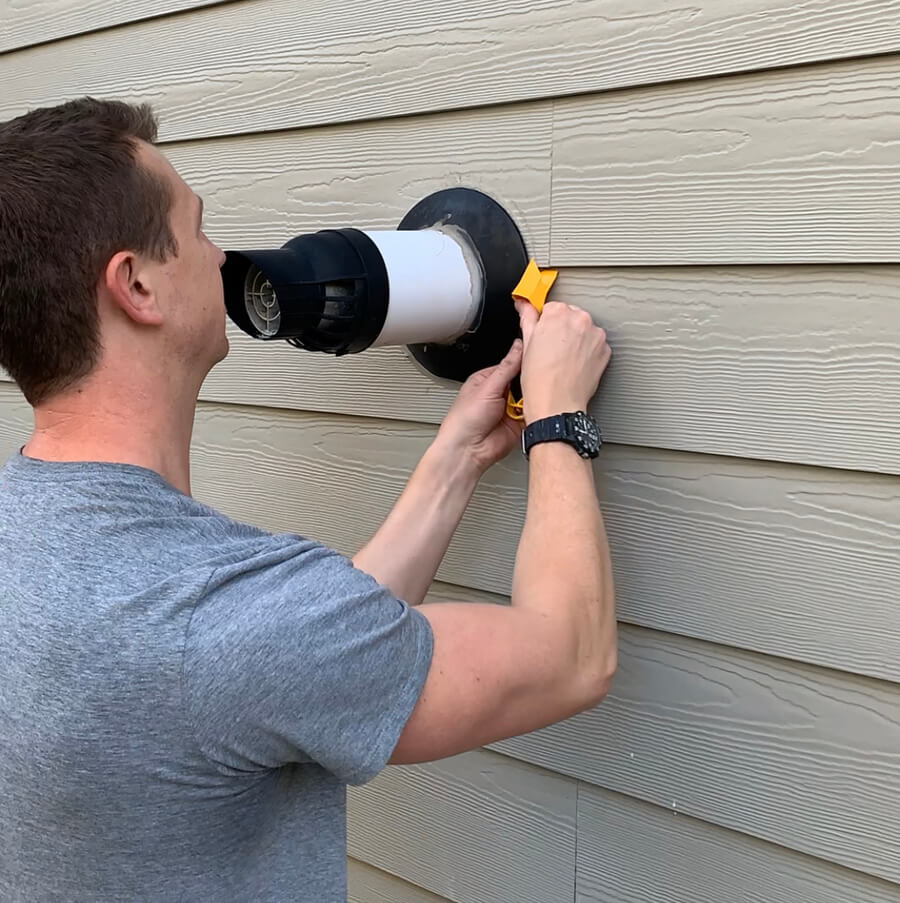
Re-sealing a Vent
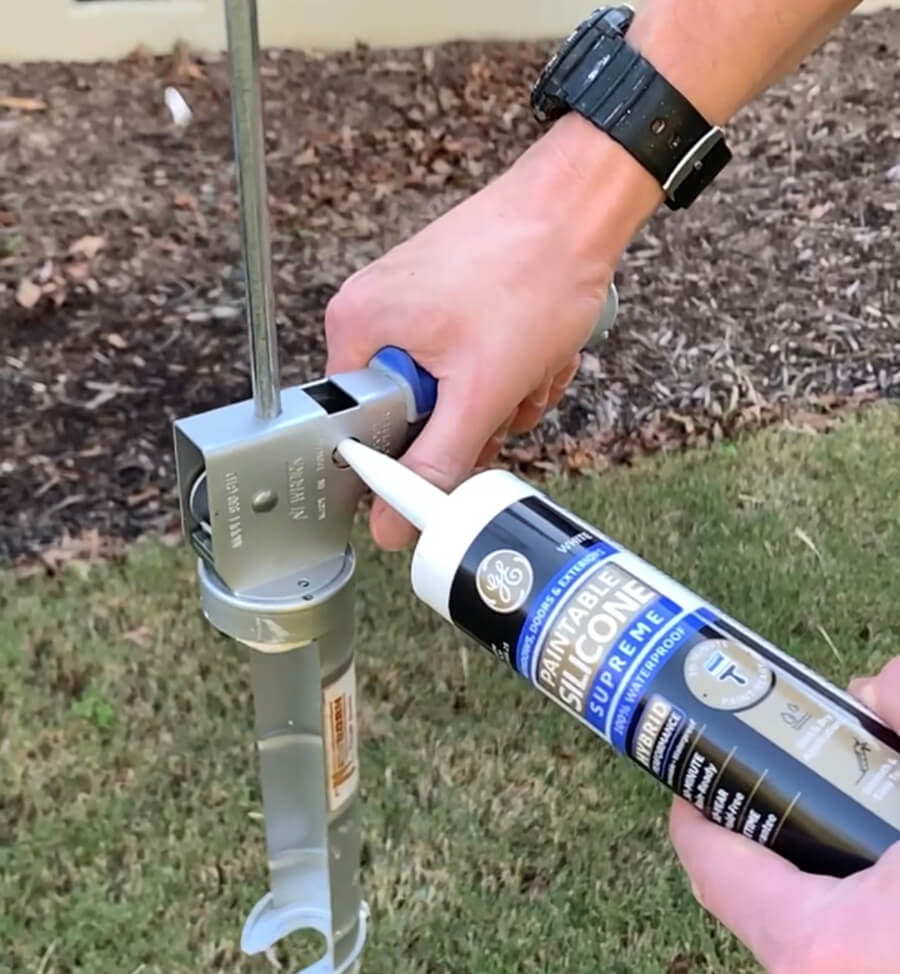
The next item on my maintenance list was the vent for our hot water heater coming through the side of the house. Even though a silicone was used originally it was not applied properly and there was a gap between the silicone and the plastic gasket (the sealant should have overlapped the gasket instead of just butting into it).
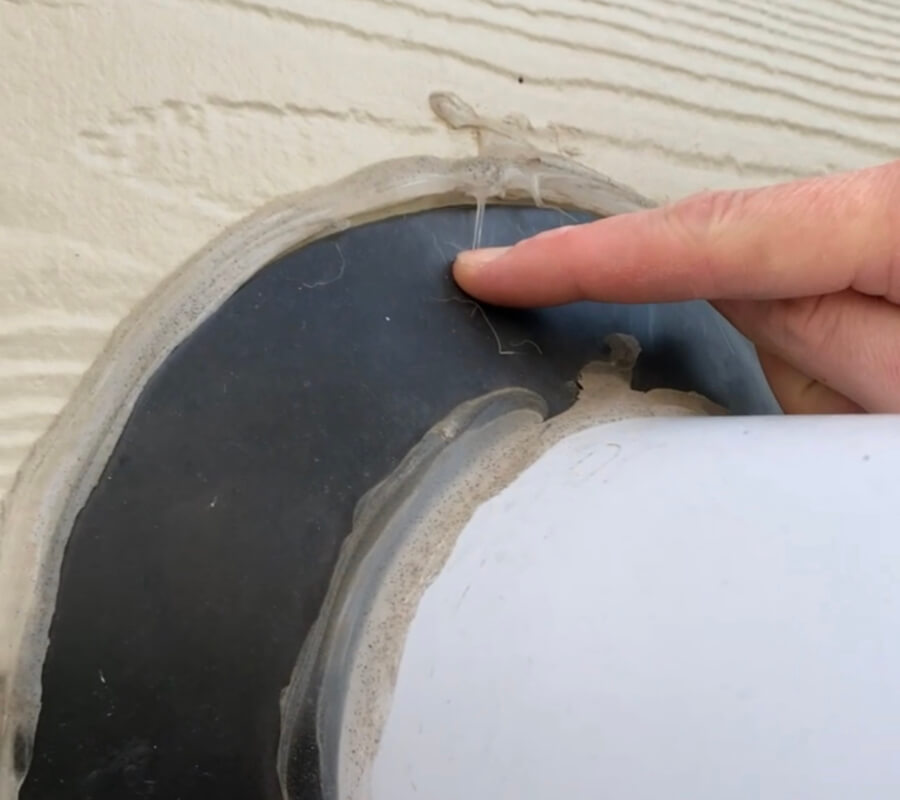
I used a plastic sealant scraping tool to remove the original silicone around the outer edge of the gasket. Even though GE-branded silicones have some of the best adhesion properties of any sealant for all of your common building substrates, it actually doesn’t adhere as well to a fully cured version of itself, so it’s always best to remove old silicone seals before re-sealing!
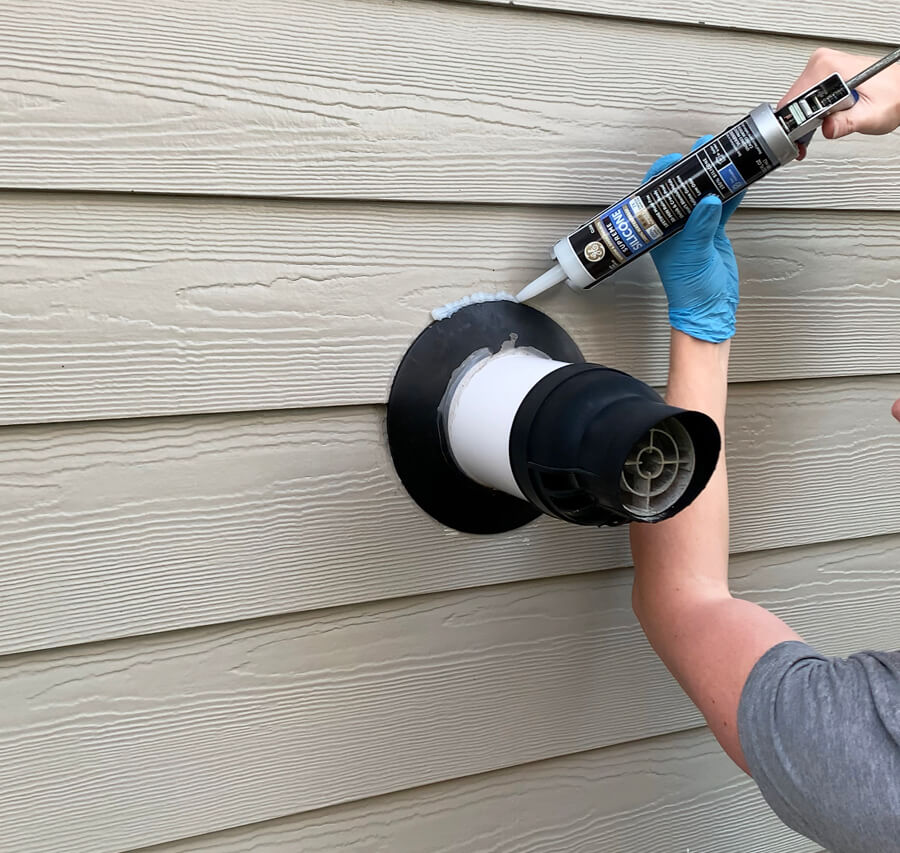
I applied a large bead of GE Supreme Silicone Window & Door Sealant, in the color clear, to the joint between the siding and the gasket. I cut a large opening in the tube because I needed a very large bead for this application, which is often the case for sealing around venting. Using a gloved finger, I carefully smoothed the sealant at the joint making sure that the sealant was making excellent contact with the siding while overlapping the gasket significantly. This will help reduce the chance of separation this time around! All of the sealants that I use in this article are rain-ready in 30 minutes which is a really helpful feature when you need to get the project done quickly and can’t wait around for perfect weather.
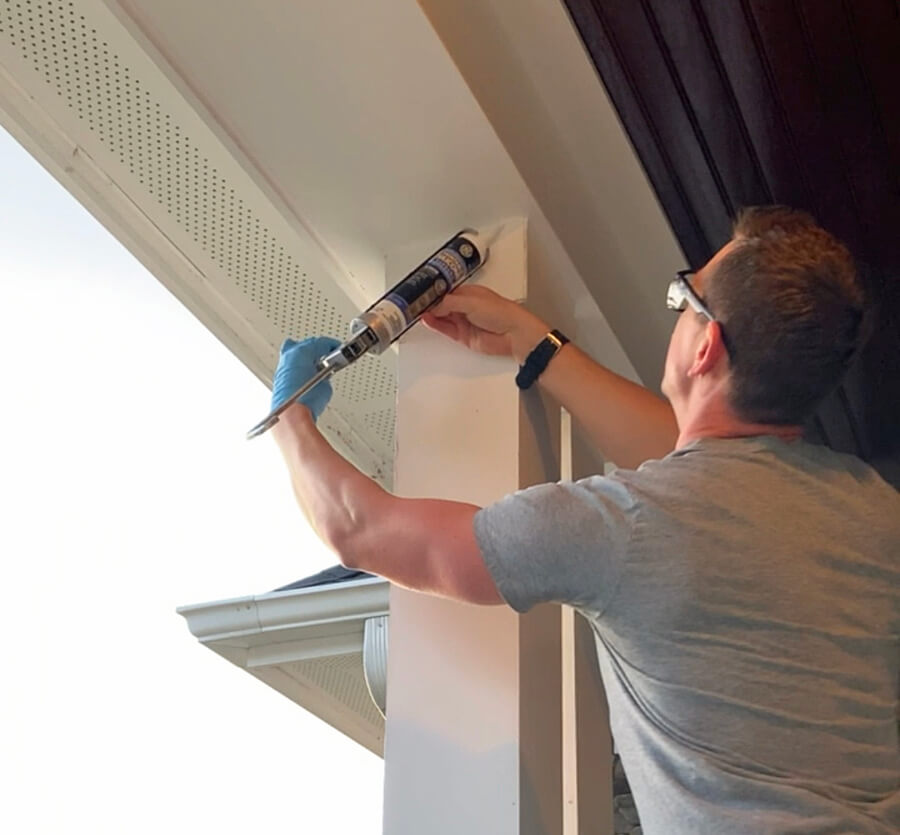
Re-sealing Porch Columns
The columns on my porch were also in need of repair. The sealant had separated at the top of each one of them. While this area is covered, so there is no worry about water intrusion, sometimes you just need to re-seal areas to make them look their best again! Using GE All Purpose Silicone 1 Sealant for this application lets me know I won’t have to do this repair again any time soon! For more information on preparing your home for the winter, check out: http://repairandprepare.com/philiporflop/
If you want to see videos of these repairs, follow me on Instagram and find the story highlight “Home Maintence”!