There’s something magical about the way your child’s eyes light up when they’re surrounded by their friends, snacks, and something just a little bit special. As a parent, we always strive to create those moments where the ordinary feels extraordinary — and what better occasion than a birthday sleepover to turn a simple night into an unforgettable experience?

A few months ago, our youngest daughter had been dreaming of a cozy Winter Wonderland sleepover where she and her friends could hang out and feel like they were in a world all their own. I knew I had to make it happen, but I wanted to do it on a budget and with a little DIY magic. Enter: simple, DIY tents.
If you’re looking to create a magical birthday experience for your child without breaking the bank, you’re in the right place. The materials for each tent (minus the embellishments) was only $28, we spent a heck of a lot less on this party then taking the kids to a trampoline park! Haha! In this post, I’ll show you how we transformed a room into a sleepover haven using just a few simple materials and some creativity. Trust me, with a little DIY imagination and some basic supplies, you can create something truly special that will make your child’s birthday feel like pure magic. The links below are affiliate ones; I make a little commission on each purchase with no cost to you!
- Materials List – Per Tent *
- Three: 1 x 2 x 8 ft. pine boards
- One: ¾” diameter x 6 ft. long wooden dowel
- Inexpensive twin flat sheets
- Hem Tape
- Twine
- 1-1/4-in nails
- Construction staples
- Tools List
- Miter Saw
- Drill
- Forsner drill bits
- Staple gun
- Nail gun
- Optional Materials List – All the Fun Accessories!
- Twin air mattress (or sleeping bags)
- Inexpensive twin sheet sets for air mattresses
- Twinkle lights
- Sheer fabric tent topper (or any fun material for your birthday theme)
- Serving trays
- Snowflake garland
- Mason jars
- Mason jar lids
- Chalkboard signs
How to Build Fun and Creative DIY Tents for Your Child’s Sleepover
Step 1 – Cut three 1×2 x 8 ft. boards in half with a mitre saw. You will end up with six individual 4 ft.long pieces used as the tent legs.
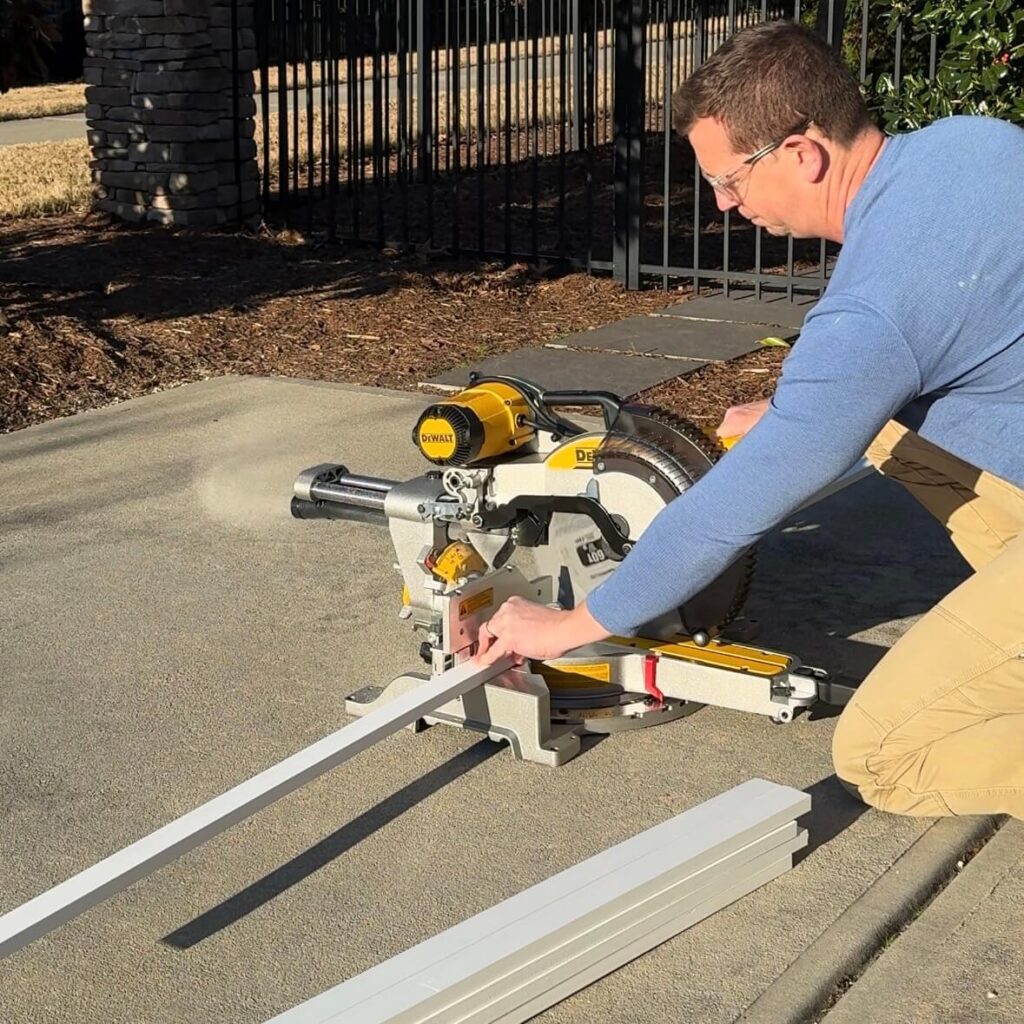
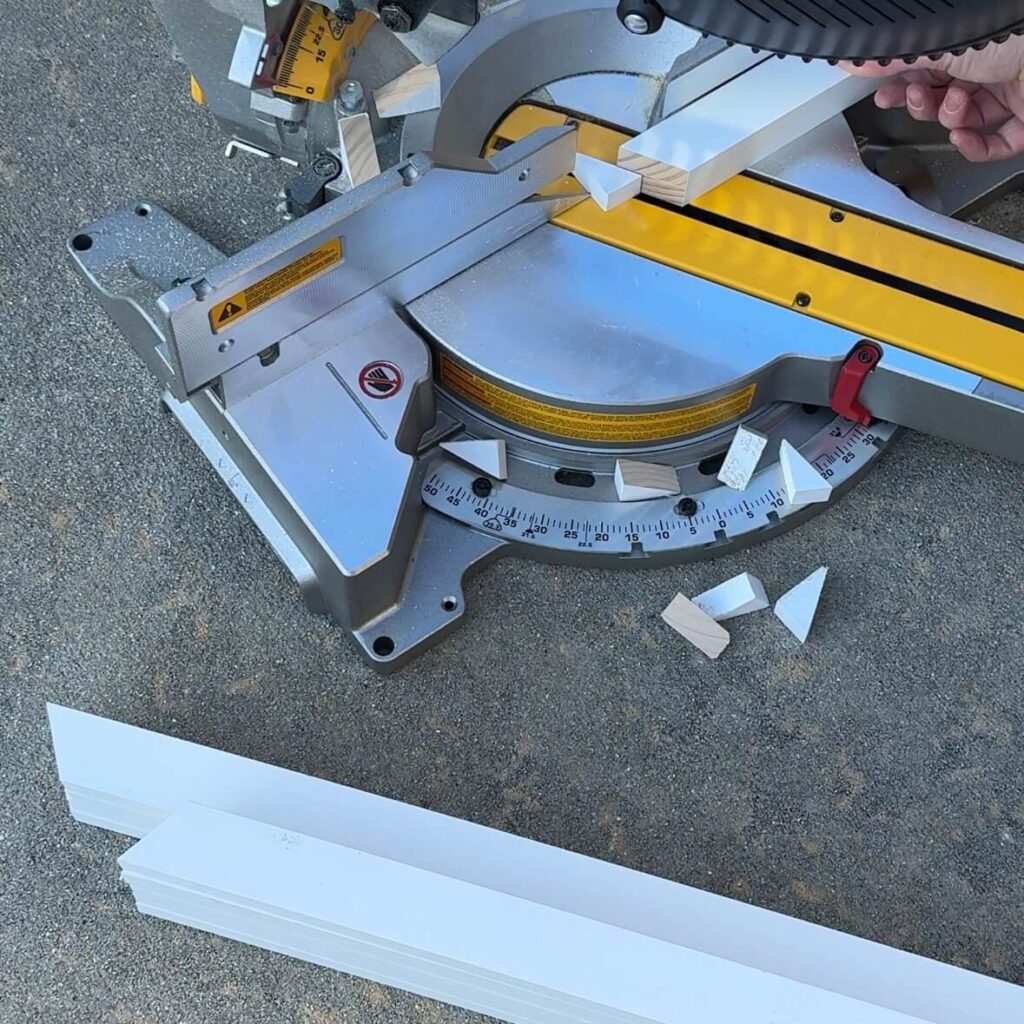
Step 2 – For four of the 4 ft. long 1×2 boards, cut a 32-degree angle at the very end of the board. This angle will allow these tent leg pieces to sit flat on the ground.
Step 3 – For the four pieces cut in step 2, drill a ¾ in. hole at the top of each 1×2, 3 in. from the top with a Forsner bit. This hole should be drilled near the flat end side, not the angled end side.
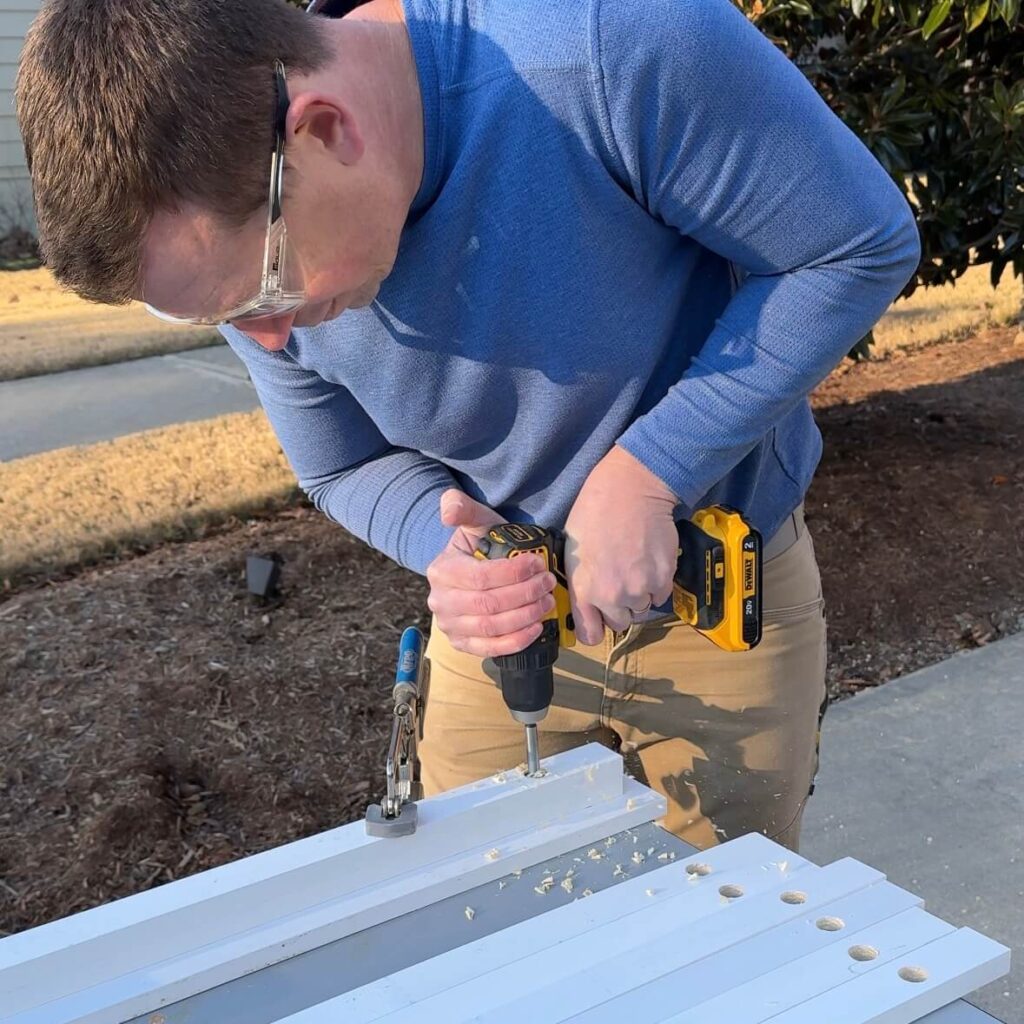
Step 4 – For the four pieces cut in step 2, drill a ¼ in. hole at the bottom of each 1×2. This hole will be drilled on the angled end of the board. These holes will be used to attach twine between the tent legs to keep them from spreading apart.
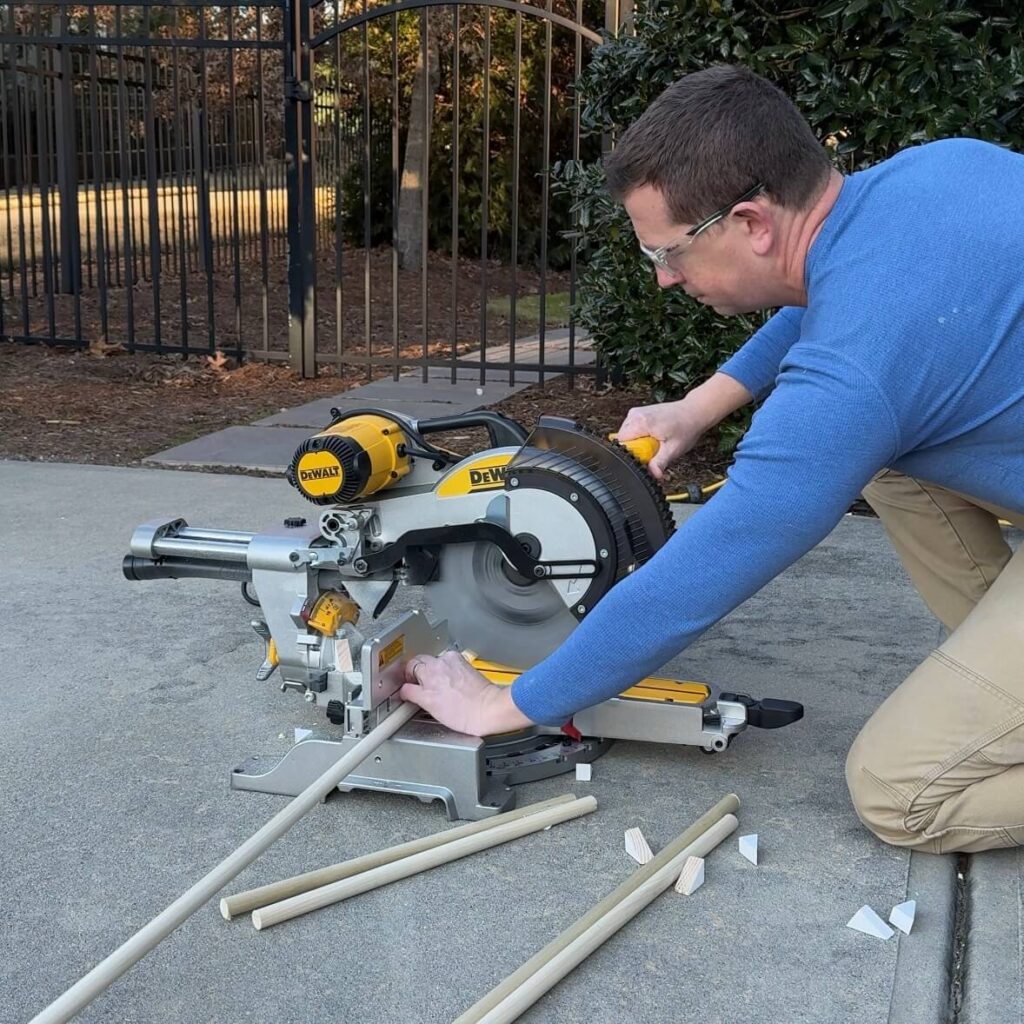
Step 5 – Cut the 6 ft. long wooden dowel down to 4 ft. 6 in. long.
Step 6 – Use twine as a stop to set how far apart you want the tent legs to spread. To make all my tents a consistent length, I used a scrap of dowel through two of the top holes to hold them in place and used a piece of scrap wood with defined length, clamped to the bottom when I tied the twine between the two bottom holes.
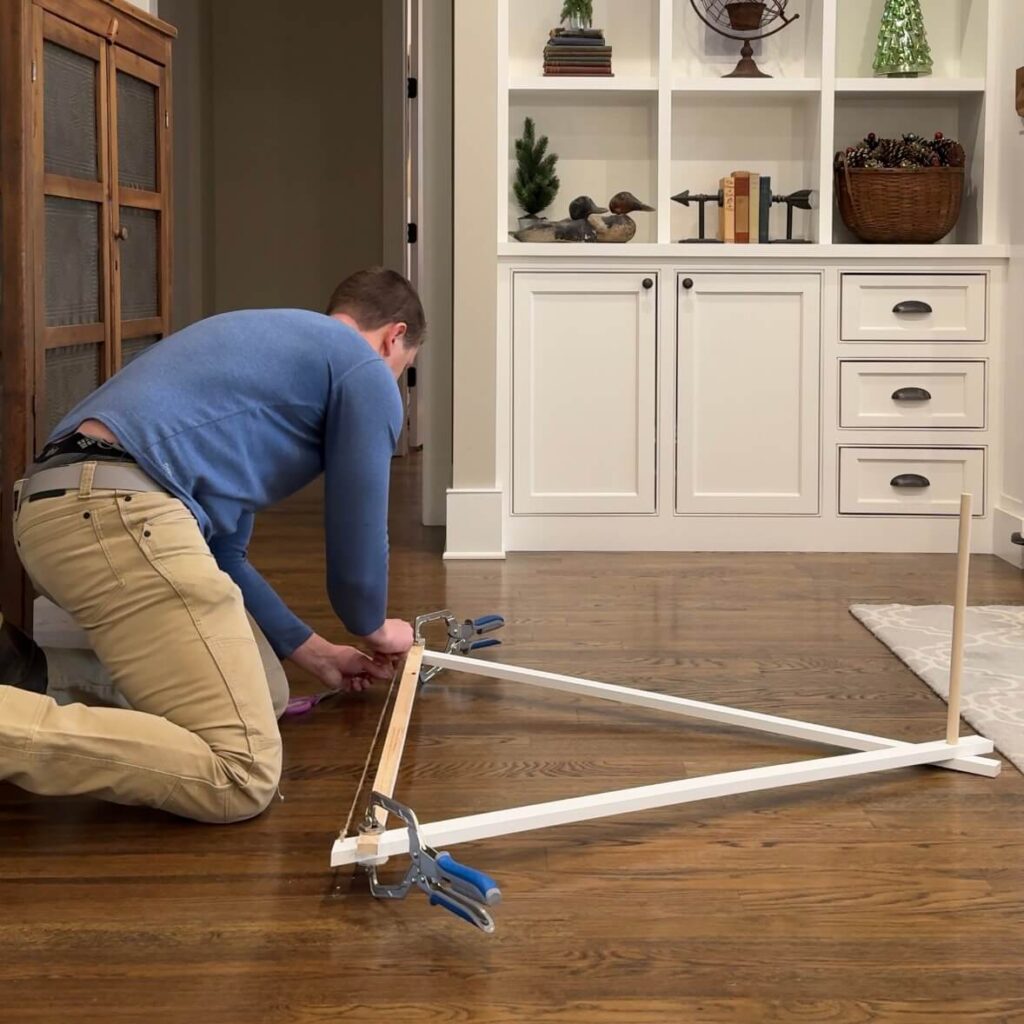
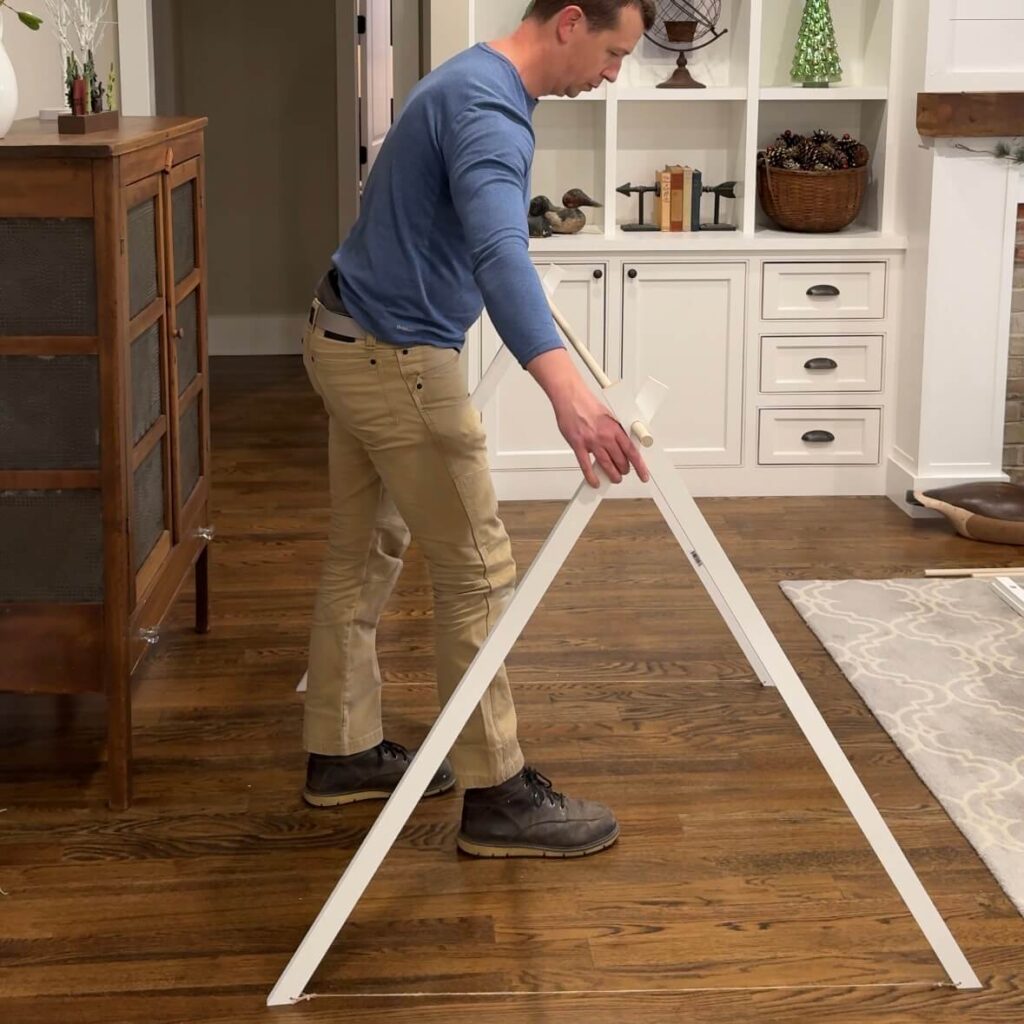
Step 7 – Run each side of the 4 ft. 6 in. long dowel through one set of tent legs. Spread the legs apart on each side and you should have a freestanding structure at this point!
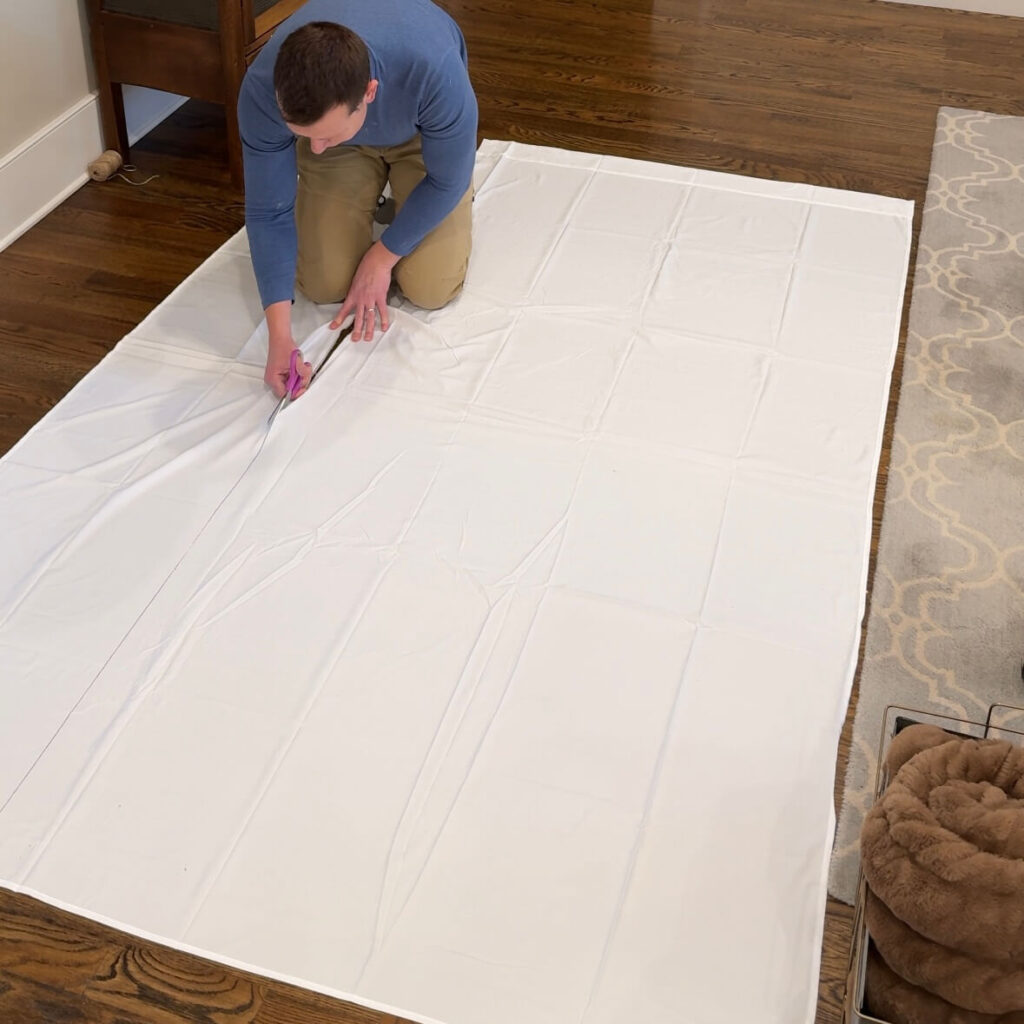
Step 8 – Cut the single bed size flat sheet down to make the tent. The long side dimension will remain the factory dimension. Mark the short side to 46 in., make a straight line and cut. I used hem tape to clean up the cut edge. I placed the hem tape about ¼” from the cut edge and then folded it over.
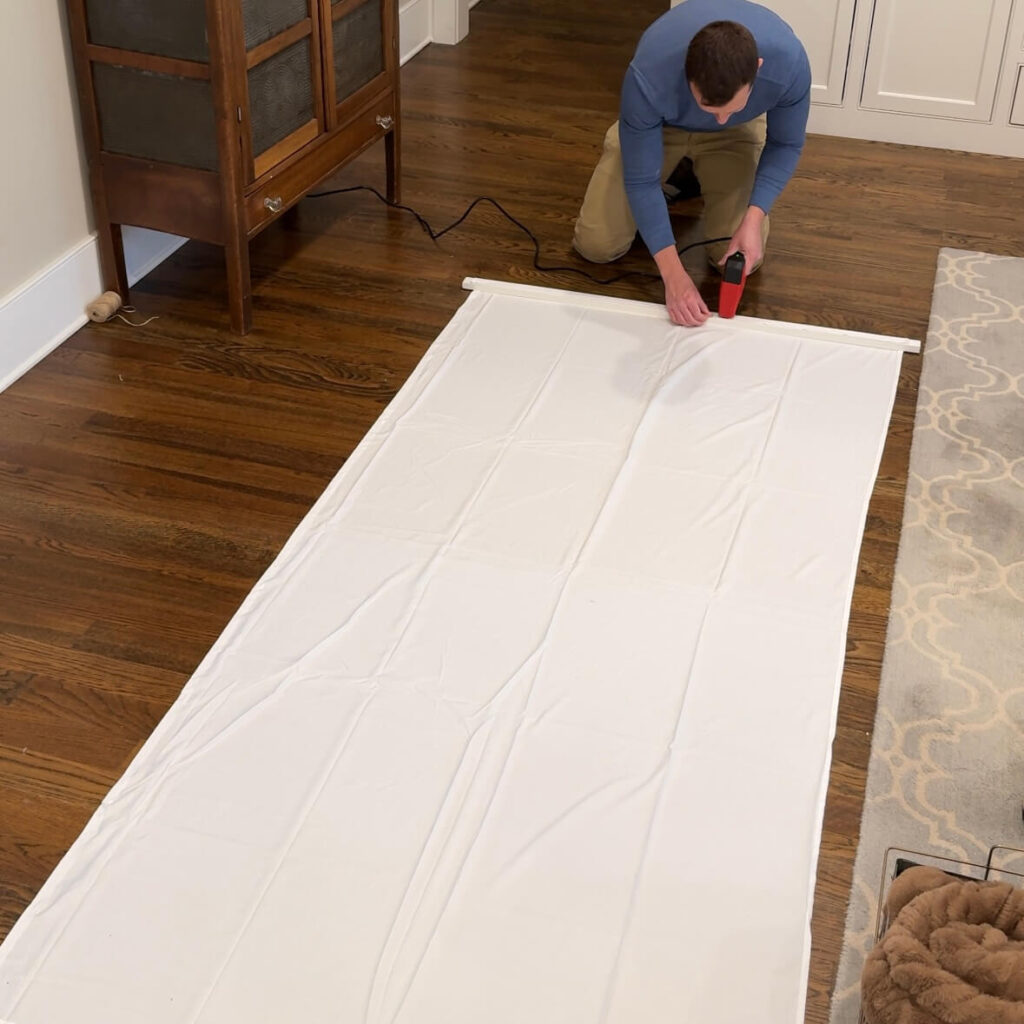
Step 9 – Attach one short side of the tent sheet to one of the 4 ft. long 1 x 2s. Wrap it around and use about 10 construction staples to hold in place. The sheet should end up about 1 in. from each end of the board. Repeat for the other short side of the tent sheet.
Step 10 – Drape the sheet with the boards attached to each end over the tent frame. Using the nailgun, use a couple of nails to attach the tent legs to the tent sheet board.
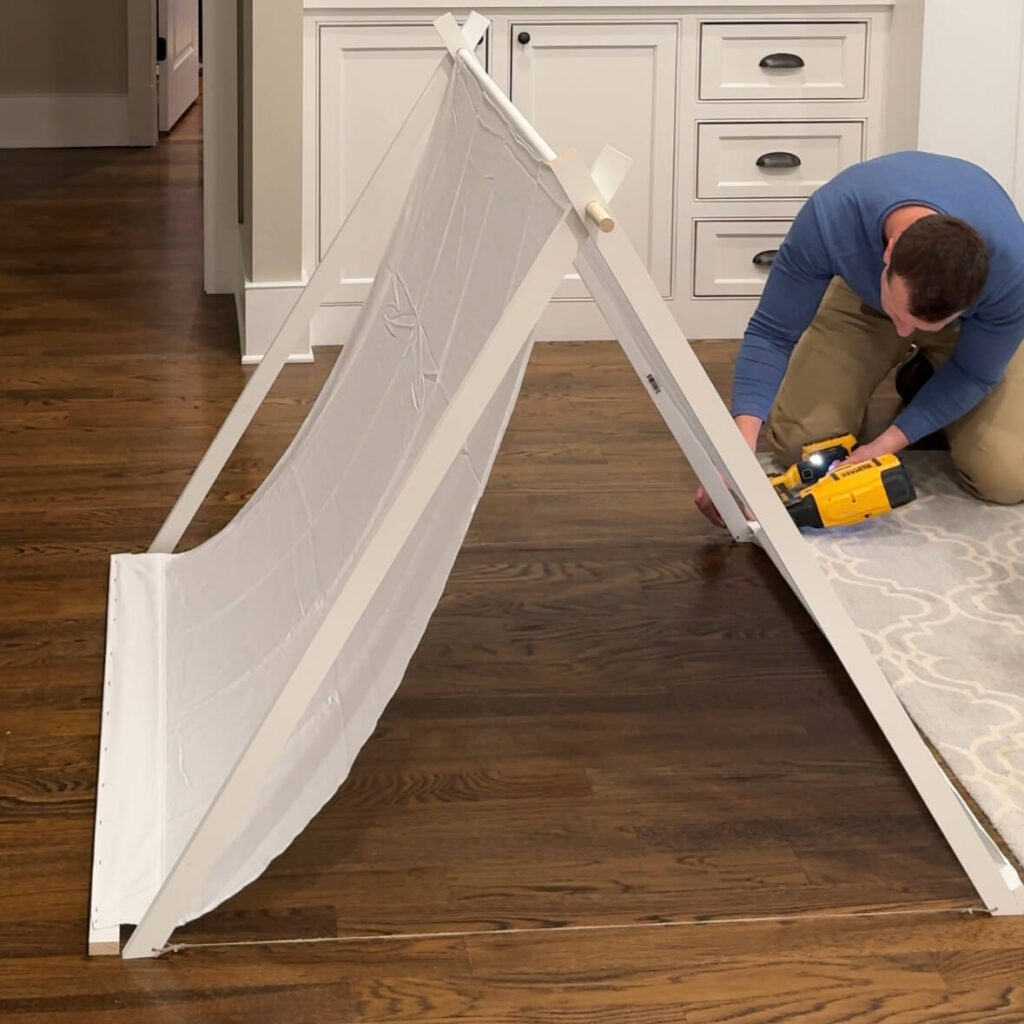
Step 11 – Now that one side of the tent sheet is attached pull tension on it to pull any slack out of the sheet. Wrap the extra tent sheet fabric around the free tent sheet board. Just roll it up. Once you have taken out the remaining slack, nail that tent sheet board to the tent legs. I should mention here that if you don’t have a nail gun, you could also use short screws to attach the tent sheet boards to the tent legs.
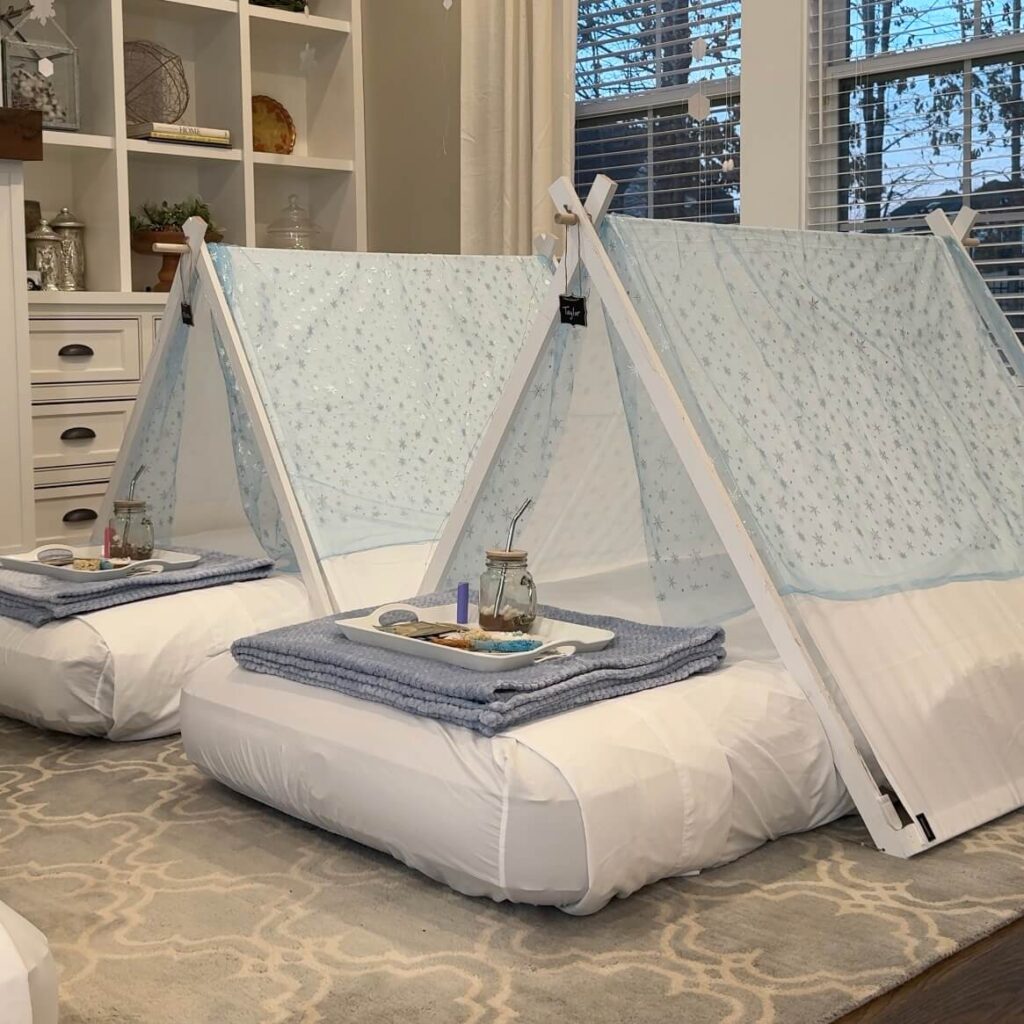
I topped off our tents with a piece of sheer, snowflake fabric to complement our Winter Wonderland theme. (You could use any fun fabric to complement the theme of your sleepover.)
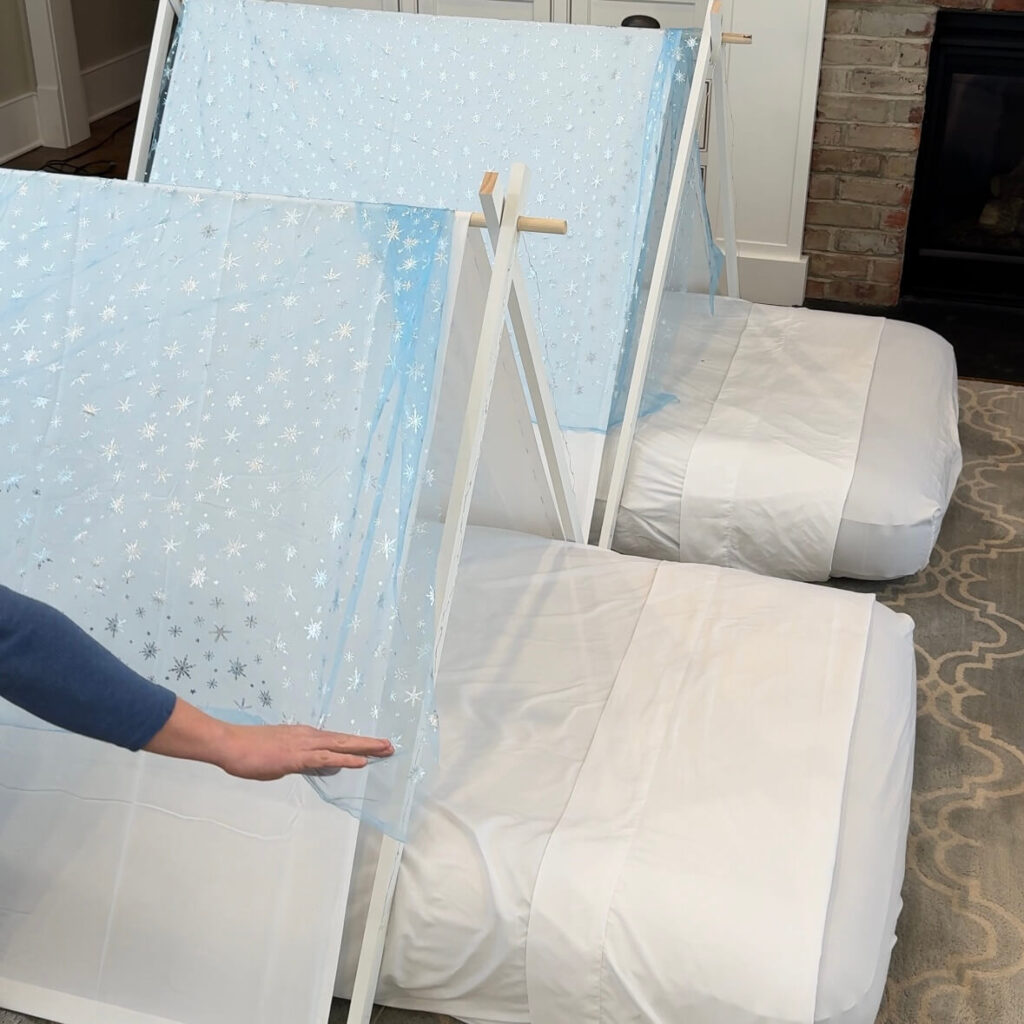
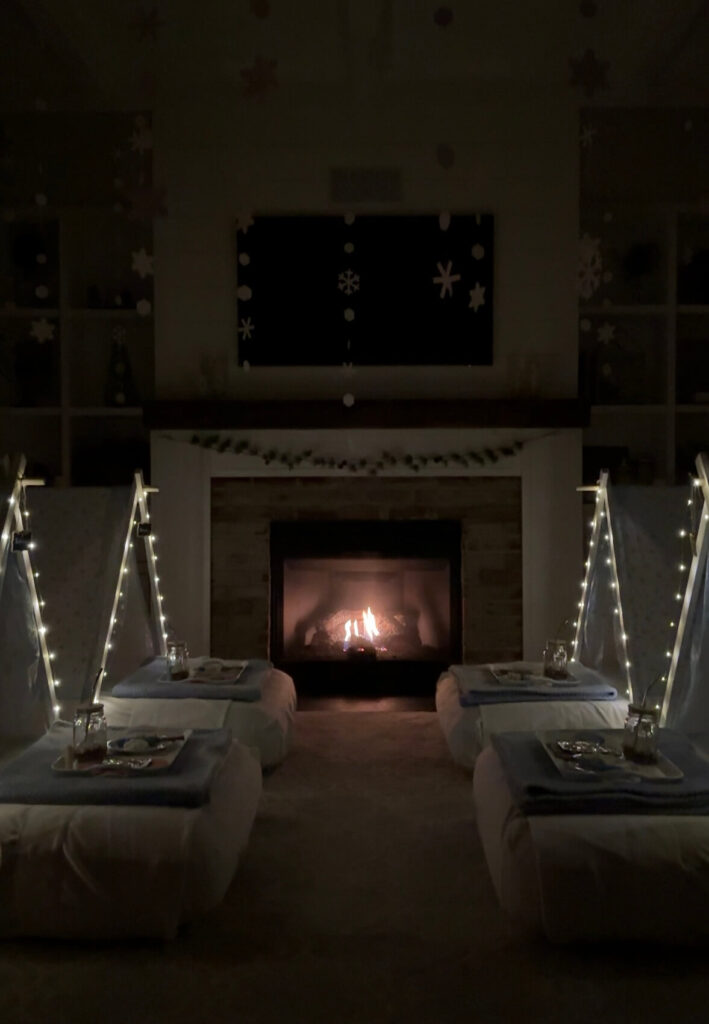
We added to the Winter Wonderland theme by hanging fun snowflake garland from the ceiling, draping fairy lights across the rod and framing the tent opening (attaching with tape), and served up hot chocolate in fun mason jars on cute serving trays. My older daughter has indicated she wants to use them for a sleepover for her birthday in March!
I have video on my Instagram account showing the process! Click here if you want to see more.
* I may earn a small commission on these links.
Love this thanks for the inspiration. Sharing with my daughter so she can tell her husband to get busy
This is the cutest idea and it looks like it turned operfectly. Why am I not surprised that a project you tackled turned out perfectly?!!! Way to go, Dad. You made her day.
Love this! Want to make for my grandkids ❤️
Love!! Will be doing this for my granddaughter’s birthday.