Are you looking for an interior window trim and woodwork style that boasts of clean lines, yet offers a strong visual interest? Read on to learn how to DIY the craftsman style window sill and trim of your dreams.

Interior window trim and woodwork is often one of the unsung heroes of interior design. It can make a huge difference in the appearance of your space since it provides a cohesive look that becomes part of the room’s intrinsic architecture. Trim and woodwork, when properly balanced in proportion to the size and shape of your windows, doors and ceiling height, can be an important element of your room’s aesthetic success.
Interior trim actually serves a practical purpose of closing small gaps between the walls, ceiling, floors and openings. It’s also an important way to establish a starting point for whatever decorating style you prefer, whether it’s vintage industrial, shabby chic, new traditional or modern farmhouse, just to name a few. So, whether you are renovating a space or designing a new one, choosing the right trim is an important, but sometimes overlooked, decision.
Custom Craftsman Style
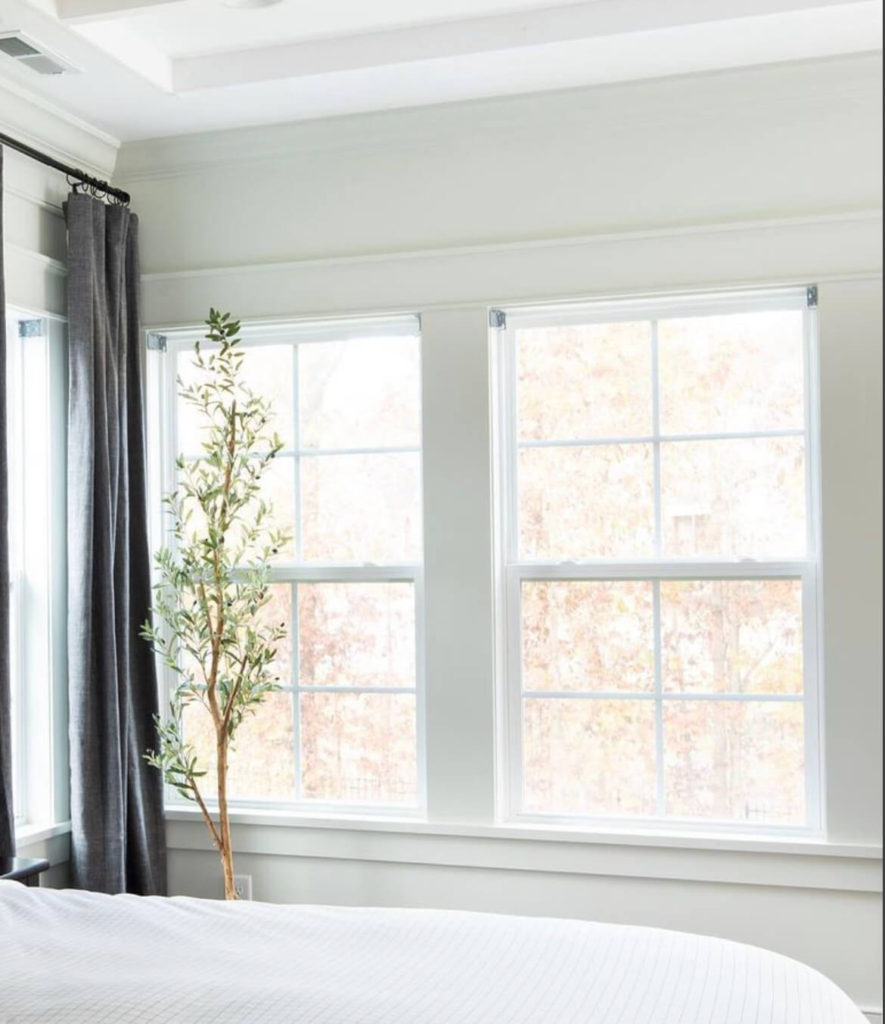
Over the past few years, we’ve replaced most of our builder grade window trim and woodwork with, what I describe as, a custom, Craftsman style trim. It features a pared down look with clean lines. This unpretentious, yet handsome trim, aligns with the clean aesthetic look we’re going after. We typically paint our trim and woodwork white to contrast with the beautiful, yet muted colors we choose for our rooms.
Let’s Get Started—Remove Existing Window Trim
If you don’t have to remove any existing trim, you can skip this section. If you do, let’s get started. I am as careful as possible when removing trim for two reasons. First, I don’t want to damage the drywall and second, I like to donate used, usable molding to an organization like Habitat for Humanity ReStore.
- First, score the old caulk with a utility knife so you don’t rip the drywall paper when you begin prying off the existing trim. Insert the tip of the knife between the molding and the jamb. Slice along the crack to cut and free the molding. I do this from at least two angles to ensure it will separate cleanly. The wood-to-wood joints are usually easier to separate.
- I recommend using a trim pulling tool to remove the trim pieces with the lowest chance for damaging your drywall but you can also accomplish the following steps with a crow bar.
- Insert the flat edge of an old putty knife between the molding and the jamb. Tap the putty knife into the transition area with a hammer. The putty knife serves to protect your wall as you begin to pry off the molding with a crowbar.
- Use a hammer to insert the crowbar into the gap between the putty knife and the trim. Using the leverage from the crowbar, pop the trim away from the wall and work your way down the trim and loosen the nails.
- Remove the top board first and work your way down the sides and then the bottom.
- Pry off each piece of molding with the crowbar while you use your other hand to pull the molding off the jamb.
- Pop up the windowsill shelf by hammering from below. Try to keep it all in one piece so you can use it as a template later, if you’d like.
- Use nail puller pliers to remove trim nails or any kinds of nails from the wall. It’s designed with a fulcrum edge to give you some nice leverage. Simply grasp the nail with the pliers and roll the head of the pliers to remove the nail quickly and easily.
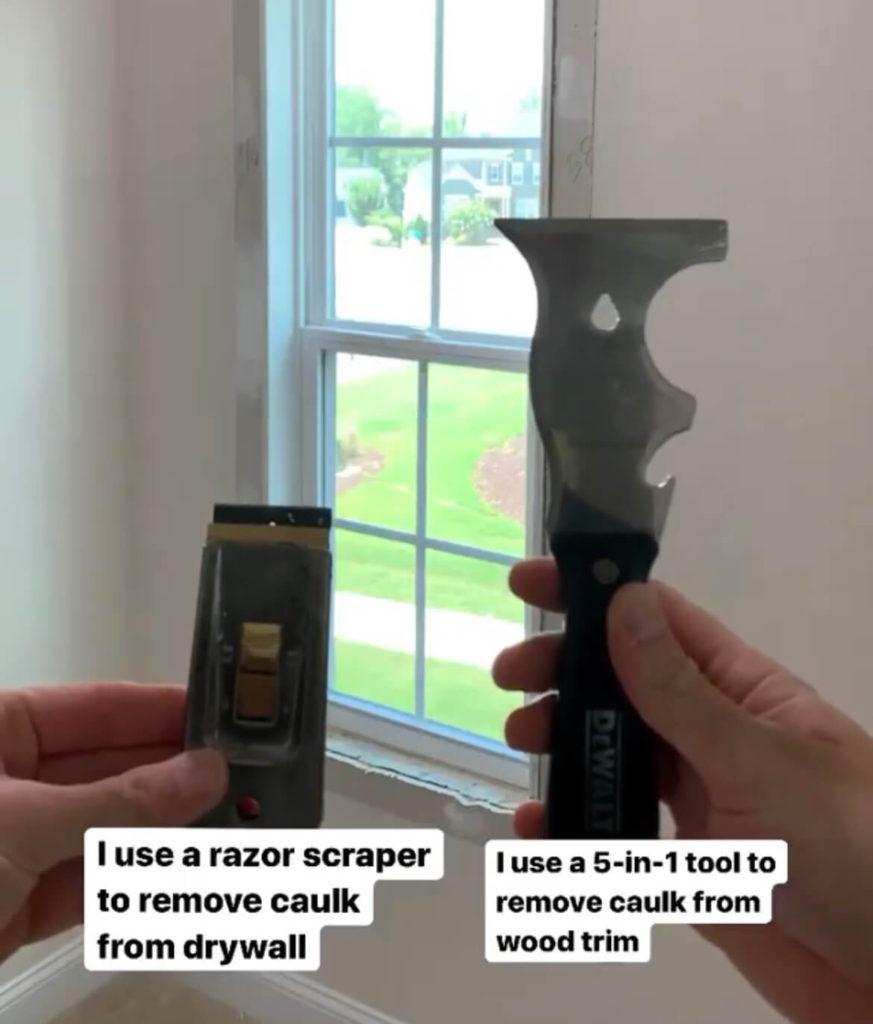
- There will be some leftover caulk on the drywall. Use a razor scraper to scrape this off. Then, use a five in one tool to remove any leftover caulk on the wood casing. It will help prevent you from gouging and damaging the wood.
The Windowsill—Made up of Two Parts
A well designed and well installed windowsill can create a finished, tasteful look. For all the trim, I recommend clear, kiln-dried (and I prefer pre-primed) wood. The windowsill is made up of two parts— the stool and the apron.
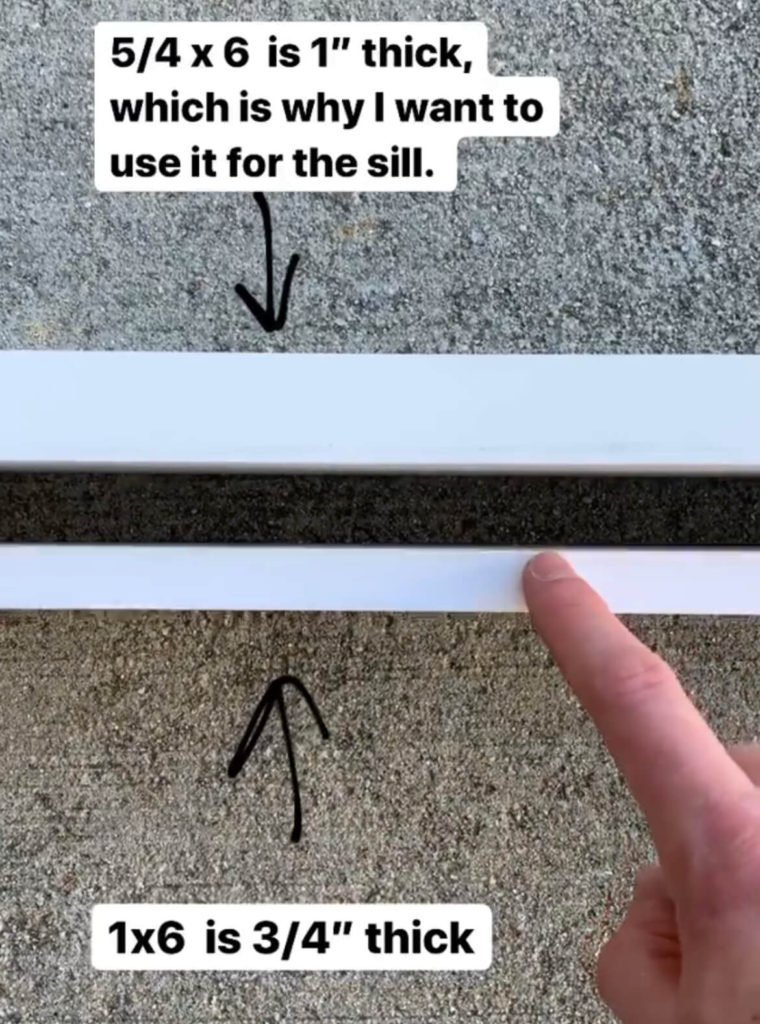
Most typical stool material (the part most people think of as the sill) is ¾ inch thick and has a rounded edge. We really enjoy the craftsman style look that has a cleaner, simpler look. I use 5/4 quarter board which is about an inch in thickness, with a flat face. I use 1 x 4 boards for the apron (or trim that sits below the stool).
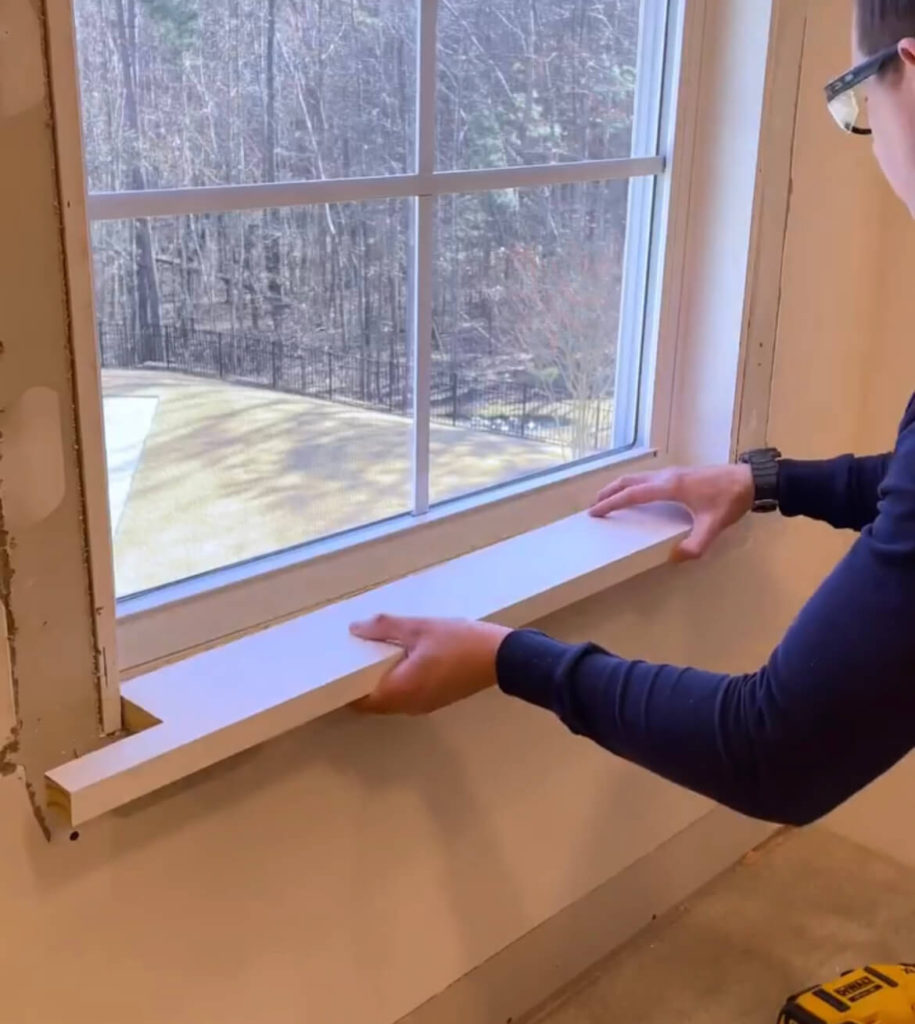
You can measure and cut your stool using a template from the stool you’ve just removed. Making a template from the existing stool (is easier) and allows you to get a good fit to un-square walls. Mark the new 5/4 quarter board using your template and then cut out with a jigsaw.
The apron goes directly below the stool and it cut 1” shorter before it is nailed in place.
Add Side Window Trim
- Measure the distance from the top of the stool to the bottom of the top window frame and add ¼ inch. Do this for each piece of vertical side trim. Cut each 1 x 4 board to size.
- Install this trim, but do not line it up flush with the wood window frame. Move it back a ¼” to create a ¼” “reveal”. This looks cleaner and creates an easily caulkable joint.
- Nail window the trim in place using your nail gun.
Add Top Window Trim
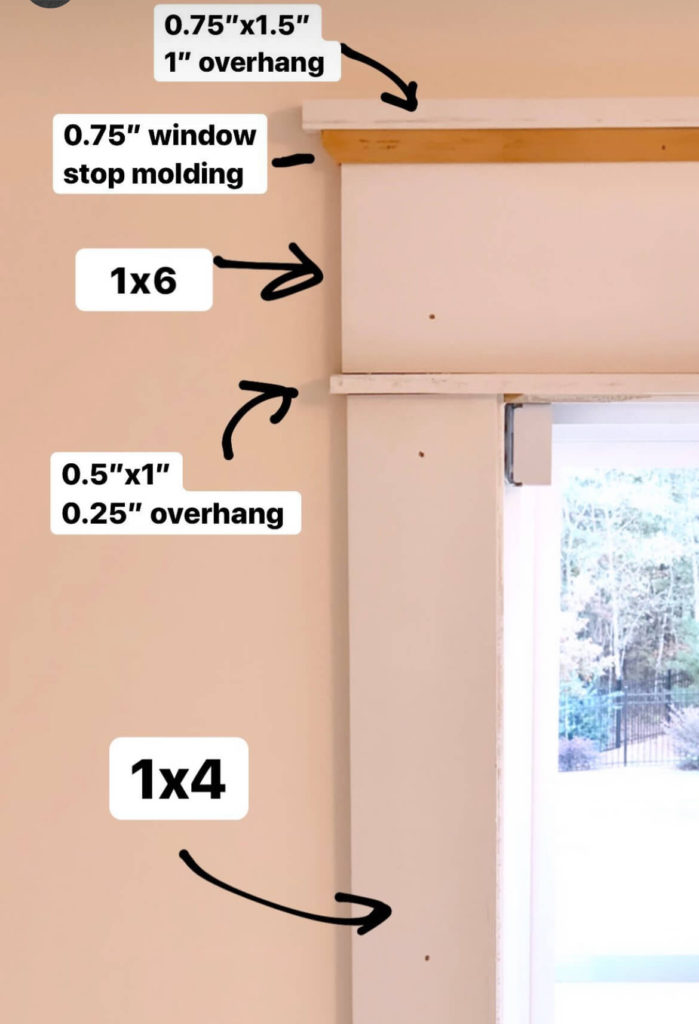
- Using a 5/4 quarter board or 1x material, rip a ½” x 1” strip with your table saw. It should be the same length as the outside distance between vertical sides + ½”. This leaves a ¼” overhang on each side. (Remember this length.) This will be the first cap of your top window trim. Nail this in place at the ends of the vertical trim.
- Next, cut a 1 x 6 to length as the header. This should be ½” shorter than the cap piece you just nailed in place. Nail into place.
- A 1×2 will be the top cap. Cut it to 1 ¾” longer than the 1×6 header. This will be the top cap of your top window trim. Nail this into the 1 x 6 trim below.
- For extra detail add a piece of ¾” window stop molding under the top cap. Miter cut a piece of window stop molding the same length as the 1” x 6” piece you just installed. Cut with a 45-degree angle and then make a return piece. (A return is the small piece between the molding trim and the wall.) Because each return is so small, it is best to wood glue them since they often split when trying to nail them in place.
Caulk, Wood Putty and Stand Back and Admire
Caulk any gaps between the trim and wall (I love my no drip caulk gun!). If needed, recess nail heads with a nail set and hammer, then fill the holes with wood putty. Allow the putty to dry according to the manufacturer’s instructions.
Using 120-grit sandpaper, lightly hand-sand the dried putty flush with the surrounding wood. Then, lightly sand all wood pieces. Wipe away sanding dust with a tack cloth, then apply a coat of primer if you have unprimed wood. Finish off with a coat of paint.
And finally, stand back and admire your new custom Craftsman style windowsill and trim. Follow along on Instagram to see my projects in action! You can find this project in my Instagram highlights under “Window Trim”.
Missed last week’s blog? Read here: Declutter, Clean and Give Your Garage a DIY Makeover.
Thank you for this! We live in an old house with a few remaining plaster walls. I’ve not had success ever hanging things, so the idea of big projects scares me to death. Lol
I love that you tell us step by step!! I would love to do this to our home!!
in Simple terms.
Thanks Phil for the inspiration.
Thank you for taking the time for this detailed tutorial! Love the classic lines!
Love how you explain the process. Really helps!
This is wonderful! Now we all can give our husbands the step by step to get it done!! 😉
I really appreciate that you always take time to answer questions and explain. This will be helpful to anyone wanting to upgrade their window trim!
Thanks so much Phil! I am going to do my first ever trim windows (these detailed tutorials inspired me). What size of nails did you use?
They look great!
Thanks you. I love how many details you share with us.
Keeping this handy since we’ll be doing this exact thing in the spring!
It really brings sophistication to a window, which otherwise would be dull. Well done!!
Thank you for sharing you craft and knowledge to help others DIYers.
Keep up the great work.