• Skip to main content
  • Skip to secondary menu
  • Skip to primary sidebar
  • Skip to footer
  • Home
  • About
  • Social
  • Subscribe
  • Amazon Storefront

Philip or Flop

Let's Make our Homes Incredible Together through DIY!

  • Projects
    • Financial Planning for a Large Home Renovation
    • DIY a Raised Bed Vegetable Garden
    • Build an Outdoor Planter from Cedar Wood
    • Transform Your Bedroom with Paint
    • Raised Kids Craftsman Playhouse
    • DIY Epoxy Garage Floors
    • Fall Porch Makeover with a Bench Swing
    • Garage Football Stadium Makeover
  • DIY Tutorials
    • DIY Indoor Glamping: Simple Tents for Your Child’s Sleepover
    • How to Build a Horizontal Fence That Looks Great on Both Sides
    • How to DIY Limewash a Brick House
    • How to Install a Craftsman Style Window Sill and Trim
    • How to Seal Your Kitchen Backsplash
    • Add Glass to Your Pantry Door
    • Install a Transom Window in a Cased Opening
    • DIY Epoxy Garage Floors
    • Install Landscape Lighting for Added Curb Appeal
    • Home Maintenance with Exterior Sealants
    • Removing Trim Without Damaging Drywall
    • Using Sealants in a Bathroom Remodel
    • Smart Home: Air Filtration
  • Tool Tips
    • Removing Trim Without Damaging Drywall
    • Hearing Protection for DIY Projects
  • Lawn & Garden
    • DIY a Raised Bed Vegetable Garden
    • Install Landscape Lighting for Added Curb Appeal
    • Get Your Lawn Ready for Spring
    • Transform a Water Trough into a Planter
    • Build an Outdoor Planter from Cedar Wood
  • Home Transformations
    • Laundry Room Remodel – How to Maximize a Small Space
    • Fall Porch Makeover with a Bench Swing
  • Building a Home
    • Building our Coastal Kitchen with Ready to Assemble (RTA) Cabinets
  • Gift Guides
    • The Valentine’s Day Gift Guide for the DIYer in your Life
    • Holiday Gift Guide for the Tech Lover

Building the Structural Foundation and Piers: the First Step in Building our Dream Beach House

December 3, 2022 by Philip

Building a house at the beach is our dream come true. In my last blog, I talked about all the steps involved in finding, acquiring, researching, and bringing the right professionals together in the pre-construction phase of designing and building our home. On a side note, we chose Allen Patterson Builders of Beaufort, SC, a member of the Southern Living Custom Builder Program, a network of more than 100 of the South’s top custom home builders. From this point on, Allen Patterson Builders will hire different subcontractors to complete each phase of the project.

In this blog, I’ll start by discussing building the structural foundation for the house. It begins with driving piles and forming footings and concludes with the laying of concrete block piers. Since we’re building at the beach, it’s important to take into consideration the environmental factors that come along with building in such an area. I’ll discuss, at a high level, how our contractor built the foundation and piers.

Driven piles are a type of foundation that is commonly used in areas that have a high-water table or loose soil. They consist of treated wood piles that are driven into the ground to a depth that provides stability for the house as well as the ability to withstand the environmental conditions that come along with living at the beach. Sometimes, the wooden piles rise out of the ground and the home is attached directly to them. In our case, the wooden piles are hidden underground a support a raised, reinforced concrete foundation. This option is more expensive but gives much more flexibility architecturally!
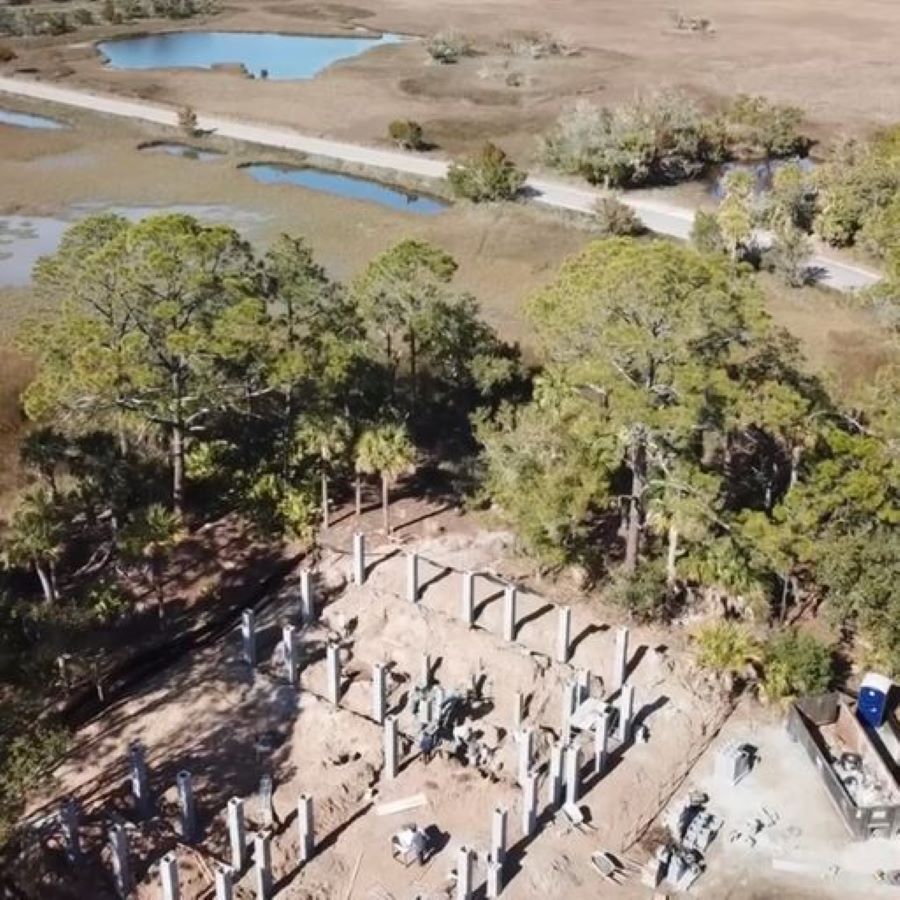
Timber Pile Layout

The first step in this process was to determine the precise location of the timber piles based on laying out footing locations. Our structural engineer factored in the size and weight of the house, as well as the soil conditions in the area, and designed a foundation plan that included approximately 48 marine grade timber piles. The engineer specified that each should have a bearing load of at least 10 tons. South Carolina has the potential for siesmic activity and one of the main concerns with wet sandy soils is liquification and settling of the soil during even a minor earthquake. The piles will prevent that settling of the foundation.

Site Excavation

Once the location of the timber piles was determined, the next step was to excavate the area. This involved removing any vegetation, rocks, and organic topsoil from the building site. After the removal of the topsoil, it was determined we needed to bring in many dump trucks of structural soil to get the final grade of the home to the correct elevation. The structural soil was compacted with 6″ addition.

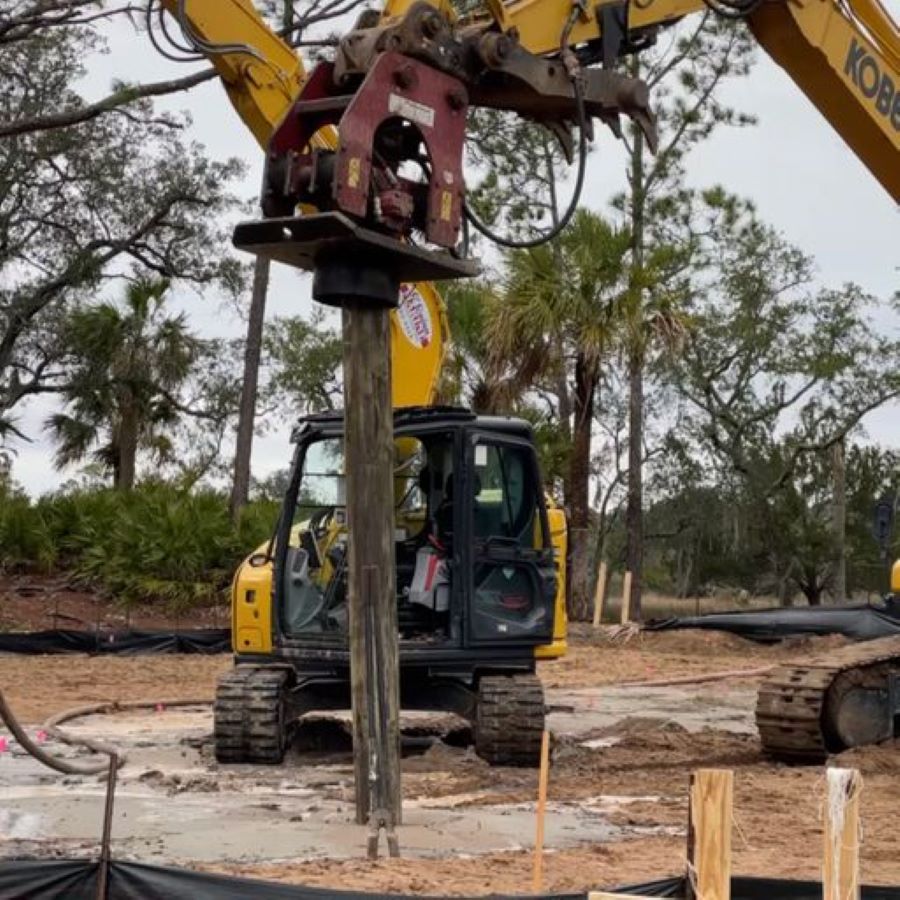
Timber Pile Installation

The next step was to drive each pile 20 feet into the ground. This was done using a hydraulic pile driver. The timber piles were driven deep enough into the ground to provide stability for the house under a variety of conditions. The marine grade piles are treated with preservatives to last indefinitely underground (the anerobic environment under the soil also slows down any potential decay).

Concrete Footings

After the piles were driven into the ground, the next step was to form the footings, add reinforcing steel, and pour the concrete to create what is called a continuous concrete grade beam. The concrete footing sits on top of all 48 underground piles. The concrete was allowed to cure for several days before the forms were removed.

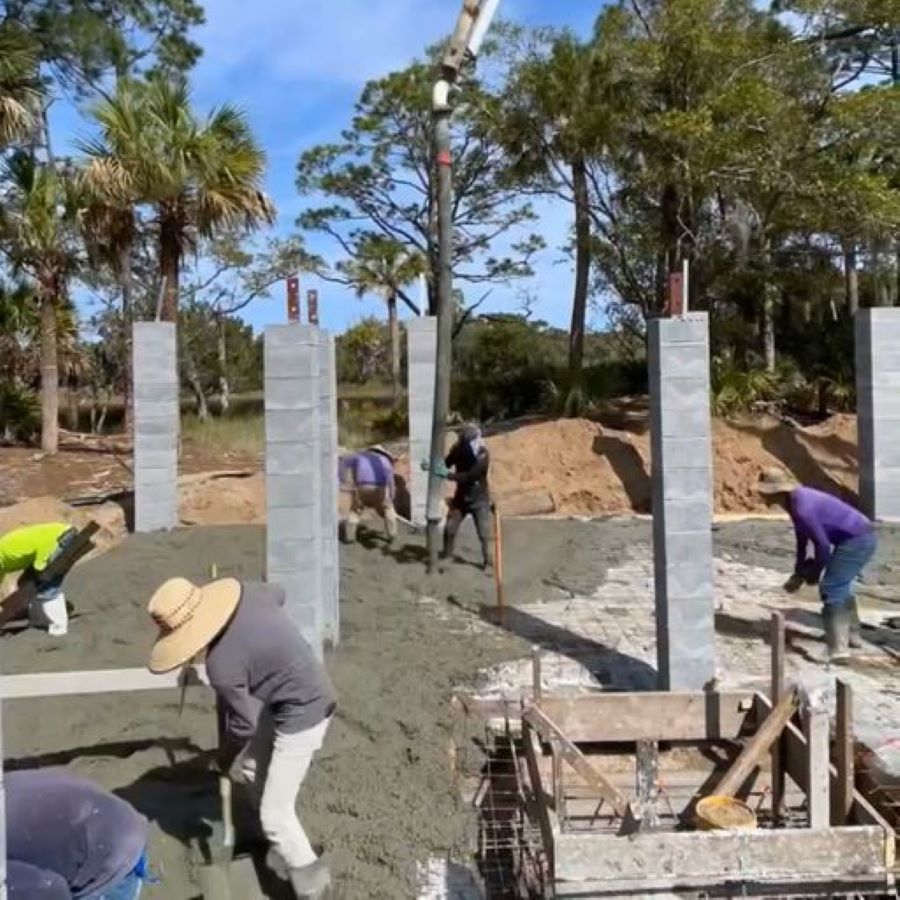
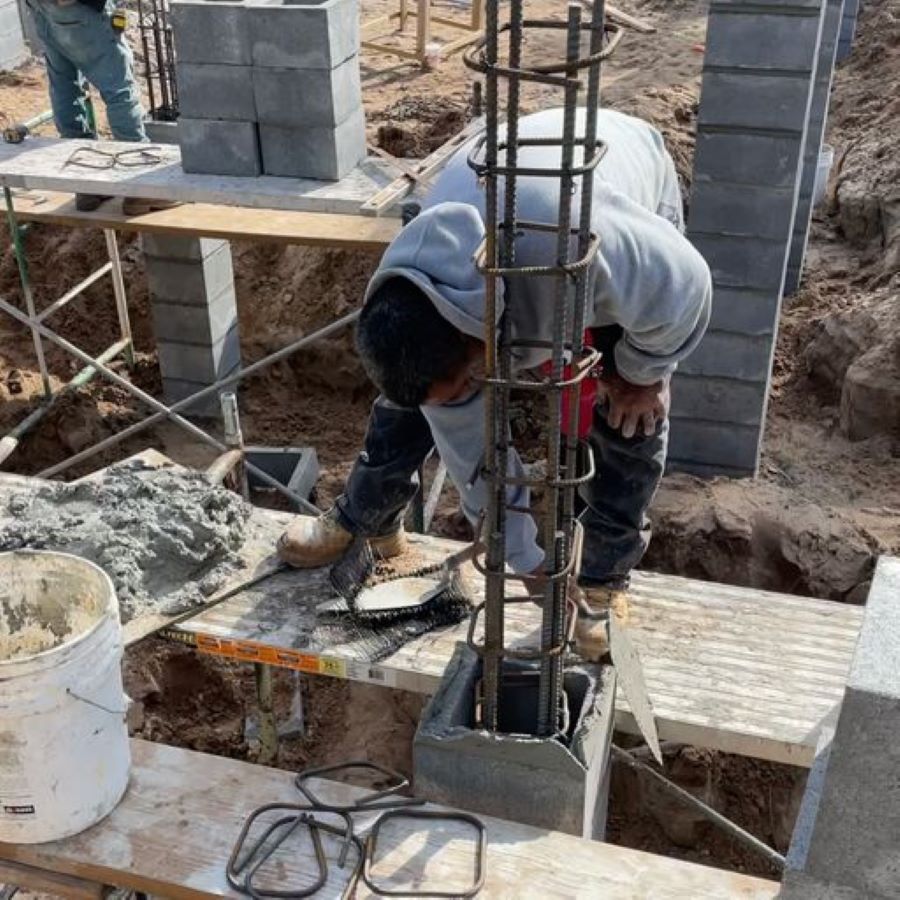
Concrete Block Piers

After the concrete footings cured, masons were brought on site to lay concrete block masonry piers up to the height of the support for the wood truss floor. The masonry blocks were carefully laid over vertical steel reinforcing that was tied into the footings and filled solid with concrete.

Garage Slab

In all, building the structural foundations and piers as well as pouring the garage slab took a little over four weeks to complete. It was a fun process to watch, and I learned a lot about building structural foundations and piers in a beach environment. Stay tuned for the next step in building our dream home. In my next blog, I’ll discuss the framing process and building the house’s wood structural system.

Filed Under: Building a Home Tagged With: new house construction, new house foundations

Primary Sidebar

Sign up for new post updates!

Search my site

Follow Me on Instagram

Follow on Instagram

Footer

Disclaimer

DIY and working with tools have inherent risks. The projects presented on this website are meant for inspiration only, as the conditions, materials and tools on your own project will vary. Always follow the manufactures’ instructions provided with your tools and abide by local building codes. Philip or Flop (of Philip or Flop, LLC) will not assume any liability for any damages, losses or injury sustained in the course of your own project.

Affiliate Links

Many of the links to products on this site are affiliate links. When you click these links and make a purchase I will make a commission off of the sale. The products are the exact same price as found as normal and the commission is paid to me by the merchant. These commissions help me to product more content for this site to make it more complete for you!

Tags

affordable DIY project alternative to custom kitchen cabinets beautiful DIY headboard beautiful fences box trim build custom headboard creative tent custom beach house custom designed house directions on how to build a kid's play tent DIY box trim DIYer gift guide DIY fences DIY headboard diy kid's tent DIY kitchen cabinets DIY limewash fireplace Garden gift guide for DIYer great holiday gift guides high end custom cabinets holiday gift guides Home Maintenance how to limewash your house indoor child's tent indoor tent interesting presenta kid's tent kitchen cabinet assembly low-cost high impact project McElroy metal roof metal roof new home construction new home preconstruction new house construction new house foundations no sew DIY kid's tent planter play tent ready-to-assemble kitchen cabinets RTA kitchen cabinets sleep over tent Valentine's Day Valentine's Day gift guide

Copyright © 2025 · Magazine Pro on Genesis Framework · WordPress · Log in amzn_assoc_ad_type = "link_enhancement_widget"; amzn_assoc_tracking_id = "philipbradfor-20"; amzn_assoc_linkid = "82eabd867b427f59250a4dc01b55bfa3"; amzn_assoc_placement = ""; amzn_assoc_marketplace = "amazon"; amzn_assoc_region = "US";