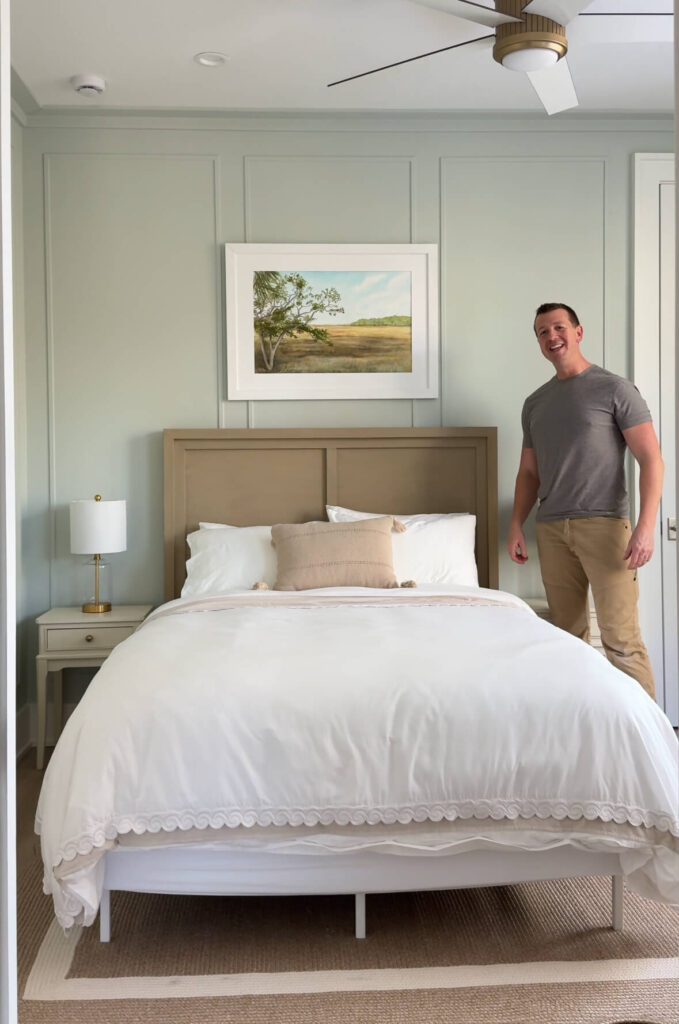
When I revealed our new coastal home guest bedroom on Instagram, I created a blog on how to frame out the room with box trim and subsequently had a lot of folks ask for directions on how to DIY the headboard.
As a result, I’m sharing how to build a sturdy, stylish, and (best of all) EASY to make headboard inspired by a similar one from an upscale home furnishing store! I wanted something custom to match the 100-year-old dresser I had refinished and also didn’t feel like spending a lot of money on a store-bought piece. So, I decided to build my own using just four pieces of wood and a little creativity. Let me walk you through the process. Note: some of the links in this article are affiliate links which earn me a small commission (at no cost to you) if you purchase any products.
This freestanding headboard is designed to attach to a standard metal bed frame for support. You will find that metal bed frames have a pair of stanchions (upright, flat pieces of metal) at the head end, one on each side. Each stanchion has six or so holes for attaching a headboard.
What You’ll Need
- 2×4, 1×4 and 1×8 boards I used white oak, but you could substitute red oak or maple for hardwoods or knot free pine/spruce/fir softwood for the most affordable options
- One 4×8 sheet of ¾ in. sanded or cabinet grade plywood. Try to match wood species to the boards if possible. (They don’t make pine/spruce/fir faced sanded plywood, but birch is usually a pretty good match)
- Lag screws
- Finish nails
- Instant wood glue
- Instant glue accelerator
- Sandpaper
- Wood finish (stain, varnish, or paint depending on your look!)
- Polyurethane topcoat
- Paint (if you’re going that route)
- Metal bed frame
- Low profile mattress box spring support
- Hybrid gel mattress
Tools*
- Mitre saw (to cut wood to size and to mitre the frame edges)
- Table saw
- Planer (optional)
- Pocket hole jig
- Finish nailer
- Drill
- Screwdriver
- Measuring tape
- Clamps
- Sanding sponge
Plan Your Design
First, let’s determine the overall dimensions of the headboard based on the size of mattress you will use. Because of the size of the room, I opted for a full-size mattress and metal bedframe. Measure the width of the metal bed frame where it will connect to the headboard and add 3-in to get the total width of your DIY headboard.
For the height, I wanted something that was tall enough to feel like a statement, but not so oversized that it overpowered the space. I decided on a total height of 54-in. which I think is proportional. You could easily make it a little shorter or taller to match your taste.
Construct Perimeter Pieces
The outside perimeter of the headboard will be framed with 2×4 pieces. If they are prefinished great, if they are rough pieces of wood, you will need to rip them down to the appropriate dimensions. If you are using clear softwood framing lumber, it often has curved edges that are not very sharp. To make your final piece of furniture look more professional, remove the curved edges by ripping off the sides with the table saw.
Two of the 2x4s will be used as sides. Each one of those sides will have a 45-degree miter cut at the top. The length of those side pieces to the long side of the miter cut will be equal to the overall height of the desired headboard.
The remaining 2×4 will be used as the top. It will have 45-degree miter cuts on both ends. The length of this top board, on the short side of the miters, should be equal to the width of your bed frame.
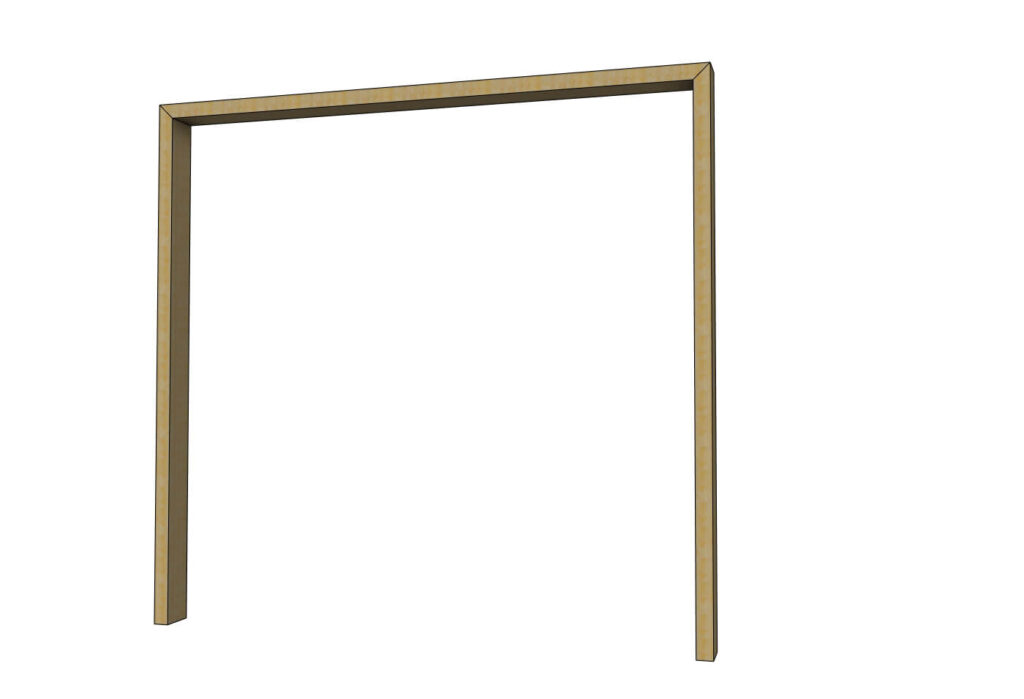
Attach the three outside pieces together at the mitered ends using high strength instant wood glue. I used instant wood glue on one side of each joint and then sprayed accelerator on the other side of the joint. The accelerator allows the final bond to develop in less than 10 seconds so you can get a really strong joint quickly.
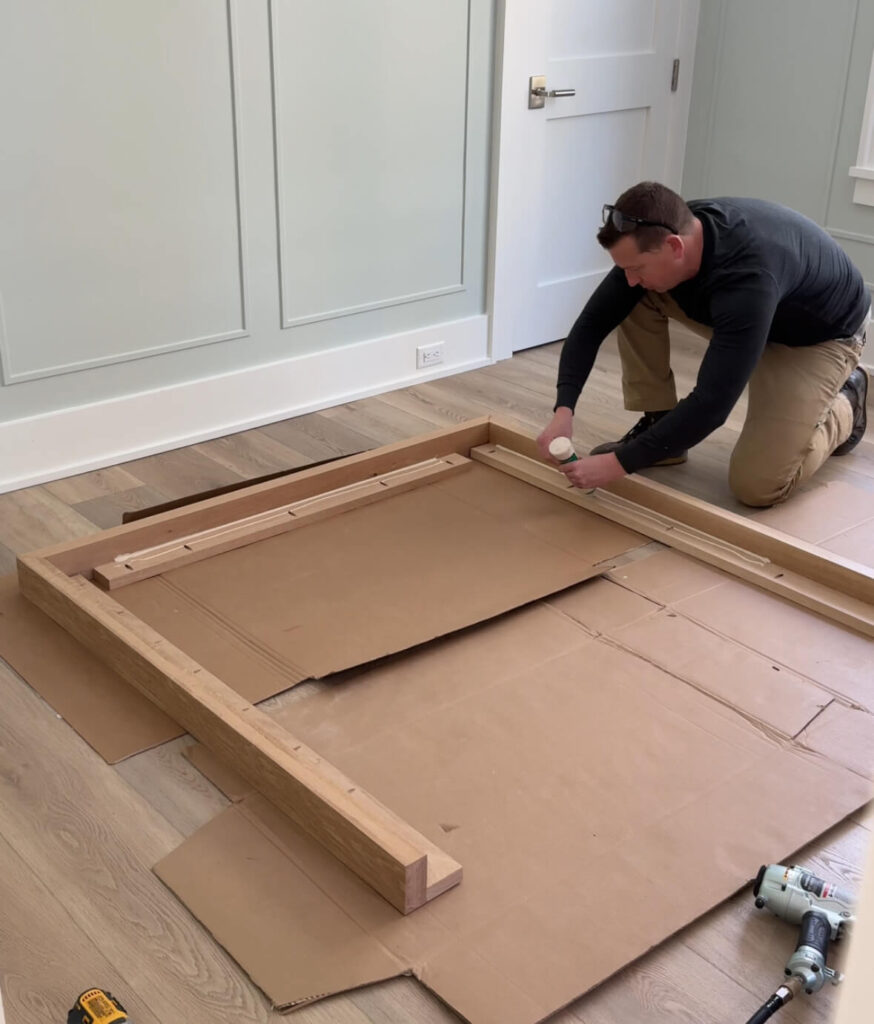
The next three pieces should be cut from the 1x4s. They should be connected to the outside pieces using wood glue and pocket hole screws. Make sure they are flush with the outside pieces on the bottom as they are attached. (These will touch the floor.) Locate the pocket holes away from the bottom of the frame where the plywood will not cover them. The goal in building any piece of furniture is to not have any fasteners showing.

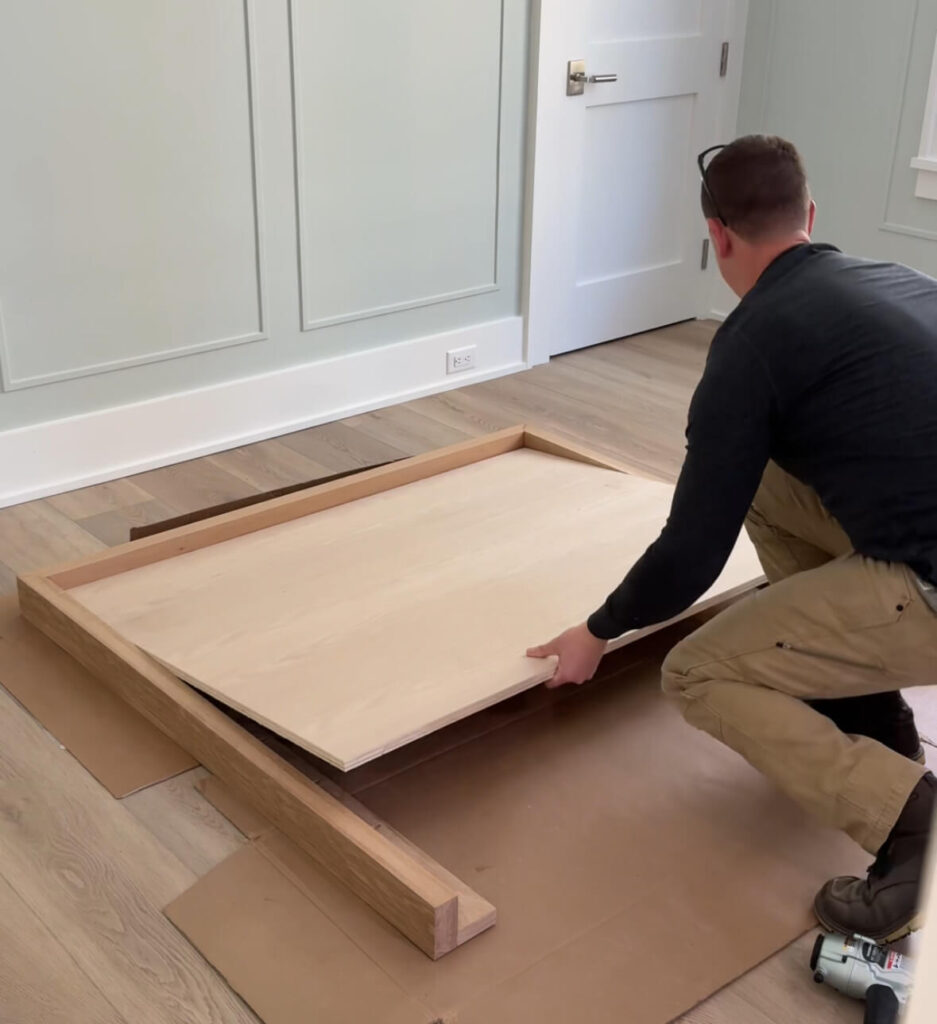
Attach the Plywood to Perimeter Pieces
Cut the plywood to fit inside the frame with a table saw. Line up the plywood with the frame, check that the frame is square, and then use glue with screws (or lots of finish nails) to secure it along the edges into the 1x material behind. Make sure those fasteners are close enough to the edge of the plywood so they will be covered by the final trim pieces. If you have clamps, you can use them to hold the plywood in place while you fasten it.

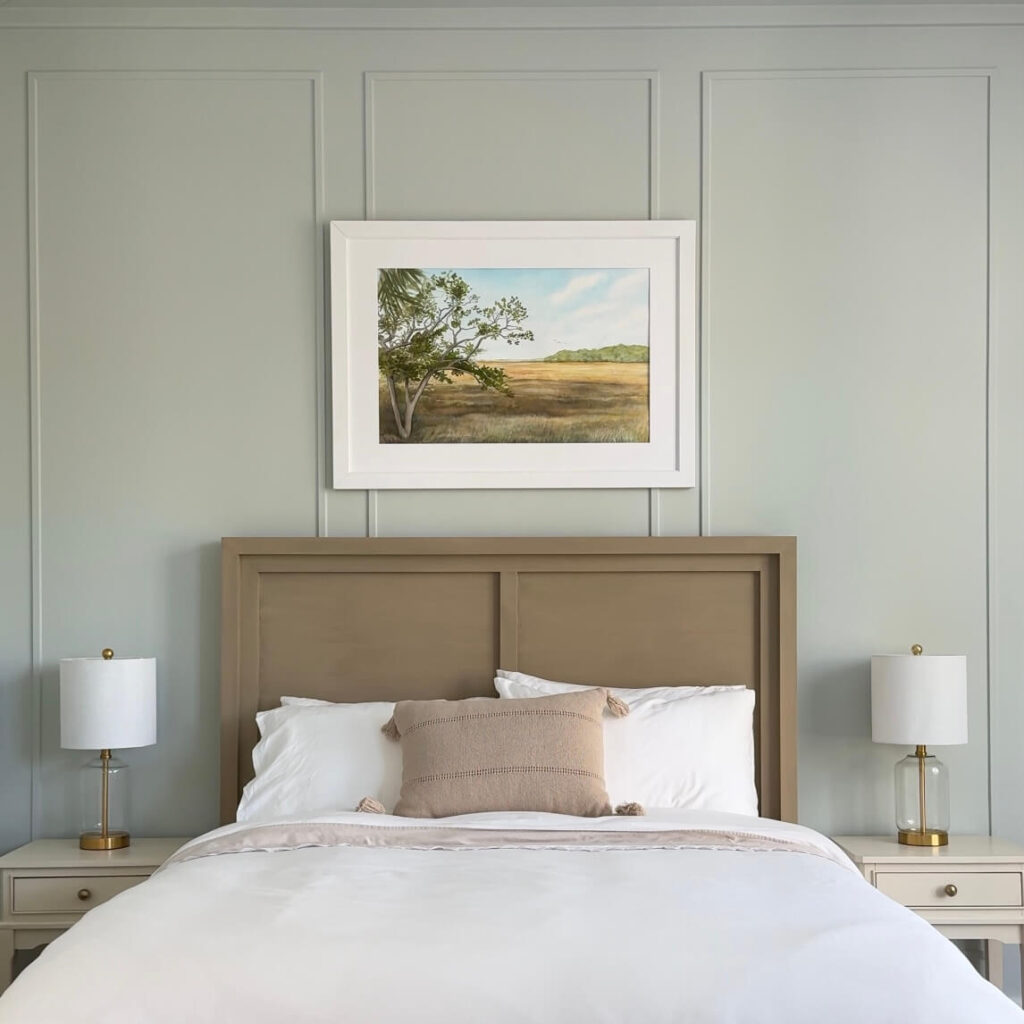
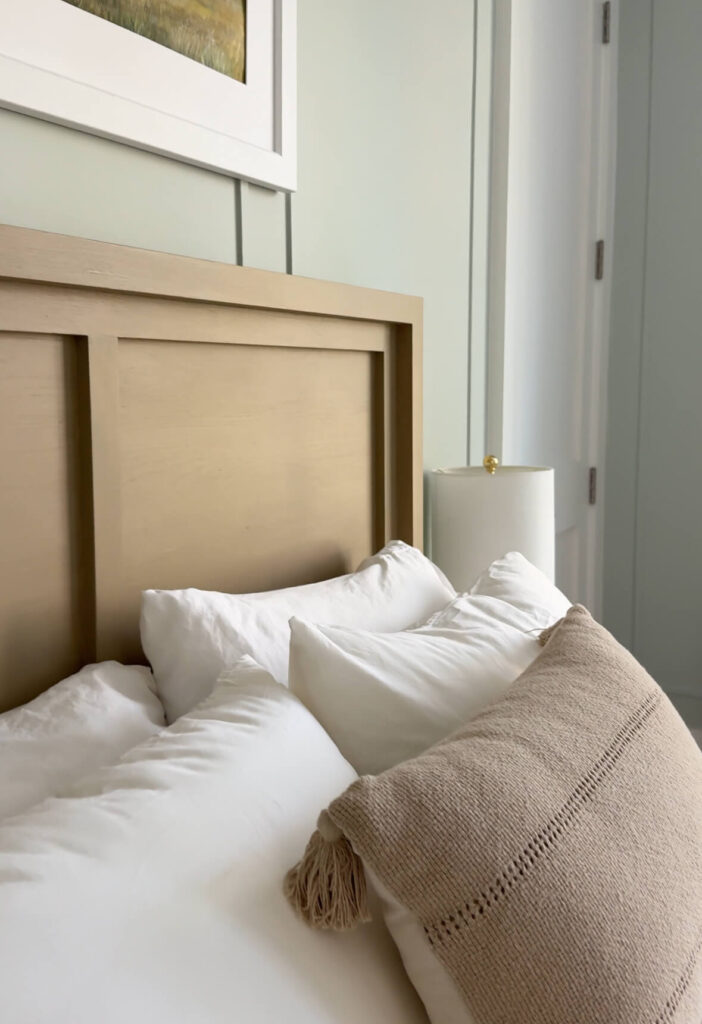
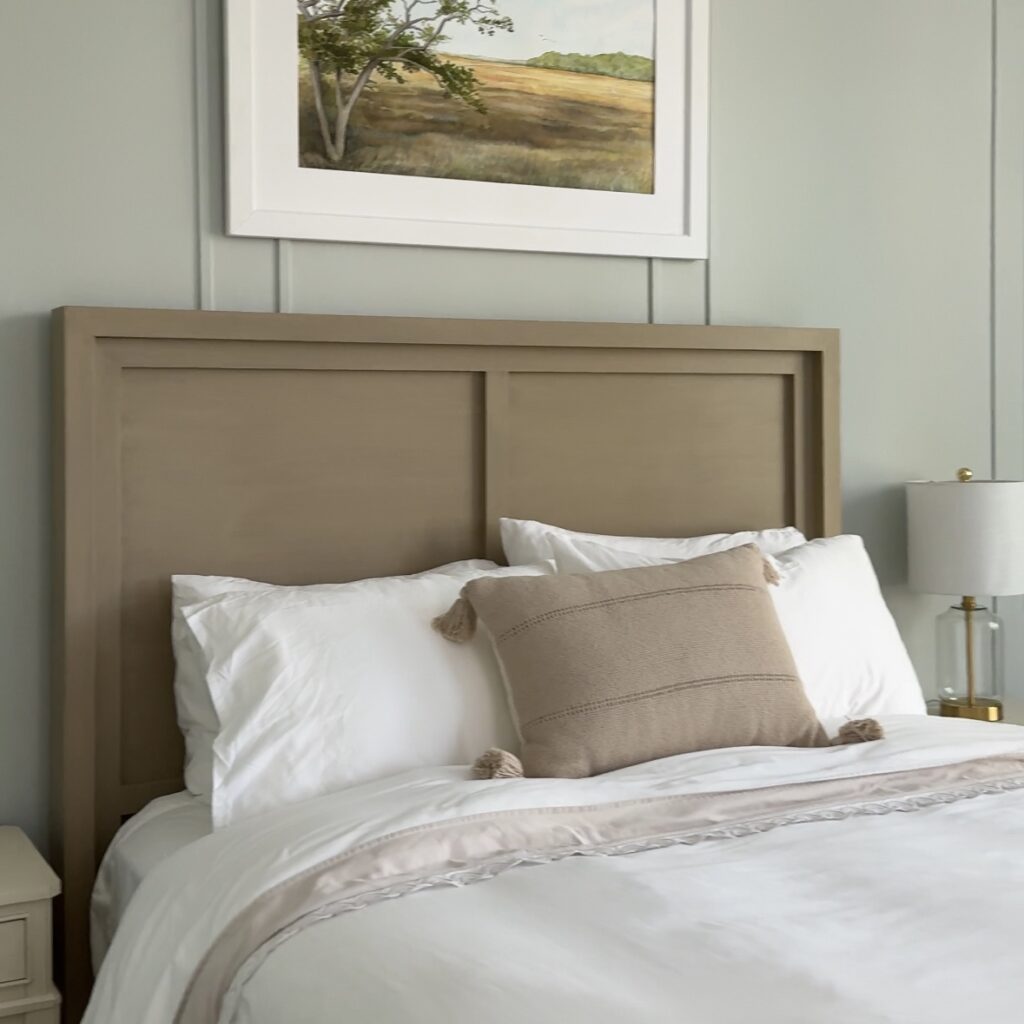
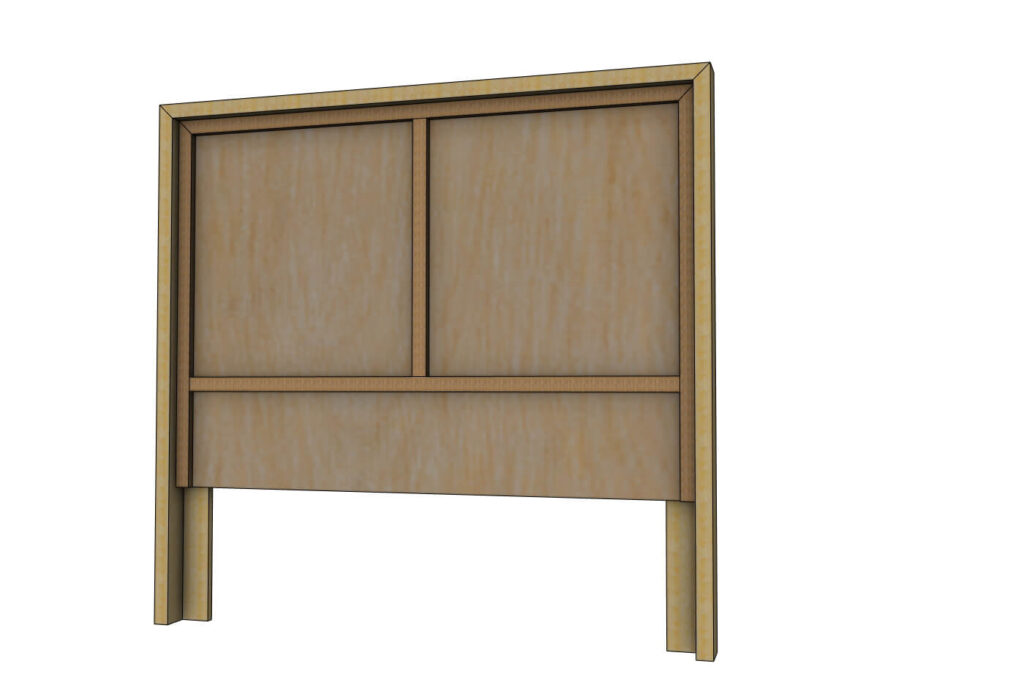
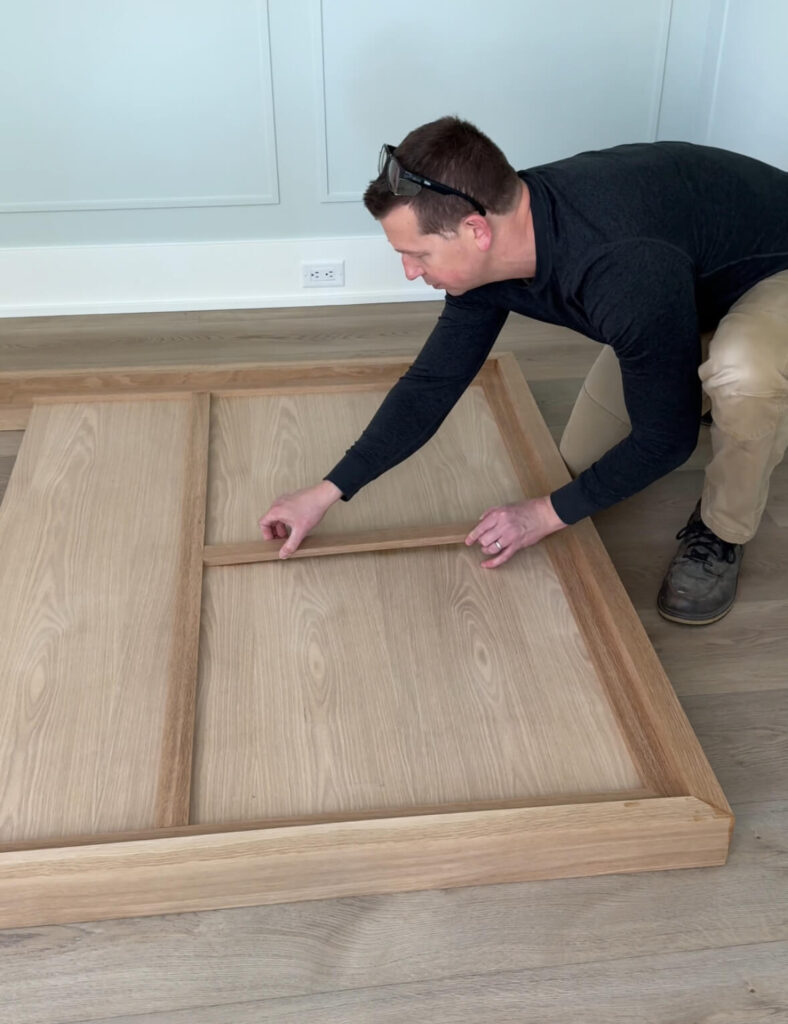
Add Trim for Detail
Use the 1×2 trim in the pattern seen below to finish out the design. I used only instant wood glue (a lot of it!) to attach these pieces to get that super clean, fastener free look. I wanted to make the bottom piece of trim just visible above the mattress, so I added up the height of the bed frame, low profile mattress box spring support, and the super comfortable mattress we have for that room and mounted the trim just above that total height.
Fill and Sand
Once the structure is assembled, fill any gaps in your miters (hopefully they will be tight already but it’s hard to get them perfect), and then do one final sanding. I prefer a medium grit because it gives the wood a nice smooth surface without making it too polished. I also use a foam sanding sponge to “ease” all the sharp wood edges that could cut someone or cause a splinter.
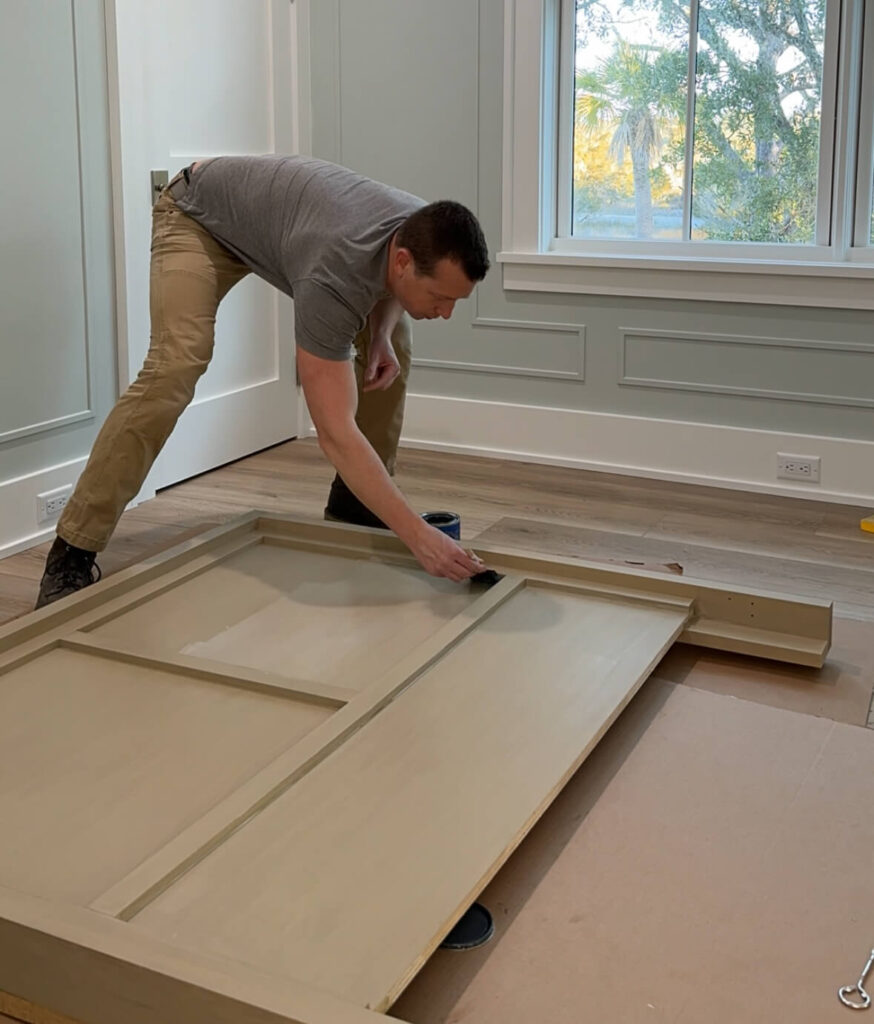
Finish With Stain or Paint
I chose to stain mine the same color I stained the dresser in the room. (I created a custom-color stain that complements our flooring.) If you want to go for a painted look, I recommend using pine or poplar wood because they take paint really well. A final polyurethane topcoat is a good idea to get the maximum durability finish. Let the finish dry completely, and you’ll have a beautiful headboard ready to go!
Mount It to the Metal Bed Frame
Attach the metal bed frame to the headboard with the 1/4 in. lag screws. Pre-drill holes in the wood. The metal bed frame will have stanchions (upright, flat pieces of metal) at the end with holes in it for mounting. Use as many of the holes as possible to mount it to the headboard.
Soften the Touch to the Wall and Floors
I added soft, adhesive backed felt pads to the back of the headboard to be able to keep it up against the wall but not scratch it. The same can be added to the base of the headboard legs to prevent scratching of the floor.
Final Thoughts
And that’s it! In just one weekend, I built a stunning, custom headboard that is made to last. The best part is that it was so much more affordable than a store-bought piece and so much fun to make. Whether you go with a wood stain or a bold paint color, this headboard can totally transform your space.
I have a video on my Instagram account showing this headboard in my room reveal! Click here if you want to see more.